



Much like the landscape in the Northern Highlands in which the artist lives and works, there is something very rich, lush and textural about Suzie MacKenzie’s prints. The textures and dynamism of the work is largely thanks to the technique of collagraph that she uses. Suzie has exclusively shared her experiences of collagraph technique on the Jackson’s Art Blog.
Collagraph Print Making
by Suzie MacKenzie
Collagraph is a relatively recent and very versatile print medium with no need for expensive or hazardous materials. It can be printed either in relief or intaglio, or in a combination of both techniques; but for me its main appeal is the richly atmospheric results that can be achieved through intaglio printing. The name was first coined by the American artist Glen Alps in the late 1950s, and reflects the fact that it is a print made from ‘collage’.

My own collagraphs begin life as photos which I alter using a photo-editing software program. This may involve moving, removing or adding features, stretching and resizing, until I reach a composition that I’m happy with and that I think conveys the ‘feel’ of the image as I originally experienced it. I then convert the image to black-and-white which I find makes it easier to begin to turn it into a collagraph, and reverse it so that the final image will be the right way around when printed.
I transfer the reversed image onto the plate using tracedown paper. I use mountboard plates with the edges bevelled (usually the ‘middles’ that have been cut out when framing work). I find this ideal as it can be cut and peeled into as well as having textures stuck onto it; it has the added benefit of being recycled!
When constructing a collagraph plate it is the texture of the collage that will dictate how it prints; if it’s printed using the intaglio method, rough surfaces will hold the ink and print dark; shiny or smooth surfaces will wipe clean and print light or barely at all. With mountboard, the unaltered surface prints in a mid-tone; when the top layer or two is cut and peeled away(I use a scalpel for this) a rougher surface is revealed that will print dark. To get a complete range of tone I also apply PVA glue or adhesive tape which prints light, and for a dense black, fine carborundum grit or sandpaper.

Other textures can also be applied – I like to use handmade papers with inclusions, but more-or-less anything flat enough that can be adhered to the plate and put through the press without damaging it can be used, including fabrics and plant material. In fact the very slightest ‘edge’ will hold ink and print. I’m always surprised by how the tiniest alteration in texture – from a careless fingerprint on the edge of a sealed plate that’s not quite dry, to a stray cat hair caught in the varnish – will feature prominently in the finished print!
I work into the plate cutting and peeling, and applying cut shapes of different textures using photo spray mount, trying to match textures and how I know they will print to the tone in the original. Lines and other marks can also be scored or cut into the plate and its textures.I take frequent rubbings from the plate using newsprint and a thick graphite pencil which gives me some idea of how the composition is working, never forgetting that this gives a reversed image.
When I’m happy with the finished plate I seal it, first with dilute PVA which I find helps adhere the various elements to the plate, and then when this is dry with a coat of spray polyurethane varnish. This stops the ink from soaking into the plate and makes it easy to clean. After a couple of days the sealed plate will be dry enough to print from.

I print my plates using the intaglio method, so I ink up with extended etching ink, often in one colour only (I prefer a darkened Prussian Blue but this will depend on the subject of the print), then wipe with scrim and pages from an old phone book; the print is taken using a high-pressure etching press and dampened paper.

This process forces the paper into the cut lines and textures to pick up the ink left after wiping and also renders the textures used in making the plate. The damp prints are then stretched on boards with their edges taped so that they dry flat. Colour can be applied in many different ways – for example the plate can be inked ‘a la poupee’ in different colours; a contrasting colour can be rolled over the top of the intaglio inking; chine collé (coloured lightweight papers adhered during the printing process) can be used; or the dry print may be hand-coloured.

Finally, each dry print is signed, titled and numbered, most with the designation ‘VE’ showing that it is from a varied edition. I make very small varied editions from my plates, rarely as many as ten and often as few as three. This is partly because the plates begin to degrade relatively quickly under pressure from the press, but also because I like to experiment with different inkings, wipings, colours and chine collé additions; each print I make is a step in the learning process and I’m always looking forward to applying what I’ve discovered to the next.

Suzie MacKenzie
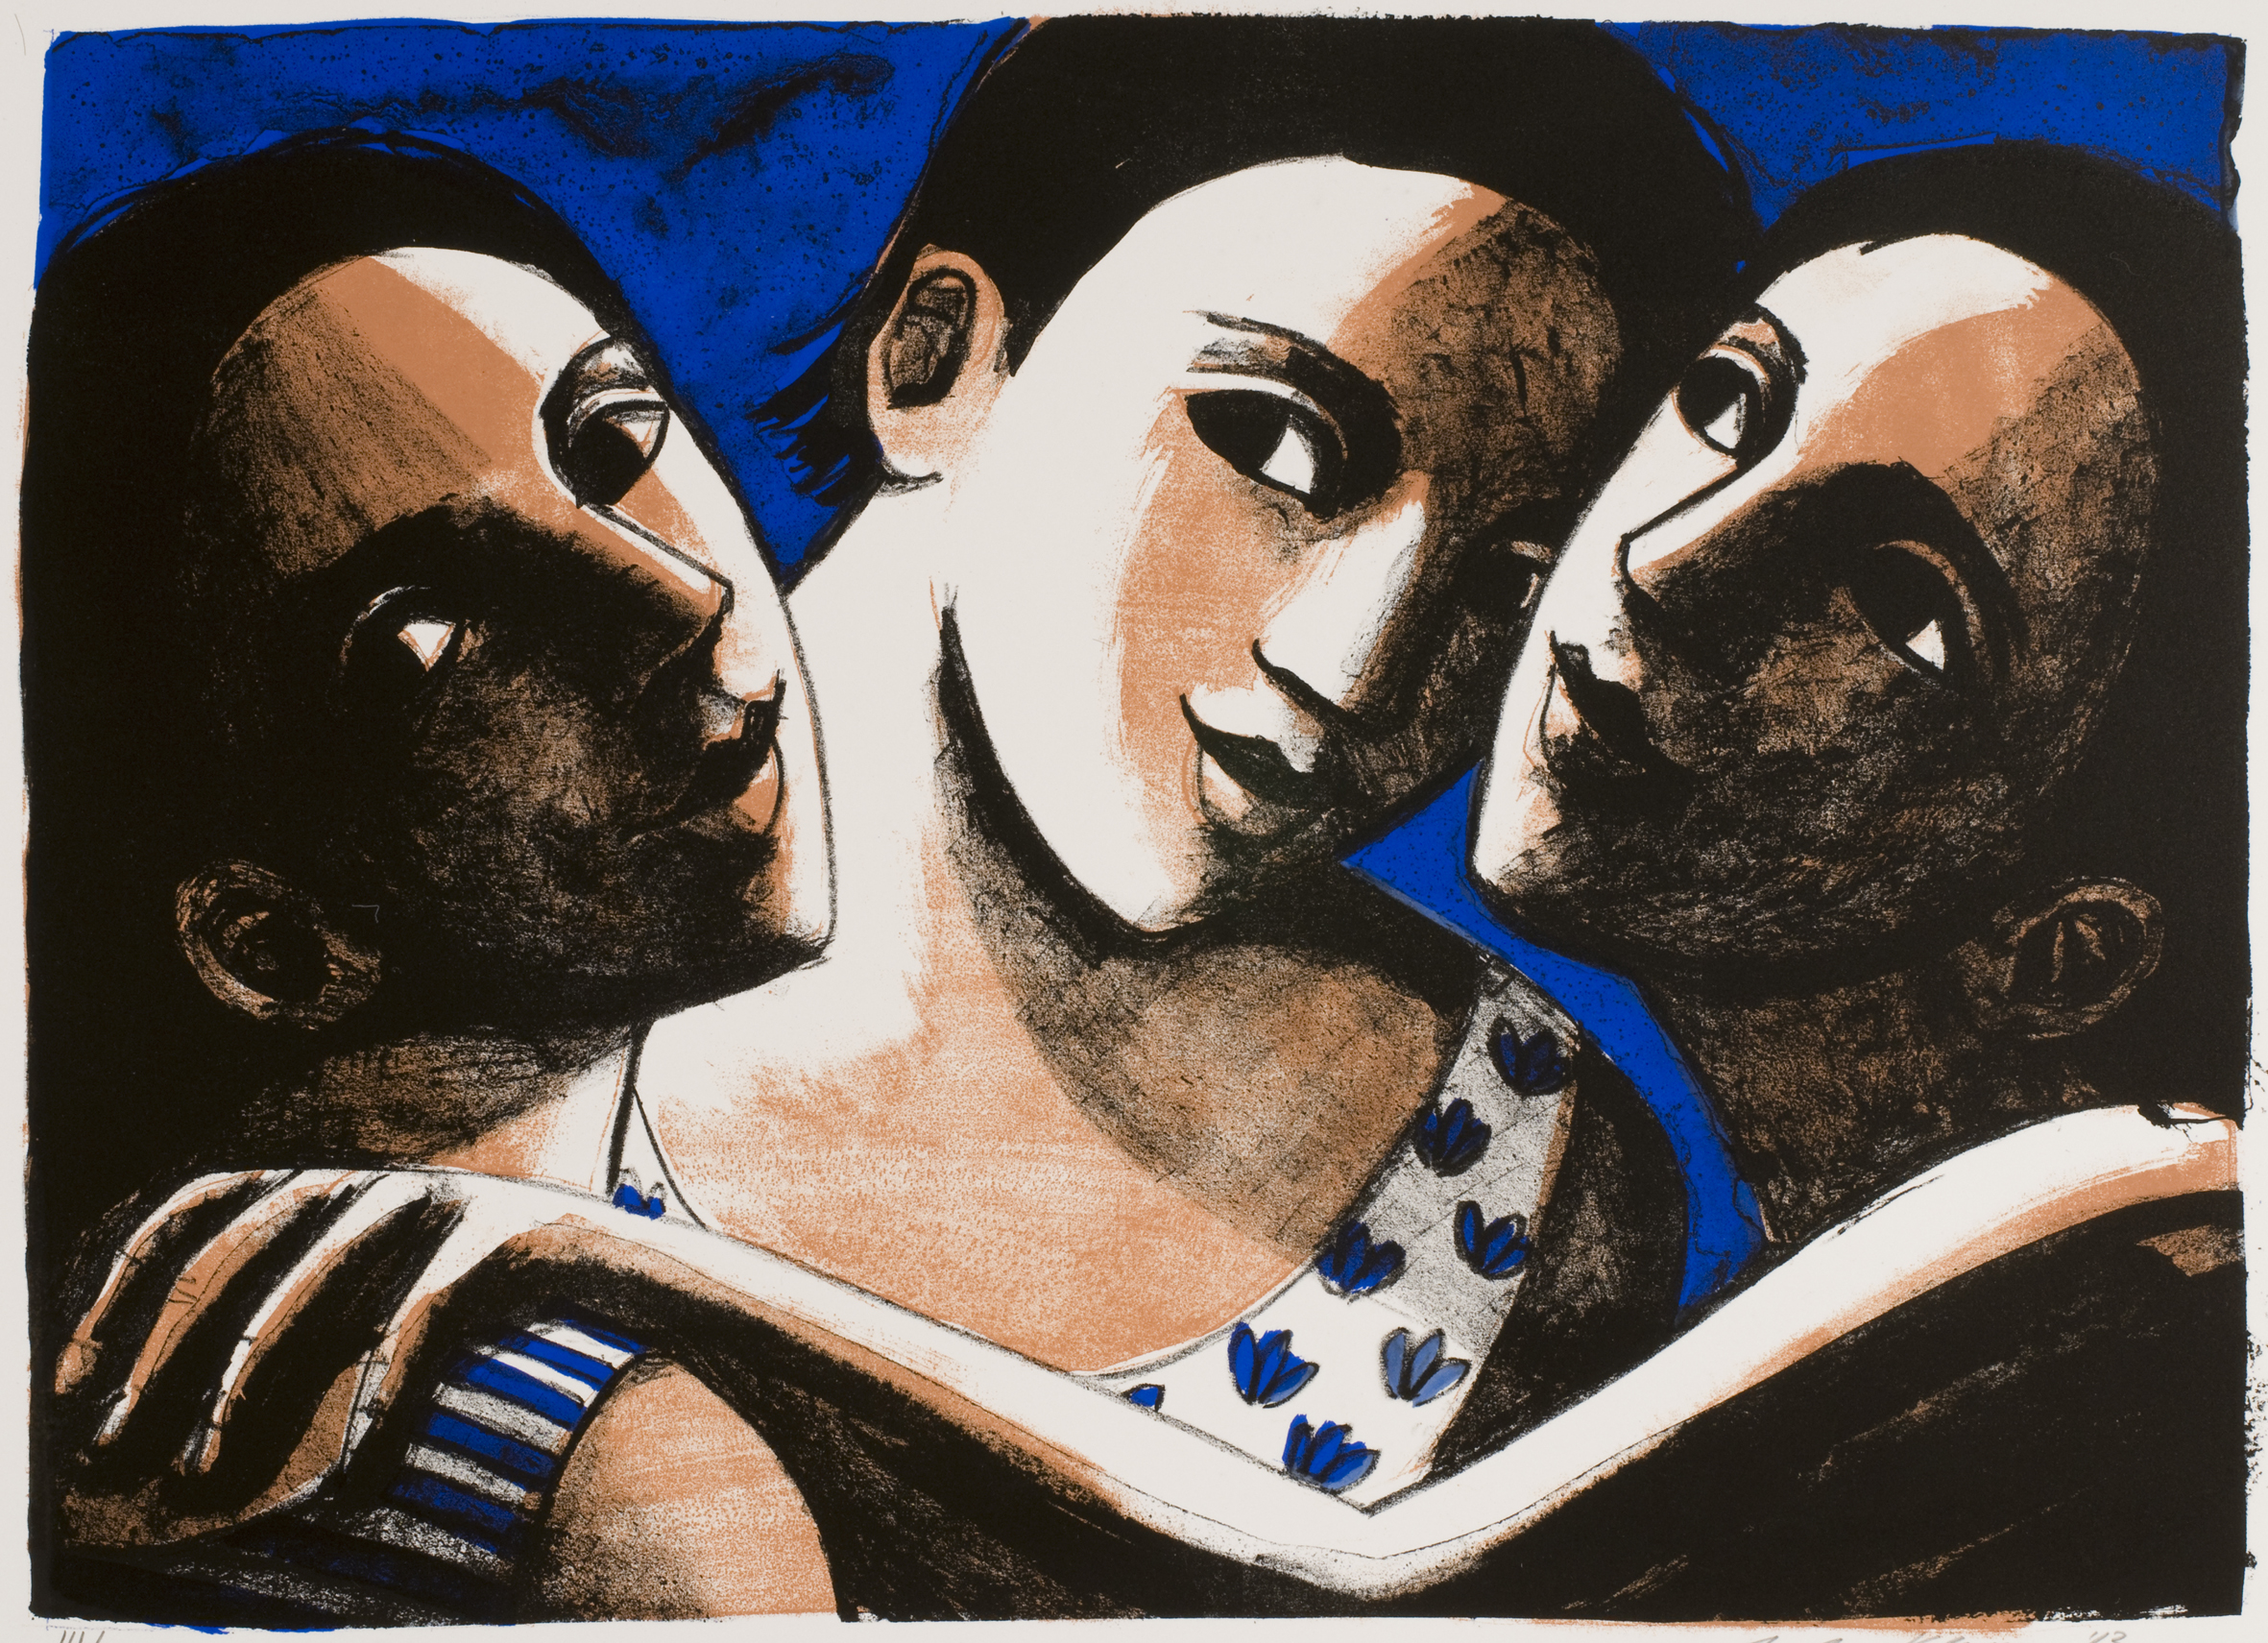
Hand coloured collagraph, varied edition of three, 57 x 26 cm
About Suzie MacKenzie
Suzie MacKenzie studied Fine Art as a mature student at the University of Loughborough, before returning to the northern Highlands of Scotland where she now lives and works. In 2013 she attended a series of workshops at the Highland Print Studio in Inverness which rekindled her interest in collagraph, and since that time has predominantly worked in the medium. Suzie draws on her previous career as a teacher as well as her printmaking experience to teach occasional workshops, and has been involved in delivering projects to local community groups.
Further Reading
Monotype Printmaking for Beginners
Etching for Beginners – What You Need to Get Started
Getting Started in Screenprinting Using Paper Stencils
Shop Printmaking on jacksonsart.com


10 thoughts on “Collagraph Print Making”
Pingback: Top Blog Posts of 2016 on the Jackson's Art Blog - Jackson's Art BlogJackson's Art Blog
Pingback: Suzie Mackenzie | OCA Printmaking BLOG
Pingback: Research – Printing techniques – threadsoffateblog
Pingback: Suzie MacKenzie – Paulina Skrzypaszek
thanks for helping me with my assignment 🙂
Hi Ella
Her work is very inspiring isn’t it!!
Many thanks
Lisa
Pingback: Project 12. Developing collagraph prints – Printmaking 1: Introduction to Printmaking
Hey Lisa, thanks for helping me with my art
assignment! Great article!
A pleasure! Thanks for reading.
Pingback: Reflecting on Feedback: Assignment 3. – LEO'S BLOG.
Comments are closed.