



James Bloomfield is an expert in fine art restoration who specialises in oil paintings. He shares his wealth of knowledge and passion on his popular YouTube channel Bloomfield Art Restoration by demonstrating the full restoration process. Here, James tells us about a typical day in the studio, the techniques and materials he frequently uses, and offers some advice to artists who wish to consider the longevity of their paintings.

Fine Art Restoration with James Bloomfield
Gemma: Can you tell us about your background in art? What made you decide to become a fine art restorer?
James: My background in art started with an art foundation course at Manchester Metropolitan University back in 1997. I loved the course and particularly enjoyed drawing and illustration. I had ambitions of becoming an illustrator or graphic designer at the time but also enjoyed the freedom of fine art. I struggled to get on the degree course that I wanted though as I had a lack of life drawing experience as it wasn’t very popular at the time. I did a filmmaking and web design course called Interactive and Broadcast Media, but only lasted two years as I was in a band and thought we would be famous, which of course didn’t quite pan out.
After a few years in the wilderness, I managed to secure a job painting reproductions of famous paintings for bars and restaurants around Manchester city centre. Pretty soon I was copying old master paintings and also trying to make a name as a portrait artist. I was doing well for myself and began to outgrow my spare room – there was paint everywhere. I was becoming obsessed with oil painting and it took over my life. I needed more room and began to look for a studio space. On this quest, I came across a gallery in Manchester that was in a semi-derelict building and inquired about a possible studio space above. I was shown inside the gallery and behind the showroom curtain was a fabulous workshop full of antique swept gilt frames, paintings on benches that needed cleaning, and paintings that needed repairing. I showed the gallery owner George Aird my portfolio of old master copy paintings and explained that I was looking for a studio space and he said they actually had an opening for an art restorer if I was interested. George had been in the art world for over 30 years and was L.S. Lowry’s art dealer in the 70s. At this stage, I was 23 years old and had never heard of art restoration so I naturally said yes. I spent the next five years working as an apprentice with George and learned all about art restoration, frame restoration, and fine art dealings, and my love of oil painting and this world has never left me.

Gemma: Can you describe your studio?
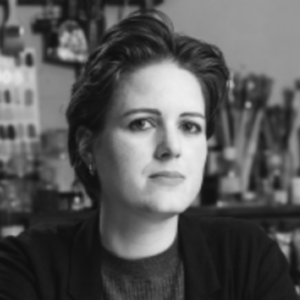
James: My studio is on the fourth floor of an old cotton mill in the heart of Ancoats in Manchester. It is part of AWOL Studios, a well-established base for artists and creative businesses in the North West. The mill is flanked by a canal and numerous other old mills. It has 200-year-old floorboards that creak when I walk around and two large windows that face east bathing it in wonderful natural light.

The studio has two large benches that will hold a variety of jobs at any one time. It has a large painting rack with various size slots where I store incoming work and completed paintings. On the wall is a selection of tools that I have ready for quick access. The side wall of the studio has my vacuum table that I use for relining paintings. Underneath one of the benches is a sealed spray booth for varnished paintings. I have two easels set up, one on the window for natural light and one under daylight bulbs for when the light is failing.
My studio is my second home and I feel completely relaxed here. It has a brilliant vibe, and as soon as I moved in I knew I would be able to work here. The floor that I am on is also home to other artists, painters, and creatives so there is always someone to talk to if I’m feeling lonely.

Gemma: How would you describe a typical day in your studio? Do you have a particular routine that you follow?
James: A typical day is tricky as it depends on which process I am at with my current workload. It depends on what jobs I have in at any one time. I tend to ignore my emails as they are too distracting and start every day with a strong cup of tea or coffee! I usually assess what work I have in the bench and see what needs to be done. If there is structural work to be done, the glue pot or wax pot will be switched on, sometimes it will be straight into cleaning a painting so the radio will be tuned and I will start methodically removing a varnish or cleaning off years of smoke damage or nicotine staining. Cleaning requires a lot of concentration to make sure you are not removing anything that you shouldn’t. So I usually will have a break from this after an hour or so.

If a painting is worthy of filming for my YouTube channel either through an interesting technique or story then I will be setting up the shot to capture the processes I’m working on. I’ve found that there is a rapidly growing audience that loves to see the magical transformation of a painting being cleaned or a painting that looks beyond saving being repaired. It must be the same feeling I had when I was first shown the cleaning process and the difference between a clean and dirty painting. I have a growing audience on YouTube and also share tutorials and exclusive paintings on my Patreon channel. This is something that I wouldn’t have dreamed of 20 years ago but has become a normal part of my restoration practice now and one that I thoroughly enjoy, especially researching the artists and sitters of the paintings and telling their stories. Some clients actually request if they can have their painting filmed during the whole process now!
If any paintings need filling these will be applied and allowed to dry. Any paintings that have been filled the day before will be retouched and to do this I need good light. My easel is set up in the window and I will begin the retouching process. Again this requires lots of concentration and after an hour or so I will be ready to give my eyes a break.
After lunch I will prepare any paintings that need lining or structural work, removing paintings from stretchers, applying glues and resins, or attaching new canvas using the vacuum table. If my eyes are not too tired I will maybe carry on cleaning a painting from the morning before the light begins to fail. And peppered throughout the day; I might be responding to emails, writing condition reports for paintings, posting to socials, and meeting with clients for appraisals of paintings.
Before I leave the studio I remove any paintings from easels and lay things flat on a bench so there’s less chance of damage occurring this way. I make sure that the studio is tidy and all my tools and everything is put away in its place ready to start fresh the next day.

Gemma: Can you tell us about the restoration techniques and materials that you might use in a typical restoration project?
James: Many of the techniques that I use are hundreds of years old and so too are the materials and recipes. Each project will require a different approach and analysis before any treatments start. We usually assess the paint surface first for losses and condition, this may also include using a Blacklight or UV light to assess for any recent retouching or damage. The next stage would be to decide how dirty the painting is and do a number of tests on the paint surface and varnish to see what will be removed. If the painting is only in for a clean then the varnish will be removed using special mixtures of solvents. If it is just in for a surface clean to remove dirt and accumulations then different conservation cleaners and soaps will be used. Once cleaned, a painting will have any rips or tears mended using various animal glues and in some cases, a wax resin is used to a traditional recipe. Rips, tears, and dents where there has been paint loss will need to be filled. For this, we use a conservation-grade filler that is watersoluble and fully reversible. The fillers that we use can be textured using brushes to match the existing paint finish or using palette knives and spatulas if the finish is flat or smooth.
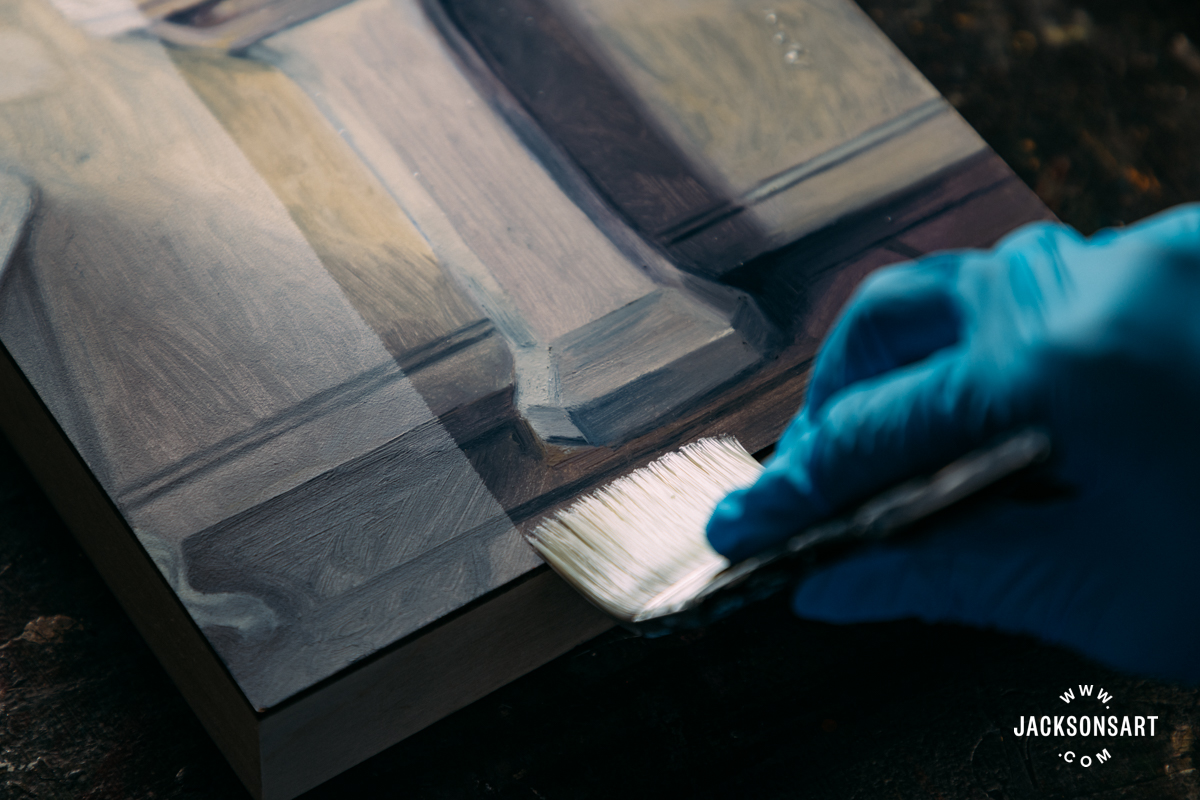
When it comes to retouching and colour matching missing paint there are several different materials that can be used, including watercolour pigments, pigments held in resin chips, and specialist-bound oil paints. The main criteria in conservation is that any material that you add is reversible. New techniques and materials are constantly being developed and I try to keep abreast as much of these as possible. Once any retouchings have been completed and are dry then I will apply a suitable varnish to the painting. These can be ready-made traditional varnishes including dammar or more specialist varnishes that I mix myself using my own formulas for certain finishes. Certain paintings will naturally have a specific varnish whereas some more contemporary paintings may well have a matt finish or in some cases no varnish at all.

Gemma: How do you balance the artist’s original intentions of the piece with the need for restoration?
James: With the restoration I do, it’s a balance of conservation and restoration, the main thing to consider is the stability of the work for future generations to enjoy. If a painting is very badly damaged with lots of the original work missing then you have to get into the mind of the artist, the colour palette used, and the techniques and approach used. This will then lead you to the approach you take in restoring the work. I will always go with minimal intervention where possible and leave as much of the original artwork intact as possible. I research many of the artists I get in to see other examples of their paintings and this also helps in choosing colour palettes and can help in replacing missing sections. Some artists you see their work quite a bit and you know the downfalls of their particular technique. There is a very celebrated northern artist that is notorious for not applying ground to their boards before painting and this leads to flaking and paint losses. When I see one of these paintings come into the studio I know what I’m looking out for and what treatments to suggest.

Gemma: When you’re restoring a painting, how do you respect the original technique (for example: the palette, the application of the paint, brushstrokes, texture)?
James: Every artist and style of painting is different and unique but the fundamental characteristics of a lot of the paintings I work on are similar. There is a support of either canvas or board, hopefully some kind of ground layer, and then oil paint or acrylic. Most artists use brushes or palette knives. So every individual aspect can be recreated at some level. Before I begin any restoration all these elements are taken into consideration and a planned approach is formulated. If it is very thinly painted you will use fine brushes, if it is rough and scumbled you may use hog hair brushes. Is the paint applied using a knife? If so, your filled elements have to match the surface texture. Is there canvas weave showing through? If so, you will have to recreate this. For the colour palette, I look at the dominant tones used in the painting and recreate this on my palette. Is it Ultramarine Blue or Cerulean? Is it more Burnt Umber than Raw Umber? Is the artist using a lot of paint without mixing; are they a lazy artist using tones straight from the tube? If for example, a sky has a complicated makeup of tones I will look at what colours are on the palate and try adding small amounts of each. The artist only had the same pigments on hand as me, so in theory, I should be able to match their colours. Copying the old master paintings when I was younger really helped in my colour matching and painting technique and has made this one of the most enjoyable parts of the process for me. I know a number of restorers who have come in from a more technical, historical, or scientific background and have struggled with this side of the job.

Gemma: What are the different approaches when working with paintings created on different supports, such as canvas, wooden panels, and paper?
James: For all works on paper, I send them to a specialist paper conservator. Paper is a tricky beast and there are many different factors to consider including weight, makeup, pH level etc. However, if it is an over-painted print or oiliograph then I can do some work on this as it has become a hybrid. Oiliographs or overpainted prints were popular in the Victorian Era as a cheaper option to the portrait. They are usually varnished and then hand coloured so sometimes you can remove the varnish and clean them without damaging the print. It just depends on how much paint is on there.
Canvas is the most versatile in terms of restoration techniques. Works on canvas can be humidified, restretched, relined, filled, and restored with many more options available. Panel paintings or works on wood and board have a tendency to warp and distort. A painting on board and panel still has options available to it but they are usually much more invasive and require more time. Panels that have been poorly prepared without a ground layer can cause problems down the line as the paint does not adhere properly and can begin to flake off. Panels and boards that get damp again can cause paint to flake and be removed. If a painting is on canvas and gets damp it can be relaxed and the paint surface can be saved through relining and re-adhered, so in that case I prefer to restore canvas paintings even though for my own paintings I prefer to work on board.

Gemma: Do you also work on contemporary paintings? If so, what are the complications you’ve come across when modern mediums and varnishes have been used?
James: Yes, I work on many contemporary paintings. The majority of these are fine as most people still tend to follow traditional painting techniques. Contemporary work that comes in is usually physically damaged rather than something that has happened over time. One thing that artists do is apply varnish too soon after completing a painting. The varnish layer then fuses to the paint surface and becomes one with the paint. These are notoriously difficult to remove without harming the paint layer. Paintings should be allowed to dry for at least 6 months before varnishing.
One of my bugbears is when people use polyurethane varnish from DIY stores on paintings. These are again notoriously hard to remove if they can be at all. I would always advise artists to buy the best quality materials they can afford and use them in the correct manner. Some contemporary paintings won’t last longer than a few decades using cheap supports and materials and applying things in the wrong order. When you’re an artist and applying so much effort and creativity into your work it’s important that you’re making work that has every opportunity to last at least 500 years!! As a restorer we see all aspects of work and some get saved and some don’t. I would want my artwork to be worthy of saving and for that, you need a restorer who is able to do it and a client who is willing to pay for it to be done.

Gemma: Explain how the emergence of new materials and technology may be able to make your profession easier in the future (new solvents, digital technology etc).
James: Looking to the future there are a number of things that could make my work easier. In terms of decorative frame restoration and repair, I spend a lot of time making silicone moulds and then casting missing pieces. Over time the original compo pieces fall off or get damaged and sometimes I have to replace full corners. If there was a way to use 3D scanning software I could scan the remaining pieces and then build up in CAD what I need to repair the frame. The missing pieces could then be potentially 3D printed using either a polymer or resin material. It’s been suggested to me several times. I just haven’t had the time to look into it. It could be quite expensive to begin and a learning curve to incorporate the technology but you could create a catalogue of decorative elements and then scale them to fit the required frame.
Other things that would be beneficial would be a complete artist database of attributed works. A lot of my time at present is spent analysing paintings and trying to make attribution. If there was a database that would allow me to scan in a painting and then use AI to analyse similarities in brushstrokes, composition, and style then it could be a useful tool to identify artists and their work.

Gemma: From your perspective, what would you say are the steps that an artist can take to ensure the longevity of their oil paintings? What advice would you have for artists who wish to frame an oil painting?
James: For me, I would always buy the best materials that I can afford, from the support to the binding oils, pigment, paint, and then varnish. Art materials are relatively cheap compared to the final price of a painting and many materials can last years. I would also recommend reading up on the correct way to prepare a canvas and apply ground layers. A lot of the problems I encounter with contemporary paintings is incorrect build-up of paint layers which often leads to craquelure and flaking. As an artist myself, I know that sometimes the creative juices start to flow and you can be impatient but if you have a stock of canvases ready prepared then you are less likely to produce something that won’t last the test of time.
As for framing an oil painting, a lot depends on the style of the painting, the period of the piece, and where it is going to be hung. On a practical level I wouldn’t advise framing a work on canvas behind glass. I’ve seen an awful lot of paintings damaged when the glass has been broken and large tears formed in the canvas. From an aesthetic viewpoint, oil paintings are traditionally unglazed so you can see the textures of the painting. For large-scale contemporary paintings on a chunky canvas, I like using tray frames or floating frames. For small oil on panels, I like the viewer to be drawn in so a wider frame moulding will always add a bit of depth and a slip liner will help with this. Also, I know that bespoke framing is expensive and a lot of artists starting out can’t afford to have it done but once framed it will be in there for sometimes hundreds of years and the frame does become integral to the piece and a marker of the fashions and tastes of the time. As a rule, I like to offer up different mouldings and see if it adds anything to the painting. If it doesn’t improve it is probably not the right frame. George always said to me “it’s scandalous what a good frame can do for a painting!” And I agree!

Gemma: You create incredible YouTube videos showing full painting restorations. Can you tell us a little bit more about why you started this and what you hope your viewers take away from these insights into your techniques?
James: I started the YouTube channel last year after I had one of my Instagram posts go viral. For years I had around 2000 hard-earned followers and then I posted an unusual varnish removal. The client had asked me to document the process and I posted a 17-second clip of a mechanical varnish removal that just took off. Within a month it had over 3 million views and I had gained 50,000 followers on Instagram! The post has now been seen by over 65 million people which is just mind-blowing. I didn’t really know what to do with this audience so I just started sharing more things on Instagram. A lot of people had never seen painting restoration before and were amazed at the transformation, especially what could be achieved with cleaning and varnish removal. I had a lot of people asking for longer videos and asking why I hadn’t started a YouTube channel. I thought I’d give it a go and why not. It was a very steep learning curve and the quality of my first videos left a lot to be desired. My editing skills kicked in from what I’d started to learn at university 20 years ago and soon I got into a flow.

What I really enjoyed was not just showing the restoration process but delving into the history of the paintings I had in the studio. There is always a story to tell, either from the journey of the painting or through the artists and subject matter. This research side of the channel has really taken off now with many viewers helping with the identification of sitters through researching family trees and artists, or visiting institutions to access their archives. I have a very active community of supporters on Patreon too where we have live Q&As on paintings, research, and techniques and I also share tutorials on some of the processes that I use in my practice.
For me as a restorer I have worked on my own for many years and it can be quite a lonely occupation which I’m sure many artists can relate to. You spend a lot of time in solitude just working on your craft. Instagram and YouTube has allowed me to connect to a community of restorers worldwide which I never really knew existed and also a community of people who treasure art and love the whole history and backstory of artists and their lives.
As the channel develops I want to bring to life the period and the lives of the artist and the works created and on a practical level show how artworks can be cared for and preserved for future generations. Hopefully, viewers will see the value in the artworks and family heirlooms they may have around them and how they all form an important part of history. Also, I hope it inspires artists to think about how they create their work and the legacy of their work as it travels through time. Most work created will outlive the artist that made it, the materials and techniques used however will determine just how long.
Follow Bloomfield Art Restoration on Instagram
Visit the Bloomfield Art: Fine Art Restoration website
Visit Bloomfield Art on YouTube
Support James Bloomfield’s Patreon
Further Reading
Recreating the Colour Palette of John Constable
The Making of ‘The Peasants’, a Painted Film
Golden SoFlat Acrylic for Hard Edge Abstract Painting
Shop Art Materials on jacksonsart.com


2 thoughts on “Fine Art Restoration with James Bloomfield”
Fascinating! Thanks for sharing
this.
Thanks Chris!
Comments are closed.