



Discover the importance of the wooden canvas wedges that you get when you buy a canvas or stretcher bars. And learn how to insert them correctly to stop your canvas from sagging over time.
What are those little triangular pieces of wood for?
A few experienced artists have told me how they just threw their wedges away and then wondered about the best way to tighten up a slightly sagging canvas. So I decided maybe the humble canvas wedge needed some clarification.
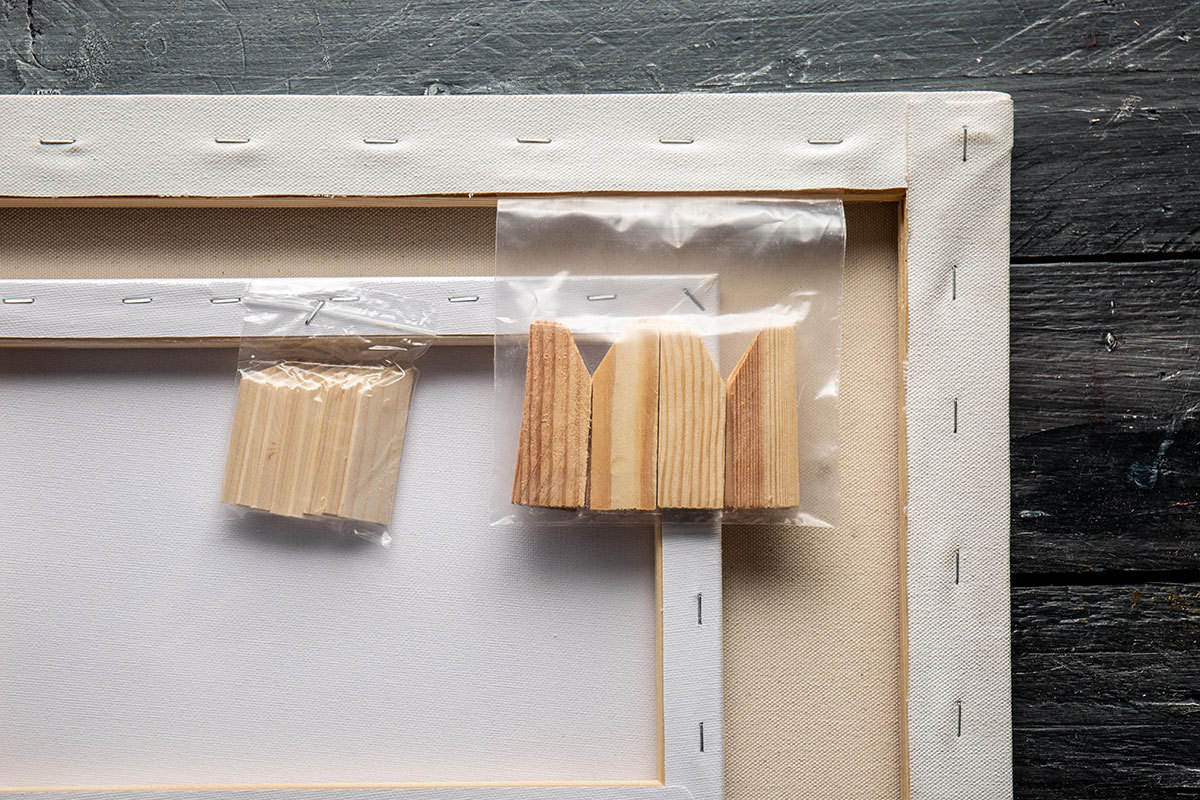
When you purchase a ready-made canvas it will usually come with a little plastic bag of eight canvas wedges. They are often stapled inside the wrapping. Occasionally the wedges are already inserted in the canvas frame. When you purchase stretcher bars to make your own canvas, you will receive eight wedges per four bars. The size of the canvas wedges varies – bigger bars will have bigger wedges. The shape can vary a bit as well. Each manufacturer makes the ones that best fit the slots in the corner of their stretcher bars.
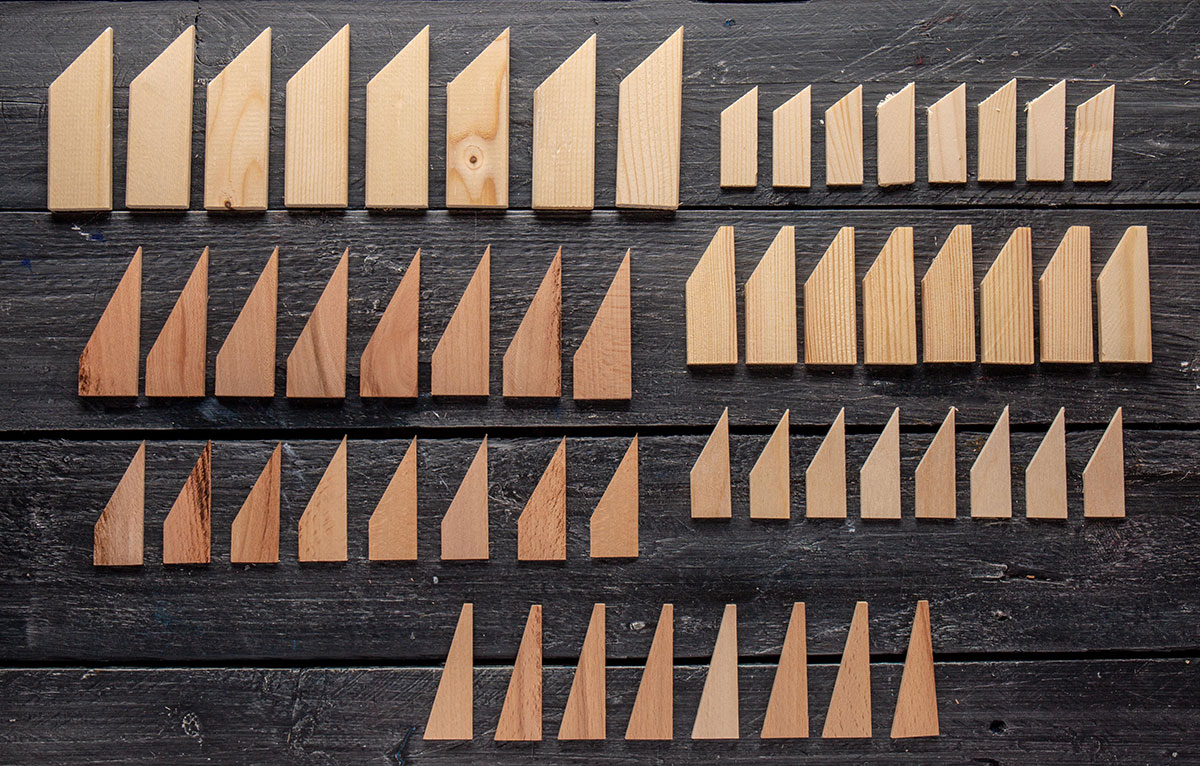
Many artists throw these small bits of wood away or start filling a drawer with them. But painter’s corner keys or retainers (two other names for them) can be very useful. If you don’t already use them you might want to give them a try. New canvases often need to be tightened and old paintings on canvas can become loose over time. This is usually because of changes in humidity and temperature. Your canvas that was as tight as a drum can loosen on its stretcher bars. They can easily be made tauter with canvas wedges, which expand the corner of the bars slightly. This enlarges the frame by a millimetre or so.
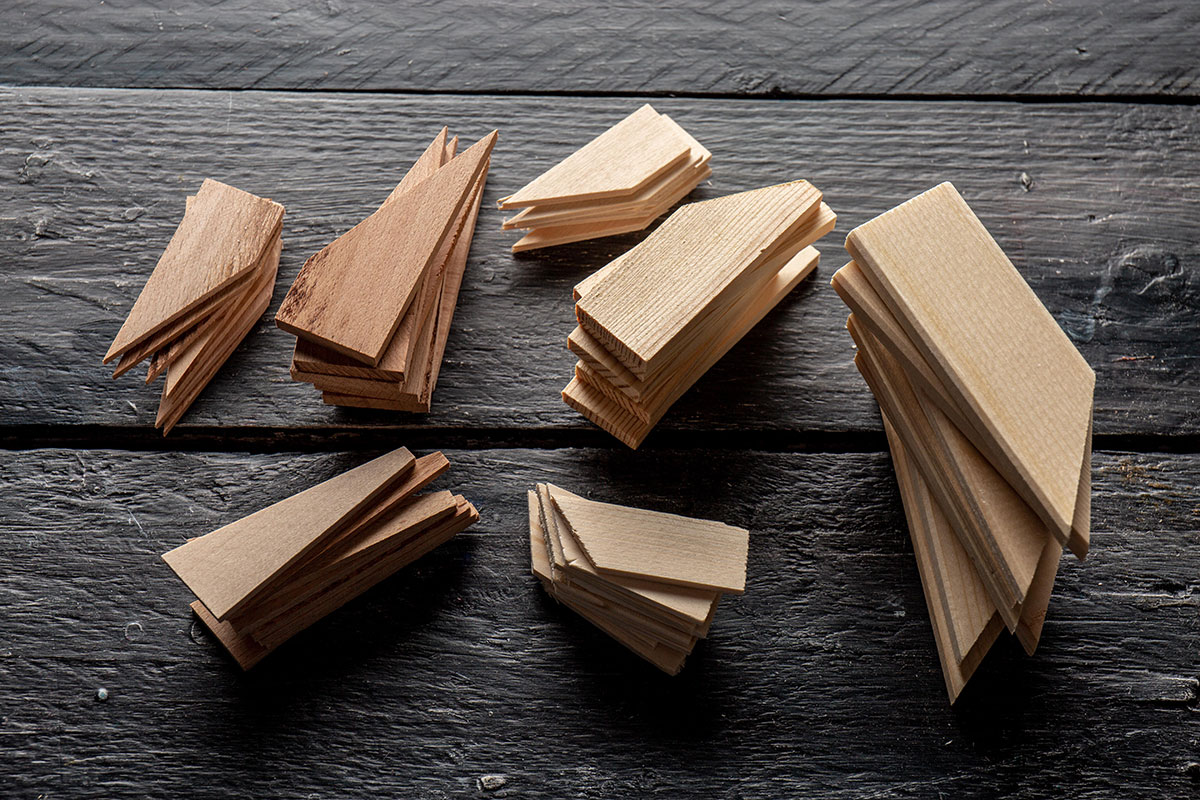
Canvas Wedges Can Be Inserted Into the Canvas Bars Before Painting or After
They can be used to:
- Finish the stretching of a hand-stretched canvas – to give it that last bit of tightening. If you are priming your canvas, wait until you have primed it as priming will cause the canvas to shrink.
- Tighten up a ready-made canvas that has loosened up in storage or shipping (the tightness will relax naturally over time). If your canvas arrived and is just a bit looser than you’d like, inserting the wedges will usually solve the problem. Often a couple of millimeters is all it takes to make a loose canvas taut again, or pull a sag out of a corner. If the wedges are already inserted in the canvas frame they may need a little tap to fully set them in.
- Tighten a canvas that was fine when you started painting but the weight of paint and pressing on it has caused it to loosen a bit. Assess if it needs a bit of tightening when you are finished painting and varnishing. This is a reason to keep the wedges for future use, because the fabric tightness may change. Take care to do it gently as over-stretching suddenly can crack an oil painting.
- Tightening a finished painting if it sags after many years. A painting might go slack over time because the temperature and humidity in a building changes throughout the year. IF it is a slight sag, then Inserting wedges will allow you to tighten the canvas back up without having to re-stretch it. Take care to do it gently as over-stretching suddenly can crack an oil painting.
It takes surprisingly little expansion in the corners to be enough to tighten a small sag. If it won’t tighten up, then the sag is too much and you will need to remove all your staples and restretch the canvas.
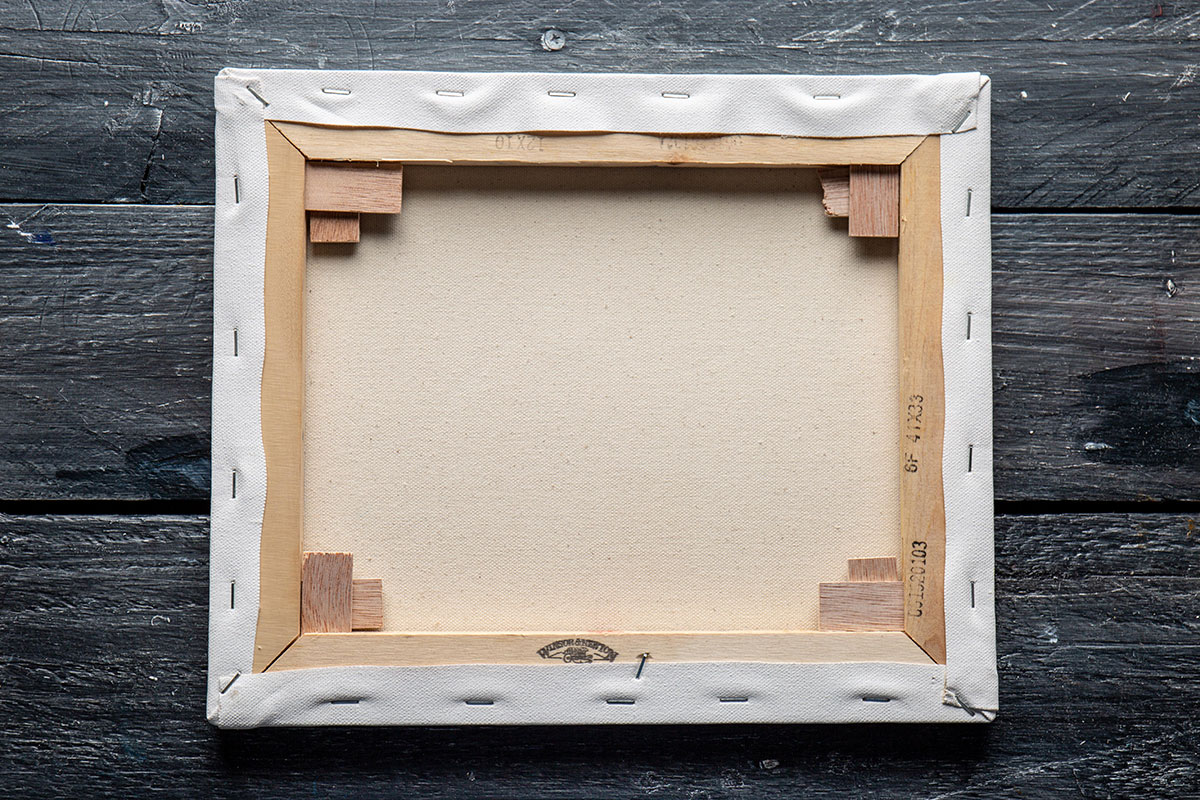
Inserting the Canvas Wedges
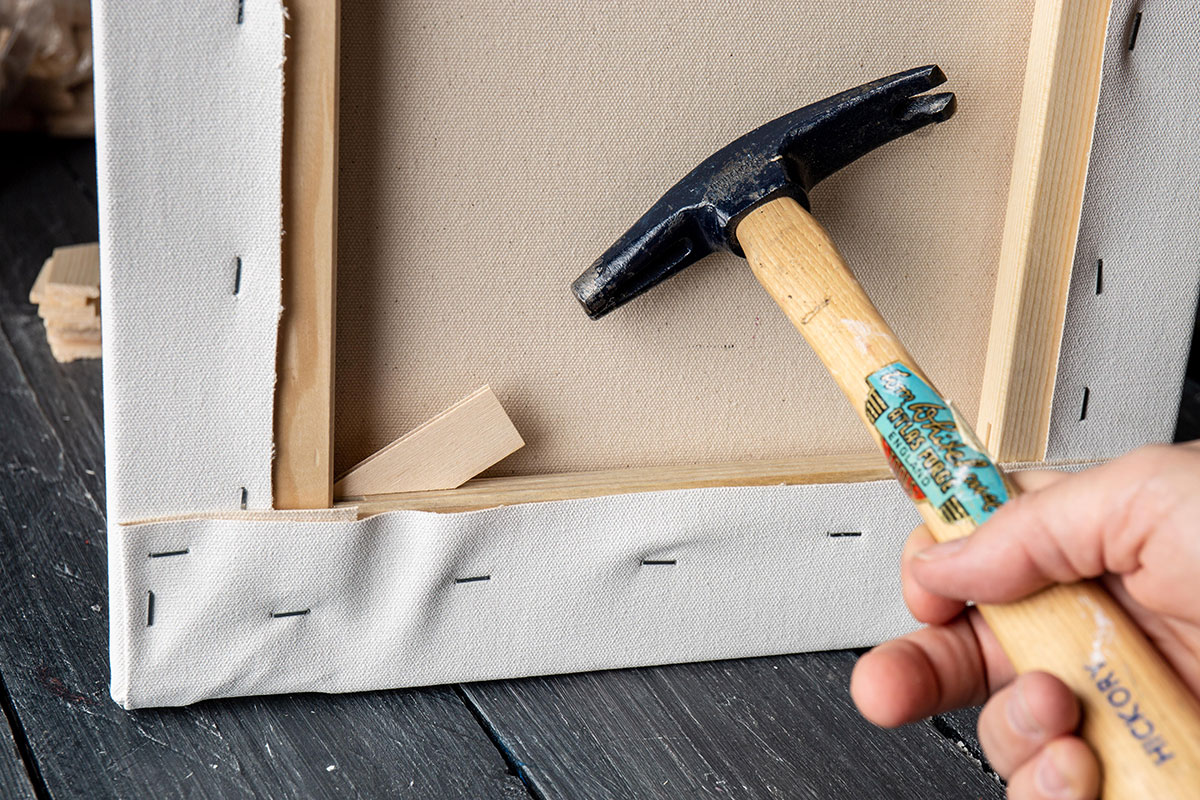
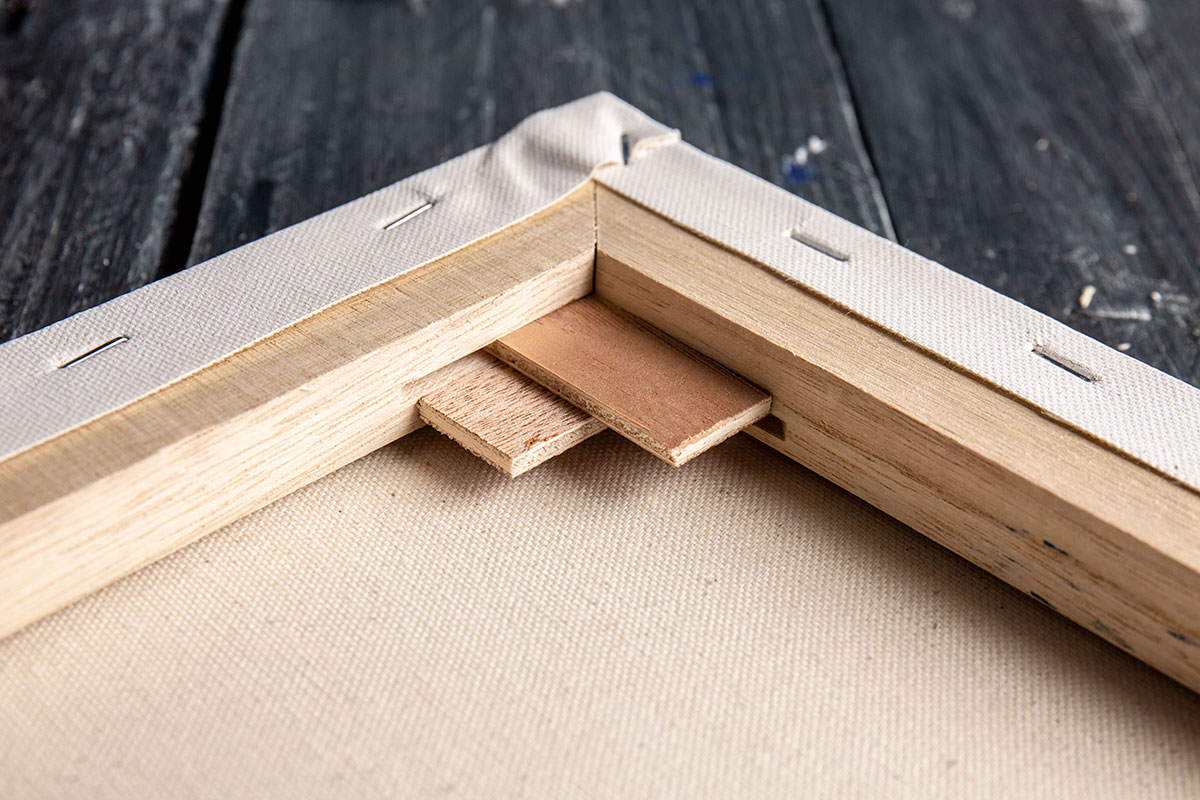
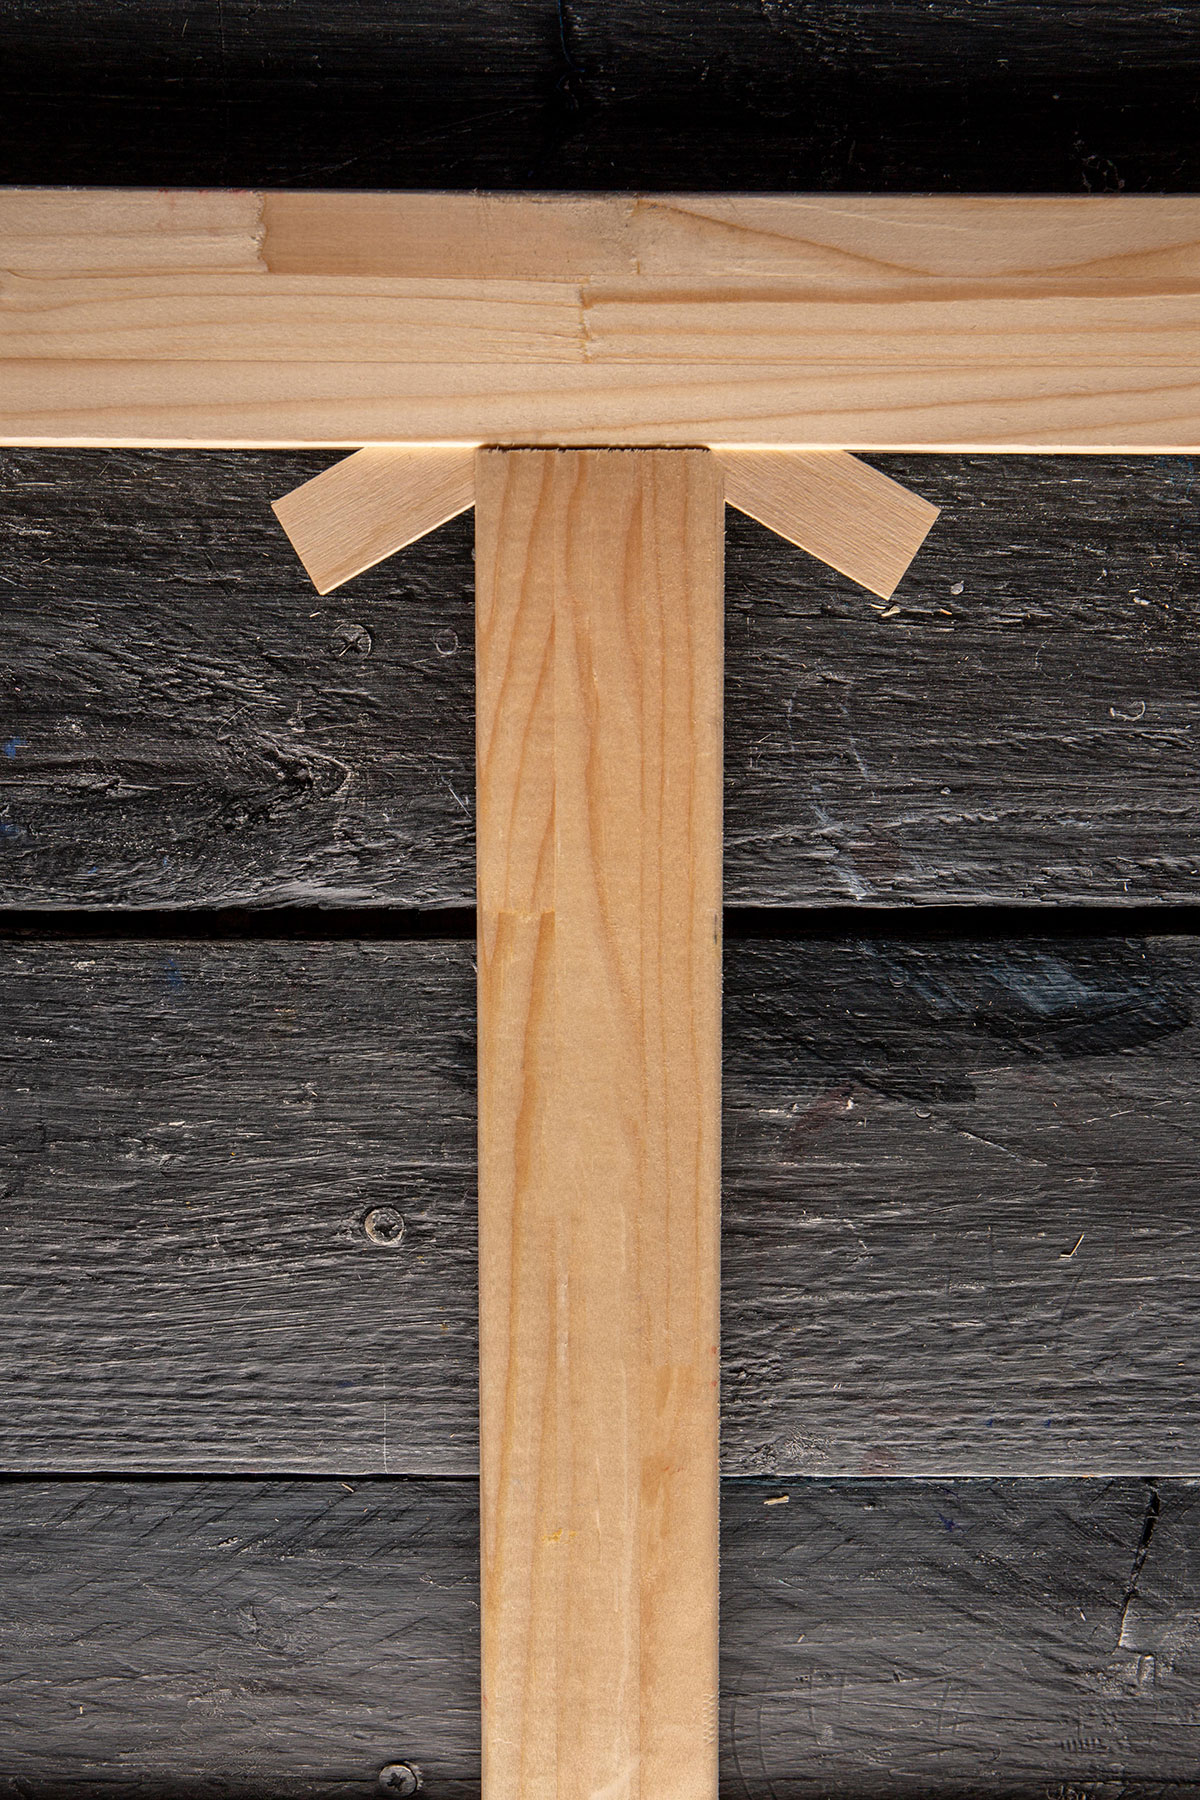
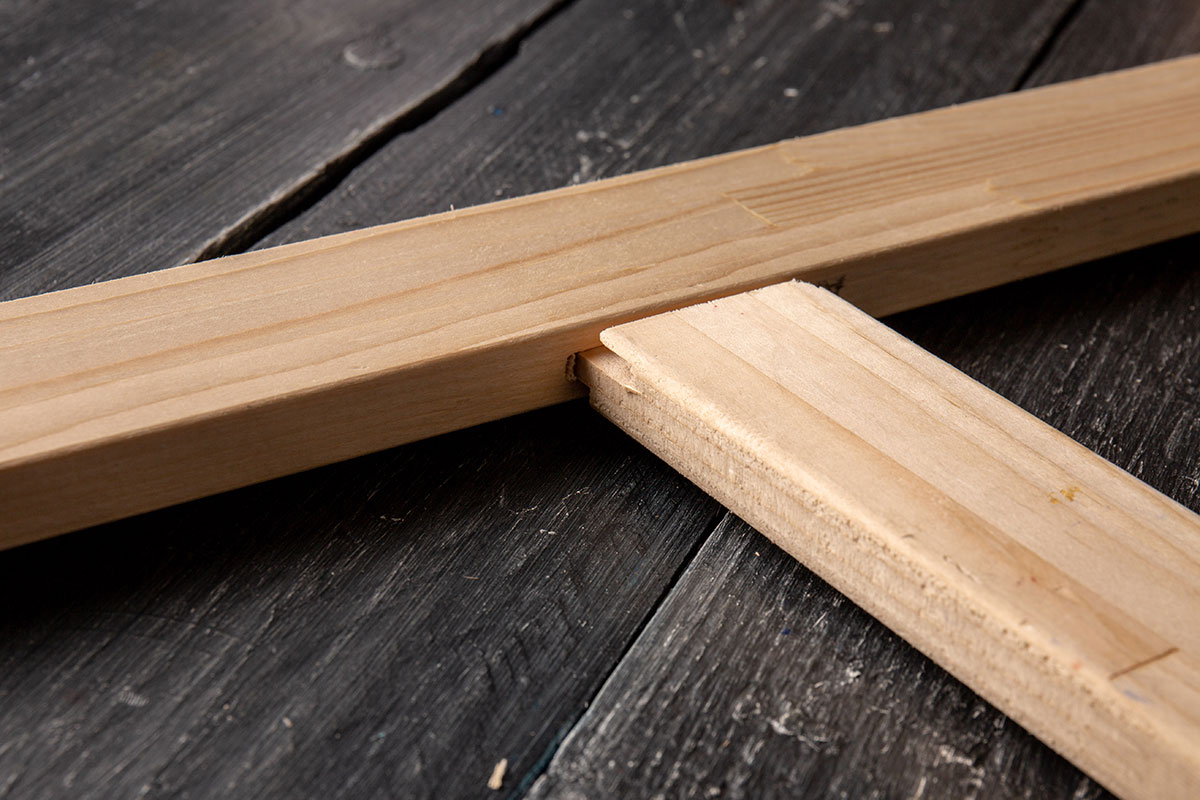
In each inside corner of a ready-stretched canvas or one you’ve stretched yourself, there are two slots in which to fit the wedges. Each slot reduces in size the further back it goes. As the wedges are tapped into the frame it pushes the bars apart at the corner. Thus stretching the canvas a few millimetres. If you spread it far enough you can see the gap in the mitred corner expand. This doesn’t make the corner any weaker, there is still a full dovetail join inside the corner.
From the back of the canvas slide a wedge, point first (top of the triangle), into each slot, one at a time. Give them a tap with a small tack or finishing hammer. Be gentle. Bashing it could split the wood of the wedge or you could bounce off and hit the back of the canvas. Or overstretching of an oil painting could crack the brittle painted surface.
Some artists tap downward with the side of the canvas on the table or floor, some tap upwards. I find upwards to be more difficult to aim, but try both and see which works best for you. Do one corner at a time and try to tap with the same force for each corner so the tension is even. There will be two in each corner, eight per canvas. Check the front of the canvas and if you need to, go around and tap them all again. I find that sometimes one corner is sagging more than the others so give that corner a few more taps.
Orientation of the Canvas Wedges
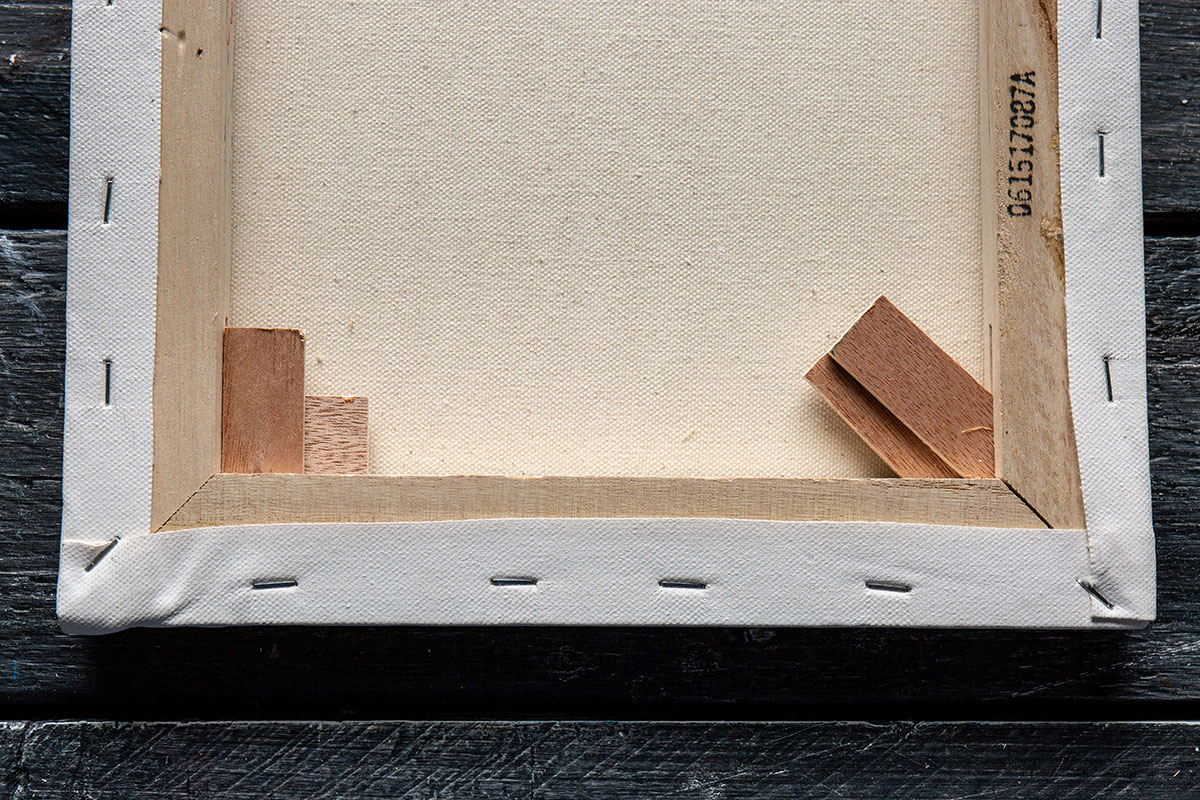
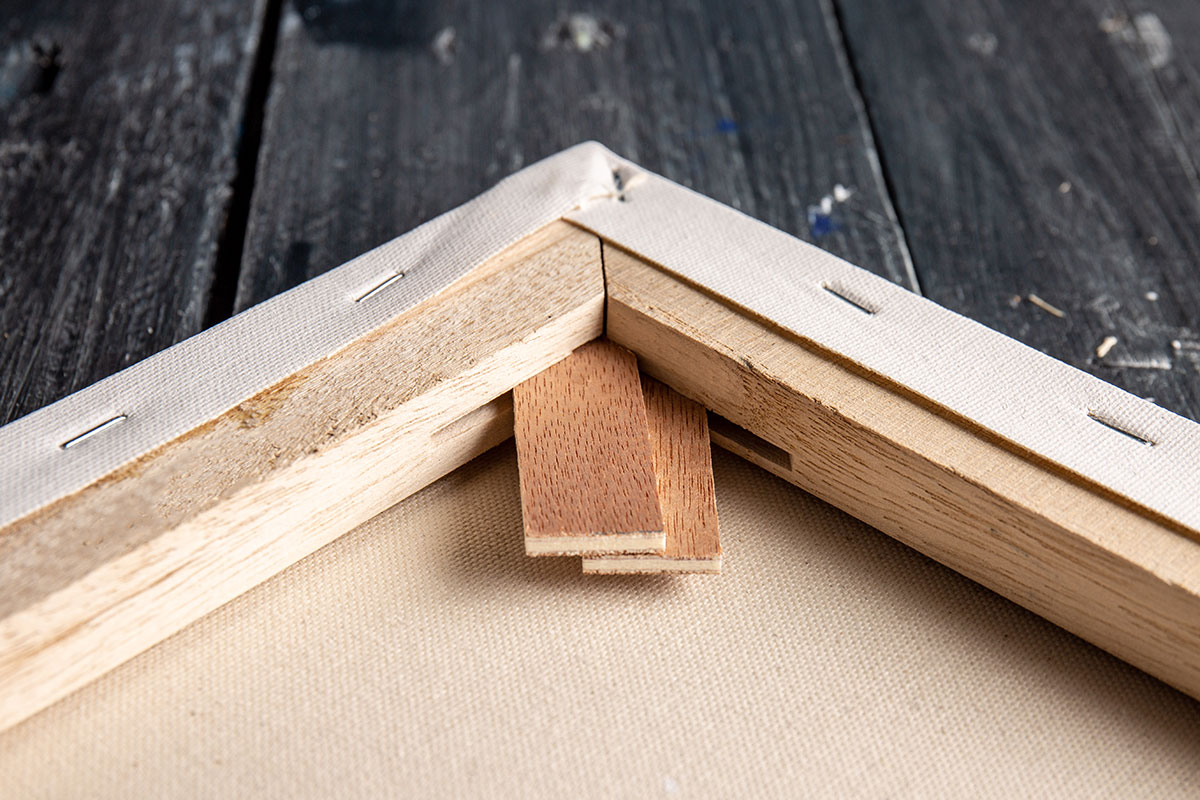
The wedges are asymmetrical and they work well in either orientation (inserted with either the long side or the short side against the side of the stretcher bar). Some stretcher bars seem to accept the wedges a bit better in one way than the other. It must be how the slots are angled inside. For instance, Winsor & Newton brand canvases work best with the wedges parallel to the bars. I used to insert my wedges parallel because it looks tidier. But now I prefer it so that the wedges are angled out toward the centre of the canvas, as they seem to work a bit better. I use hand-stretched canvases and Jackson’s Professional Canvases and it works well with them. The orientation is up to you, try both and see which works better with your canvas.
Spreading the Canvas Bars Apart
It is good practice to try to get your bars to spread apart a bit before you start tapping in your wedges, rather than just using the wedges themselves to push the bars apart. Best practice is that you should do all the movement of the bars by pulling and tapping on the bars to expand them and only inserting the wedges after you have expanded the frame. They are called keys or retainers because they fit in the space you have created by pushing the bars apart, to retain the expansion of the bars.
Claire, our former bespoke canvas maker, explains: “If you need to tighten a canvas during painting, take a slip or block of wood, hold to the inside of the stretcher bar near the centre and tap this out with a light hammer (the piece of wood stops you getting hammer marks on the stretcher bars). Do this on all four insides, then push the wedges home. They are there to act as keys to stop the stretcher from contracting, not to be hit with a hammer. Do not bang the wedges themselves in.”
This is what is meant when someone says you need to “Bang your stretchers apart”. They mean to tap the stretcher bars in their centres, one at a time, away from the middle of the canvas. After you have expanded the canvas a bit then push your wedges in to hold them apart, like a doorstop wedge holds open a door, or a keystone holds a masonry arch in place. I find this allows the wedges to be pushed in further before you start tapping on them. It also gives a tighter canvas. But I usually do need to do some more pushing with the wedge to finish the job.
Leaving the Canvas Wedges in Permanently
In case you were wondering – the canvas wedges are meant to be left in permanently. They keep the corner of the stretcher frame pushed apart slightly. If you remove them the canvas will sag again as the bars move together.
Centre Bar Wedges
Centre bars also have a little gap. When you purchase a centre bar to stretch your own canvas you should receive some slim wedges to tighten up the centre bar.
Updated: 1st October 2024
Read our other articles about canvas and canvas stretching
- Choosing the Right Canvas for Your Painting
- Everything You Need to Know About Stretcher Bars
- How To Assemble Stretcher Bars for Canvas
- The Right Canvas: choosing stretcher bars, canvas and priming
Stretched Canvases at Jackson’s Art
- Stretched Canvas
- Bespoke Stretched Canvas
- DIY Canvas Stretching – Stretcher Bars
- DIY Canvas Stretching – Canvas by the metre




65 thoughts on “How to Use the Canvas Wedges That Come with a Canvas or Stretcher Bars”
Thank you learnt something new today
thank you for that , I did wonder how to use them.
Great! Glad you found this helpful!
Lisa
Thank you, was wondering what these
little chips were meant for
Good to hear you found the article useful!
First thing I did was scan down article to see how they fit
in. Pictures show them inserted (yes you do explain how
they are inserted) but a simple picture of position pre insert
would have been much better.
Thanks, this was really helpful. I’m just a beginner with
canvas so all tips and advice help. Much appreciated,
Richard
Great, thanks Richard!
Thank you so much for this information. For years I
have tried to find the best way to use these and now I
can be sure that I’m doing it right.
Great news, thanks Kathy
Most wedges seem to be too small (thin) and just slip out, that’s when they go in the bin!
Oh no Roberta, that sounds annoying. Even when you tap them all the way in? If you ever need wedges and they’re too small, just call customer services, we should be able to send out replacements if you bought the original canvas from us.
Many thanks
Lisa
Any idea where I can buy these canvas wedges please?
Hi Peter
I’ve never seen the wedges sold as such, they are usually packed in a plastic bag fixed to the back of each canvas.
Do you need spares?
Many thanks
Lisa
This is an interesting article. But can I
ask why the Jackson’s premium
canvases I ordered recently have staples
across the corners of the stretcher
frames – 8 on each corner/4 front and 4
on the back? This makes it impossible to
use the wedges to re-tension the
canvas…
Hi Dominic
Thanks for your comments and we are currently in discussion with the manufacturers to see if we can change how the Premium canvases are made so that canvas wedges can be used.
Apparently the reason the canvases are stapled in this way is because the stretchers are put together first before the canvas is stretched and it prevents the rectangle from moving and becoming a rhombus before the material is attached. They are made by hand and not by machine.
Of course you could un-wrap the corners and remove the staples, and as now stretched, the canvas will not distort and you could then push the wedges in for more tension. I realise this is not an ideal solution, but these canvases are very popular and we have sold thousands of them without this issue being raised (until now!) so we feel this proves that the original tension is usually excellent.
We’ll keep you posted on any developments with how the Premium canvases are made.
Many thanks
Lisa
I need some! Do you know where I can
buy them?
hi Amy,
If you contact the customer service team of the shop you bought the canvas from they should be able to sort some extra wedges for you.
Many thanks
Lisa
How big are they?
Hi Dennis
They vary depending on the size of the stretcher bars, but they are generally quite small, about 5cm long.
How do I order Wooden Wedges ? Does any
one sell them ?
Hi Ernest
Unfortunately, I don’t think anyone sells them separately, not that I’ve seen.
They are generally provided with a stretched canvas or stretcher bars. Some artists have a few in a drawer somewhere, so maybe someone you know has a few.
We might be able to include a few in your next order, so that you don’t have to pay postage for us sending them, but I don’t know if our loose ones will even fit your canvas, as each maker uses a different size slot. Ours fit the stretcher bars that we sell and they are very large, so wouldn’t suit any ready-stretched canvases.
Do we leave the wedges in??
Hi Carol
Yes, they are meant to be left in to hold the corners apart. They should be inserted so well that they do not fall out later. They are sometimes called canvas keys, referring to the idea of a keystone, the last stone added to a building that locks everything into place and cannot be removed.
Thank you so much, I’m just about to
start and thought they were for jamming
between the easle and canvas for
stability
Hi Scott
Glad it was timely!
Don’t worry about the staples, I’ve
been stretching my own canvases for
years. Just tap in the wedges as
desired. There shouldn’t be problems
caused by the few staples at the
corners. Good luck, contact me if you
like Purcell
Thanks Purcell!
Made no sense or point to me at all.
Maybe a YouTube video will explain it
better
Thank you for the suggestion David. We will have a look into that.
This page was concise, and sufficiently
detailed with photos. How can you not
understand. ?
thank you Julie, I was wondering what was
the purpose for them
Hi Terry
It’s funny how they just assume everyone knows what they are for.
Glad it was of help.
If you have a stretched canvas that was
made but there are no slots for wedges (i
ordered wedges separately a long time
ago). Is there still a way to use them to
tighten the canvas. This is a 48 x 72
canvas and I used water and it tightened
it somewhat but i need it to be tighter.
Please let me know if you have any
suggestions.
Hi Andreanna
It’s unusual for artist-quality or student-quality stretched canvases to not have slots.
If you don’t have slots then it’s also possible that your corners are not interlocked in a way that allows you to expand the corners. If your corners are fixed then you cannot tap the bars apart and if there are no slots you cannot then insert a wedge to hold the expanded bars apart.
Where did you get your canvas and who made it?
Terrific article. My wife Nancy has started
painting again and has asked me to make up
her frames. And re-stretch some of the older
canvasses.
Glad you found it helpful, John!
Excellent help! You have turned a dilemma
into a blessing
Glad to help, Robert!
Really great article! Thank you. I’m curious
though, what the downsides/potential risks
are to use the keys (by tapping them) as the
only way to separate stretcher bars/tighten
the canvas, as opposed to the best practice
method described over, by tapping the
stretcher bars first? It seems to me that
most people do it the wrong way (myself
included) by only tapping the keys.
Hi Eirik
I think when the experts I know have reminded me of the fact, it’s more been a case of pointing out how the expandable corner system was designed. The keys (wedges) are not designed to force the corner overlap open, but rather to sit in the gap to keep the tension as the bars try to close the gap.
Most of us use them to open the gap, but it is not what they were meant for. It doesn’t do much harm if you tap lightly and do it gradually. But realise that it changes the shape of the canvas so the corners are not square.
But I find that on all canvases but especially on large canvases, I get a better tension if I hammer on the centre of the bar with a block of wood against the bar and then tap the wedges in. I think it is because when I hammer on the centre of the bar it moves both ends of the bar the amount that they will freely go, which might be slightly different to each other. If I do that on the centre of all four bars (I often tap upwards so the weight of the canvas gives something to push against) I usually get an even tightening, then when I tap the wedges in I do it quite lightly, just until they stick.
If you were just to use the wedges to open the expandable corners then uneven tension is probably the main problem it could cause, which can be avoided by doing it gradually, tapping them all in lightly and then going around again a few times. Whacking them in forcefully could cause too much tightening of the fabric on one corner and uneven tension could cause that corner to eventually tear. Uneven tension could eventually cause your bars to bend and warp. Sudden over tensioning can also crack an oil painting (I did it once.) If you expand by tapping the bars it is hard to over-tension the canvas, it only goes as much as it can. Also, some wedges will split or smoosh or otherwise collapse when hammered because they are soft slivers of wood not intended to be hammered.
And don’t forget you could end up with a canvas that is not square anymore.
your ability to elucidate something
amazes me. it is art.
Thanks again, John!
I was throwing wedges out too, but after I’ve
read your article I’ve started actually using
them. Thank you!
You’re welcome! Glad you found it helpful!
Hi I have a painting framed in glass but
lately I have noticed some blotches of paint
like the painting is sticking to the glass, can
you tell me why and how I can have it
repaired.
Hi Brian
In order to help you could you please answer a couple of questions.
What medium is the painting?
Did you use a mount/matte or a slip to give space between the painting and the glass or is the painting up against the glass?
Can I use these to help with a warped
frame… I recently purchased some
canvas from Jacksons and 2 of the 4,
when laid flat have 1 corner that stands
proud by around 10mm… The 2 are the
same size/brand so assume it was a
storage issue… But would like to know if
tightening a certain corner could bring
the canvas square again..?
Hi Dawn
Probably not. I have personally found this a very difficult task where I wet the bars and dry the canvas under weights and it may still re-warp later. My framer said the warping is so strong that if you bend a warped canvas flat with a frame it will break the frame in order to go back to the warped position.
So I think we should consider them faulty.
If you could please email the details to [email protected] they will sort it out.
I am sorry your order wasn’t perfect.
wow. i couldn’t tell which way to insert
them and found this page profoundly
helpful. I’m confident now because of how
well worded and detailed your explanation
on orientation of the keys.. ty so so so
very very much! i loved it
Thank you John!
My aim with each of my articles is to answer every question I can think of around a topic, in a complete and clear way.
So that is great to hear!
Hi Julie, I was hoping you could give me
some advice. I have a painting that I put
a lot of texture and detail into (including
the borders) and the top two corners
creased. I sprayed room temperature
water on the top two corners of the back
and it seemed to get worse. I’m hesitant
to try hot water. Would re-stretching the
canvas cause it to be aligned differently
than it is currently? It’s not significant
creasing but it’s white in white space
and very noticeable.
Hi Morgan
A slight dip or sag in the corner can become the centre of attention, I have found, it can be what the viewer ends up focussing on for some reason.
Trying to get rid of them is very frustrating if they don’t respond to the slight adjustment of inserting the wedges or water on the back. I have often found that hot water won’t be enough either, it looks tight for a day or less then sags again.
If you have already tried these then I’m afraid you will need to re-stretch the painting. You might try first just to re-stretch the the 1/4 of the painting that has the problem, it might be enough. But you will probably need to remove it and stretch it completely to get an even tension.
All paintings have a problem when re-stretching of being difficult to line up all the edges. So artists who roll up their canvases for storage or shipping have a challenge when putting it back on the bars. But if you have painted heavily on the sides that sounds even more challenging, as your canvas will now hold a box shape even without the bars and it will be hard to get that to lie flat even for the few mm you need to pull over the edge.
If it’s a good painting it may be worth the effort, and it could be a learning experience to practice re-stretching.
Your instructions were exactly what I needed
to adjust my canvas. Thank you!
Thanks, Lisa! Glad you found it helpful!
Great and very informative article!
I’m not an artist but bought some pre
manufactured canvases to mount some
pictures on that I bought from a well
known auction site. I was baffled as to
what these wedges were for, I could see
where they could go but didn’t get why,
thanks for this, I can now sleep again 😉
Hi Mike, I’m glad to hear it, sleep is very important!
Thank you so much. I also threw away some
of these wedges and I found it very puzzling
that there was no diagram or instruction for
how they should be used. I think it would be
a great help to artists new to stretched
canvas to give a short description or
diagram of the process within the
packaging material.
Hi Judith
I’m glad you found it helpful.
That sounds like a good idea to me. I’m not sure why they don’t include a short pictorial instruction, perhaps they think of them as an optional accessory.
Thank you, was wondering what these
were meant for.
Glad to be of help!
Very informative
Glad you found it helpful!
After you’ve inserted the wooden
wedges to tighten the canvas, are they
supposed to be removed prior to selling
the canvas? Or should they remain
inserted? Thanks
Hi Dave
The wedges are inserted to keep the little gap pressed open. If you remove the wedge it will close again and the corner will sag back eventually. So they are meant to remain permanently.
Comments are closed.