



Using sponges for painting may initially bring back memories of using poster paint in primary school, but they’re also a valuable tool for artists working in painting, drawing, and printmaking. In this article, I explore the sponging technique by looking at examples from antiquity to Dutch botanical painting, as well as Degas’ prints. Articles in the Techniques Series define the meaning and context of art making processes and give practical tutorials on how to work with them.
Sponging Techniques for Painting, Drawing, and Printmaking
Definition: Sponging is the application of paint or ink to a surface using a sponge. This could be a natural sea sponge or a manufactured one.
What is the Effect of Sponging?
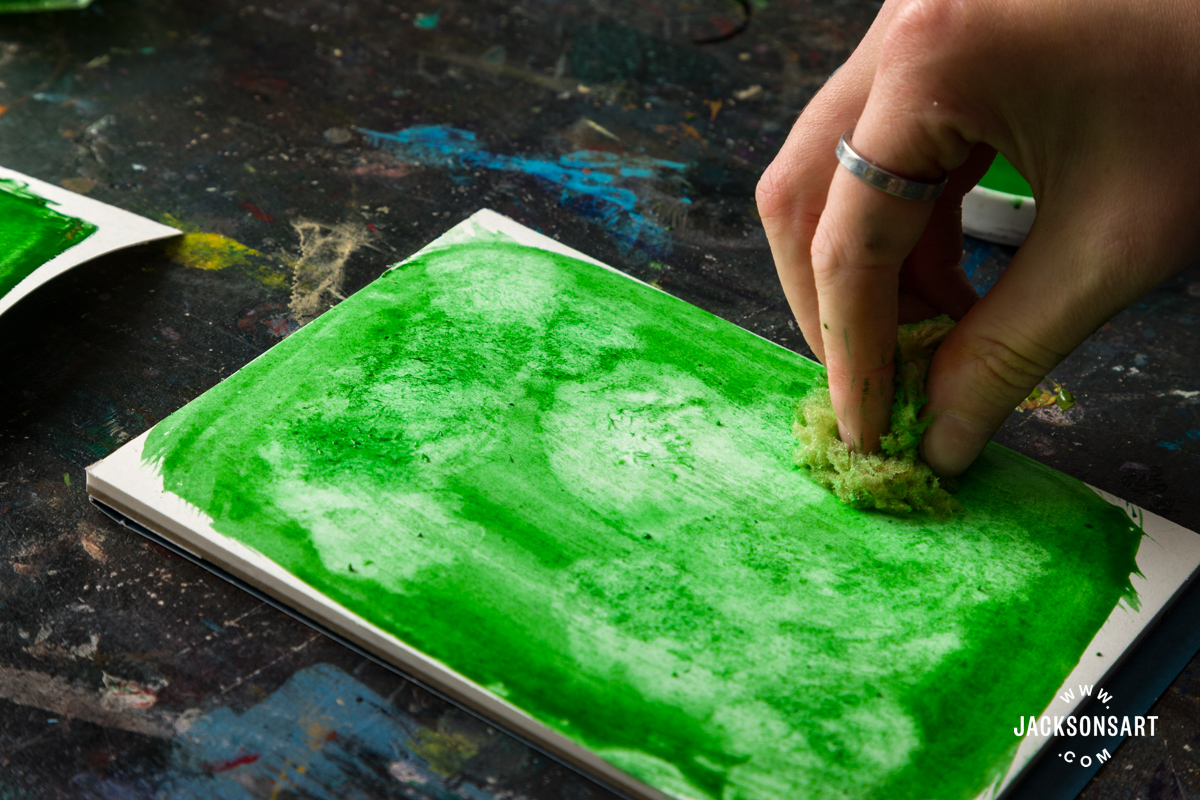
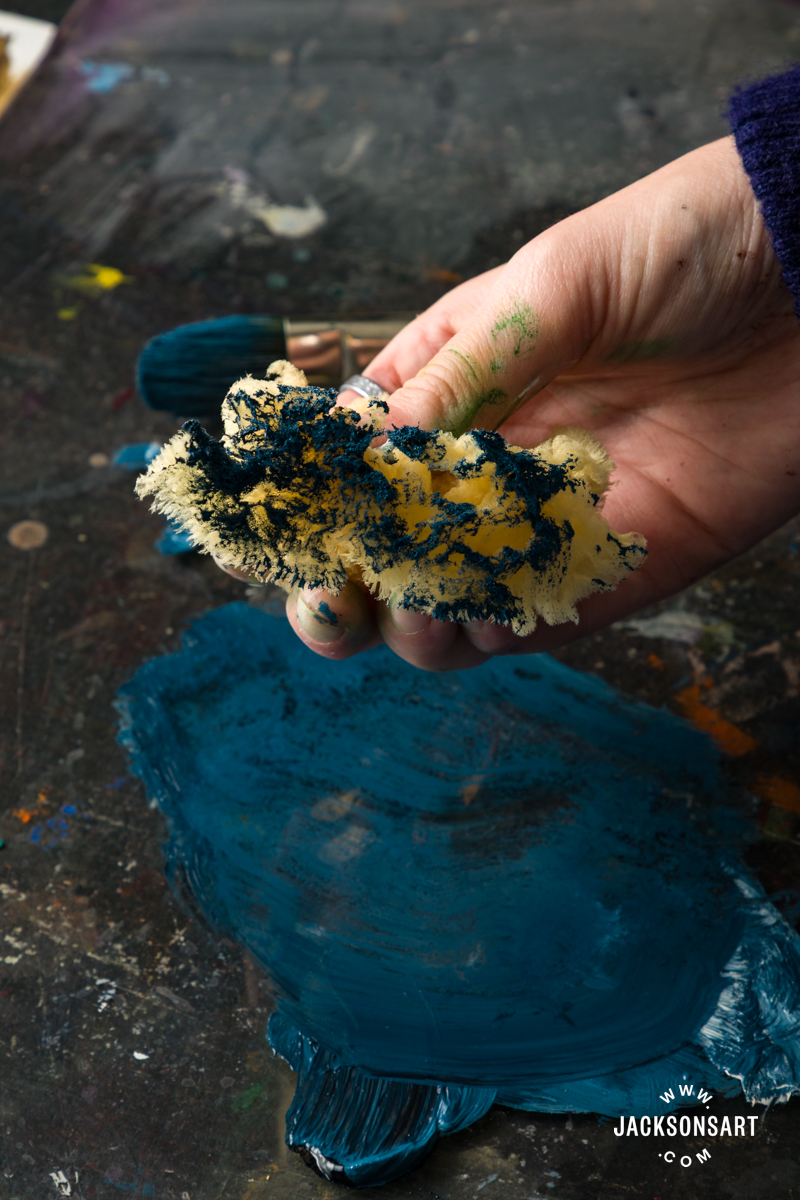
Sponging adds texture to paintings by printing the impression of the sponge onto the surface. Sea sponges generally have defined holes which will appear when dabbed onto a painting. Whereas manufactured sponges have tiny holes which make the sponged mark appear more unified. The artist may manipulate a sponge by cutting it into a particular shape for their purposes, or compress or twist it in their grip to make a specific printed mark.
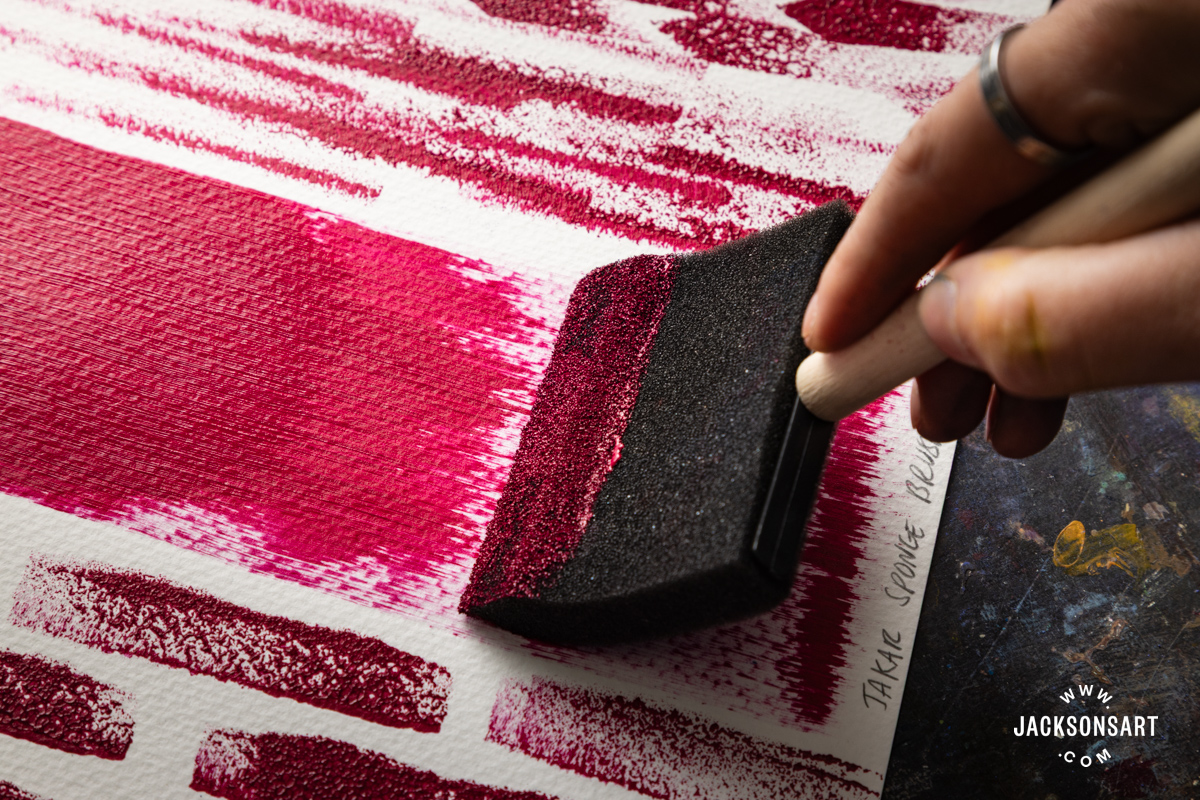
Sponges may also be swiped or dragged across the face of a painting, engaging the sweep of the artist’s arm for mark-making. Some artists may use sponges to buff colour into their support, using it more as a tool for evenly spreading or diffusing colour than for its textured effects.
For drawings, artists may use sponges to lift or blend with manipulable mediums like soft pastels or charcoal. In printmaking, a sponge may be used for a variety of effects that can break up the rigidity of the painted line in monotypes, adding new visual interest to the plate.
The History of Sponging
The use of sponges in art was first recorded by Pliny the Elder, describing the Greek painter Protogenes. As hard as Protogenes worked on his painting, he couldn’t quite render a dog’s foaming mouth the way he imagined. In his frustration, he threw the sponge he was using to wipe his brushes at the picture, which applied the paint just as he had wanted it, “and chance thus became the mirror of nature.” Unfortunately, none of his original paintings survive to this day, but this act of exasperation is probably representative of how artists throughout history began painting with sponges – in moments of spontaneity.
It’s speculated that the foliage in some late 17th-century Dutch paintings may have been achieved through the use of sponging, because of the distinctive texture that appeared in works from this period. In the painting Still Life with Thistle and Snake, by Otto Marseus van Schrieck, we see a mossy area at the bottom of the work, rendered by the application of light highlights, with a sea sponge, or by using moss as a sponge. According to his wife Margarita, van Schrieck kept lizards and snakes in a shed in his garden to work from for his highly detailed paintings of creatures among the foliage. He is also credited as the first person to use the technique ‘lepidochromy’ by pressing butterfly wings onto his canvases to transfer the scales. With this knowledge, using a sponge for painting texture doesn’t seem so outlandish.
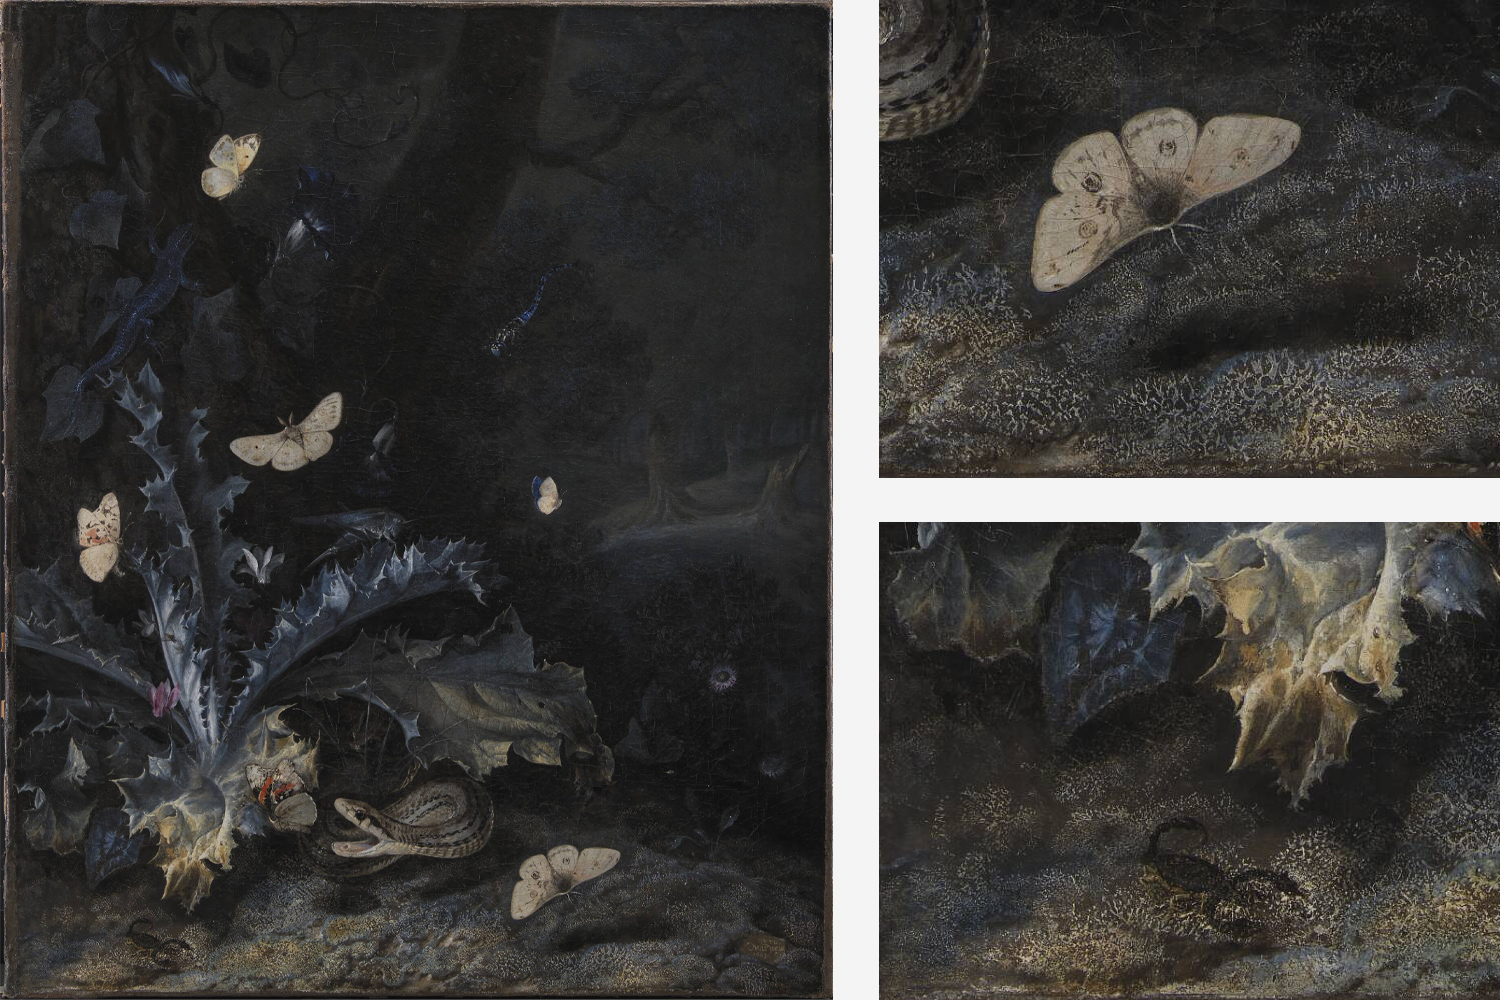
Otto Marseus van Schrieck
Oil on canvas, 60.5 x 50.5 cm | 23.8 x 19.9 in
Statens Museum for Kunst
Most people know Degas for his paintings and drawings of ballerinas, but he was also a prolific printmaker. In the mid-1870s, he was introduced to monotypes. It allowed him the freedom to quickly experiment with adjusting compositions, revisit the same motifs, and generate new ideas. He worked with ‘greasy ink’ using the dark-field technique, which is when the entire plate is coated in ink, before being selectively manipulated and removed to reveal the image. He worked directly with his hands, rags, brushes, brush handles, and sponges, giving each of his prints a wide variety of mark-making. Many of the works approach the potential of abstraction, and flicker with movement. Sponges were specifically used to wipe the ink and to dab it back onto the plate for textured effects. In his monotype Woman Reclining on Her Bed, we see wonderful areas of sponged texture at the top of the print.
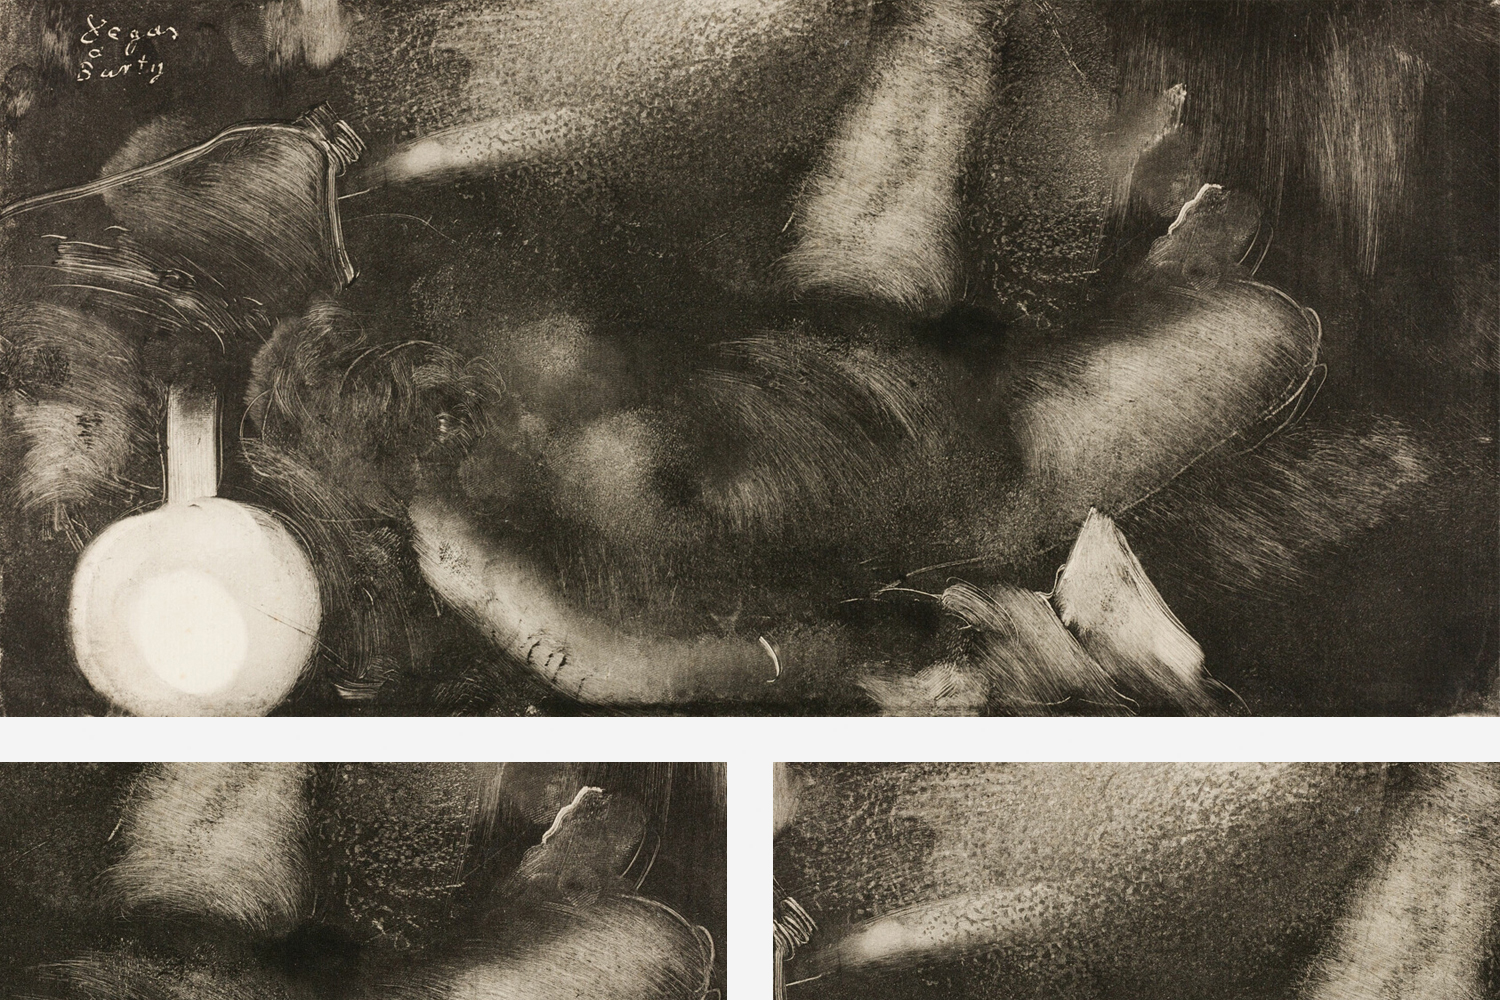
Edgar Degas
Monotype in black ink on ivory laid paper, 19.9 x 41.5 cm | 7.8 x 16.3 in
Art Institute Chicago
Demonstrations of the Sponging Technique for Painting
Mark-making with Jackson’s Assorted Sea Sponges
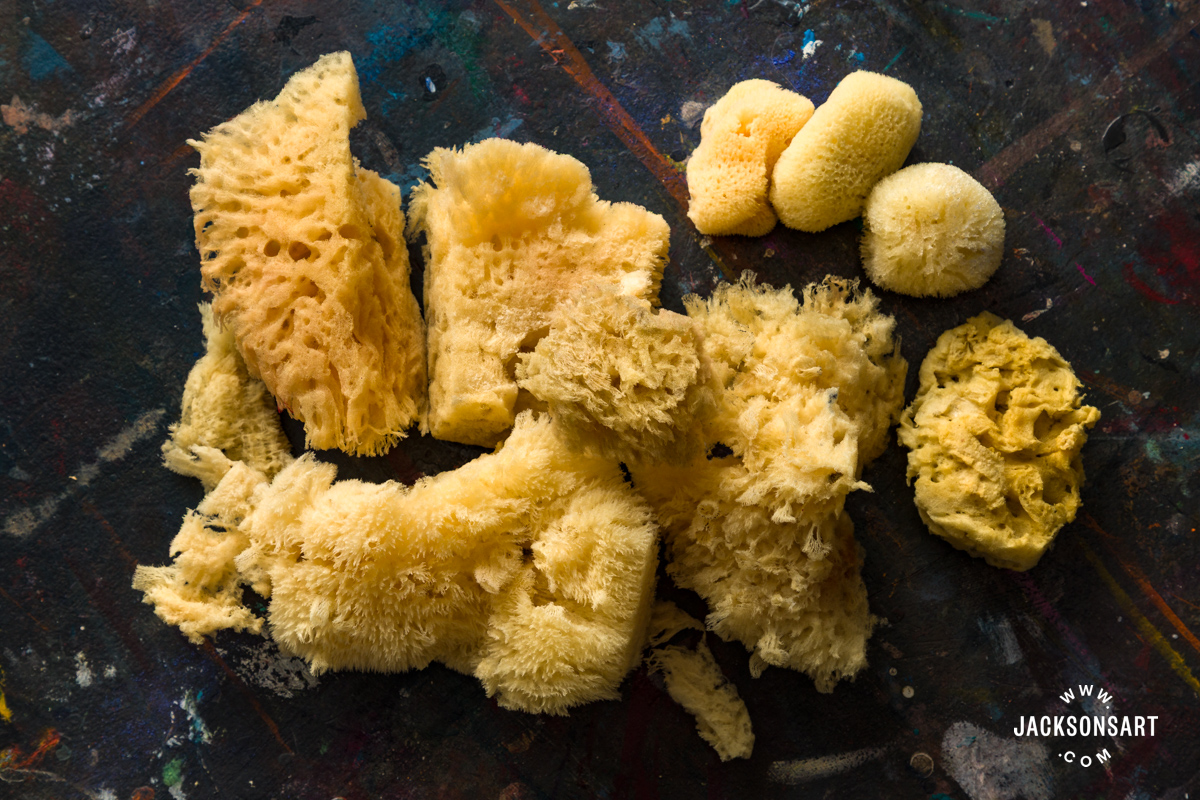
For my first examples, I wanted to make reference sheets of various textures that can be achieved by working with sea sponges. The Jackson’s Large Assorted Sponge Bag contains an assorted selection of 6-9 sponges, with a variety of sizes, shapes, and textures. This set is unsuitable for vegans since these are real dried sea sponges, harvested in Greece.
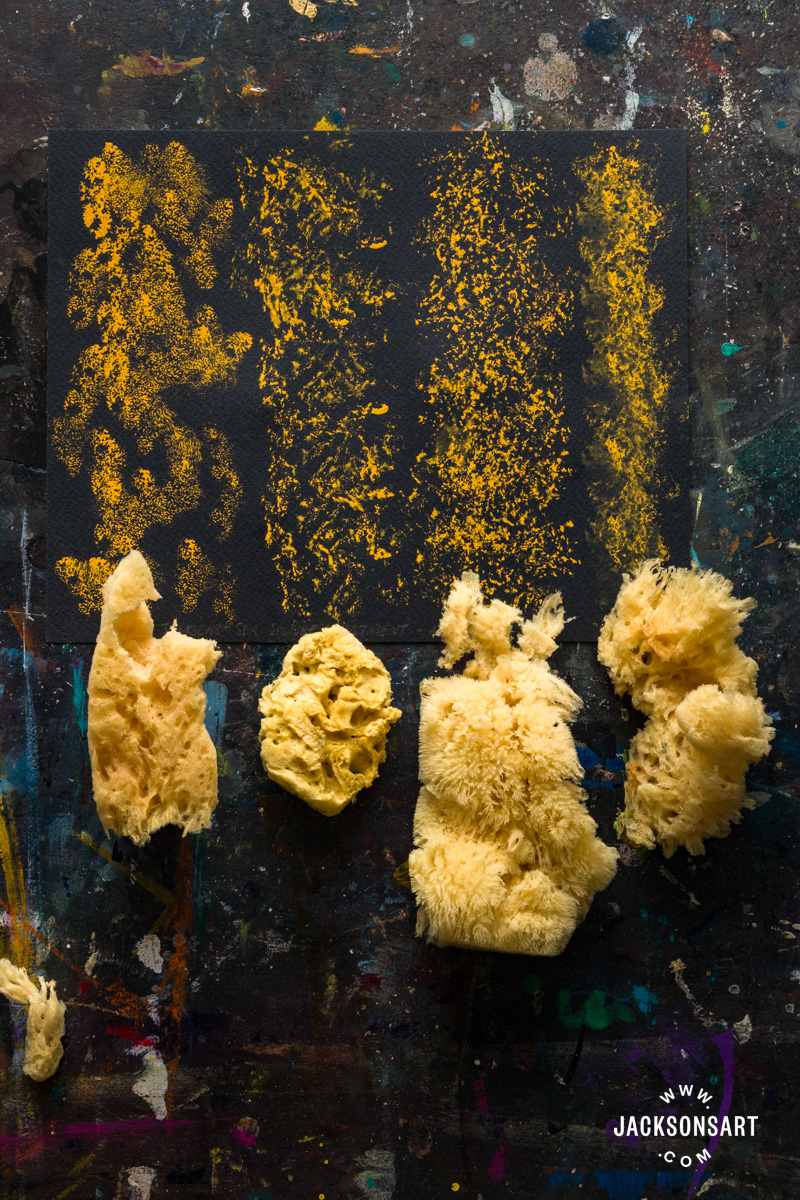
Before using the sponges, it’s important to thoroughly rinse them out with water, since they are sized to hold their shape in their packaging like new paintbrushes are. After giving them a good rinse, you’ll notice that they are softer in your hand and ready to absorb your paint.
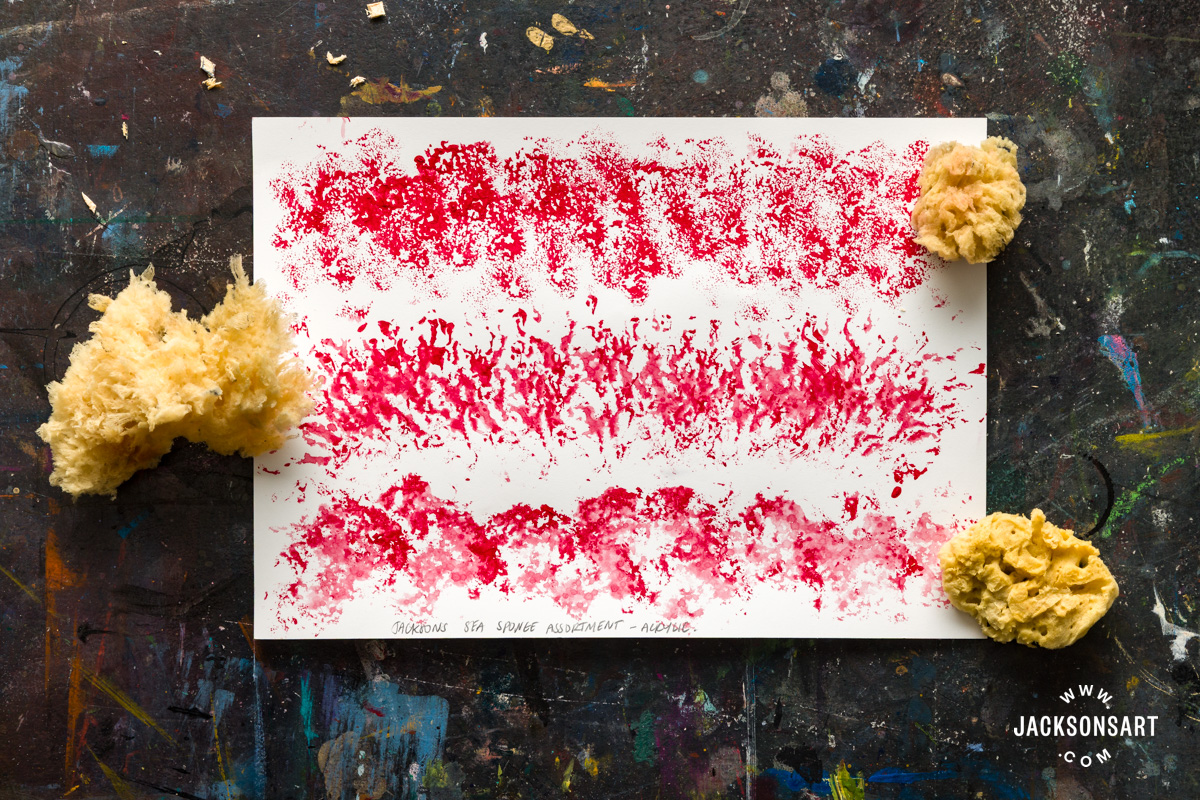
As you can see, the sponges with more distinctive shapes produced some really compelling marks; from broken rocky patterns, to fibrous grass-like impressions, and dabs like sea foam.
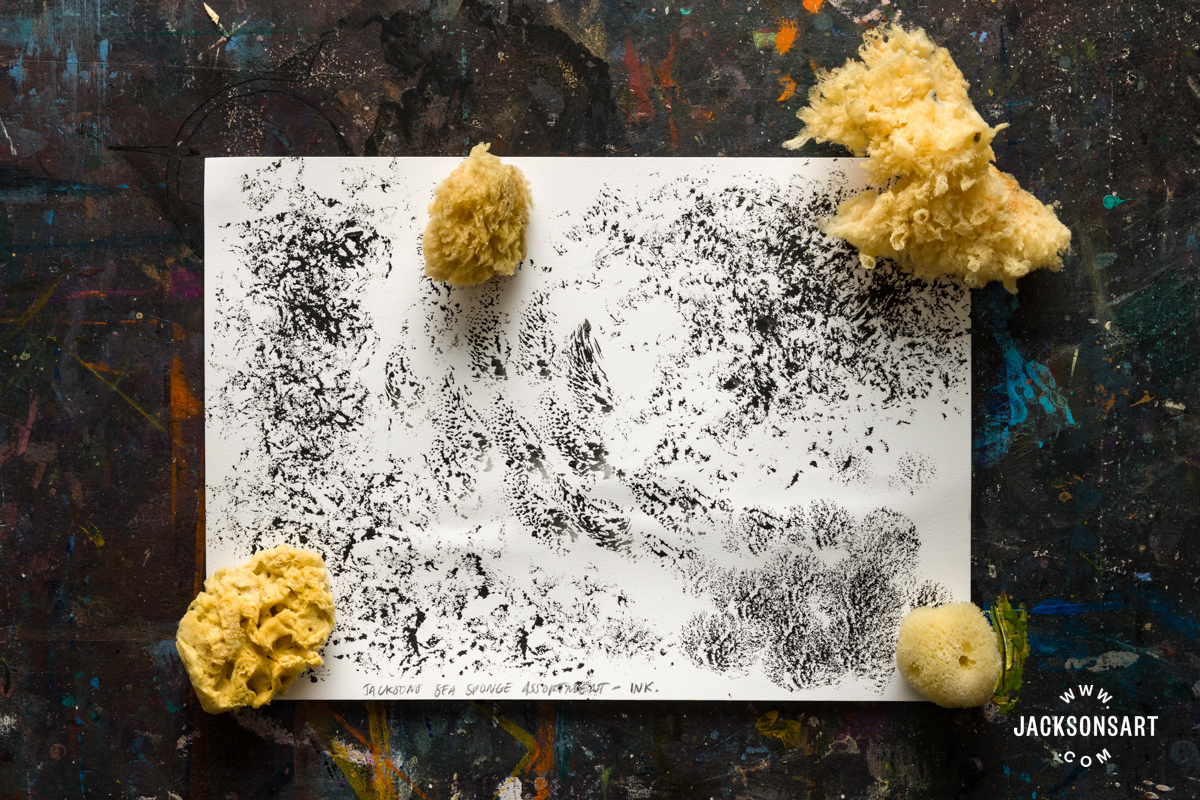
Tips: The pressure that you apply to make the sponged marks will have an effect on their appearance. Very lightly dabbed areas will appear wispy and faint, whereas pressing hard may give you the distinct outline of holes. Or squeeze so much paint out that it obscures any texture. It’s best to test out the difference in appearance that this will make on a scrap piece of paper before you apply it to your work.
Using Assorted Sea Sponges for Lifting and Dabbing in Watercolour
For my next example, I wanted to demonstrate the same assortment of sponges with watercolour paints, since they’re a favoured tool for creating textured, lifted and dabbed marks alike. Lifting is one of the assets of watercolour painting as a medium, since you can bring back the white of the paper. When watercolour has been applied in a wash, you can lightly dab a dry sponge on the surface of the wet paint to lift it off. As you can see in my example, where the paint was lifted by the sponge created a textured cloud-like effect. I was then able to dab this lifted paint onto the side of the sheet.
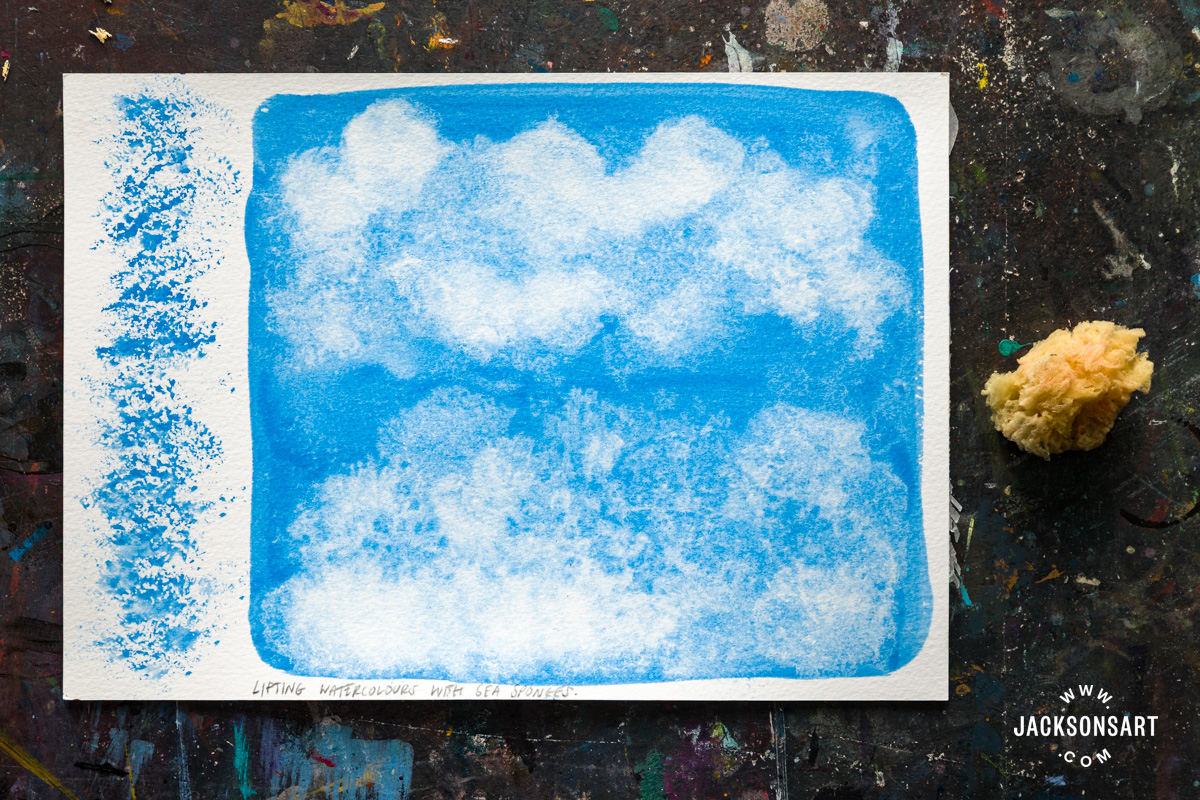
Tips: Lifting watercolour with a sponge is a time-sensitive technique, since the paint still needs to be wet for the sponge to absorb and remove it from the paper. If your paint dries before you can lift it, you can try rewetting the surface with a brush and agitating the paint before trying to lift it again.
Cutting Sea Sponges
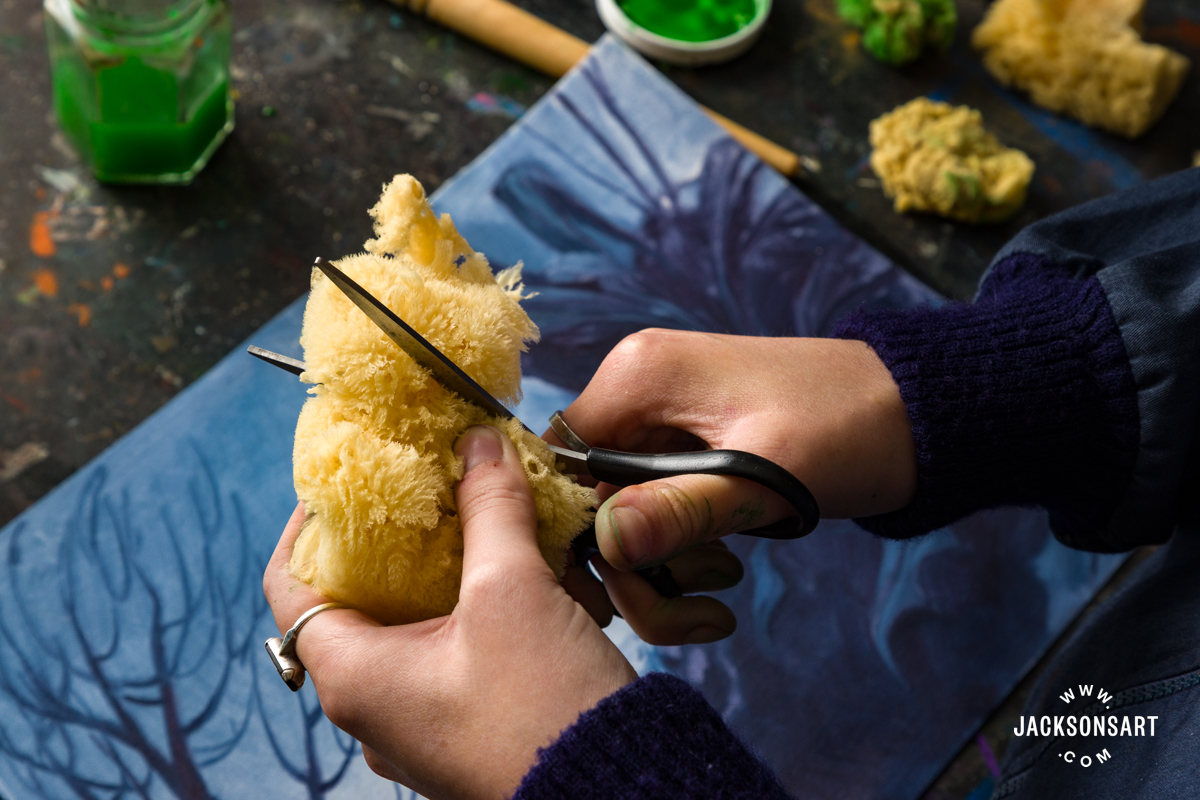
Sometimes, the texture you want to apply with a sponge would be best achieved by cutting it into a specific shape. Sea sponges can be very easily cut with scissors or torn if you’d prefer a ragged edge to suit the task at hand. I used the sponge I cut here to apply the sponged texture in my next example.
Using Assorted Sea Sponges for Dabbing in Oil Paint
Painting with sea sponges isn’t solely reserved for water-based media; it’s just much easier to clean and reuse the sponge again. To demonstrate the effect with oil paint, I painted an imagined landscape inspired by van Schriek’s palette of dark blues, using a simple palette of Jackson’s Professional Oil Paints in Indigo and Titanium White, on a sheet from a Jackson’s Canvas Pad.
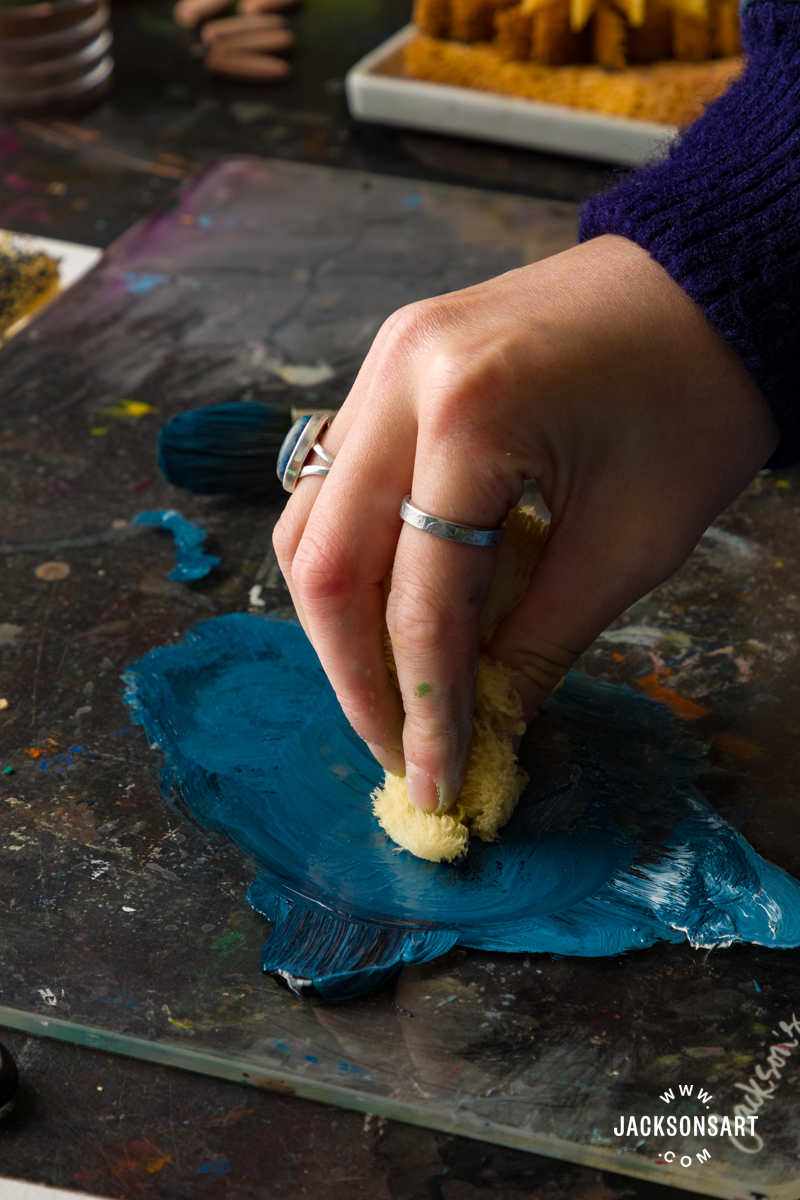
Next, I used my sponge to apply the texture of foliage in the foreground and the leaves on the tree in the distance. Using my cut sponge from the previous example, I was able to dab on the undergrowth in a natural wedge shape, rotating it in my hand as I worked to disguise the effect of it being repetitively printed.
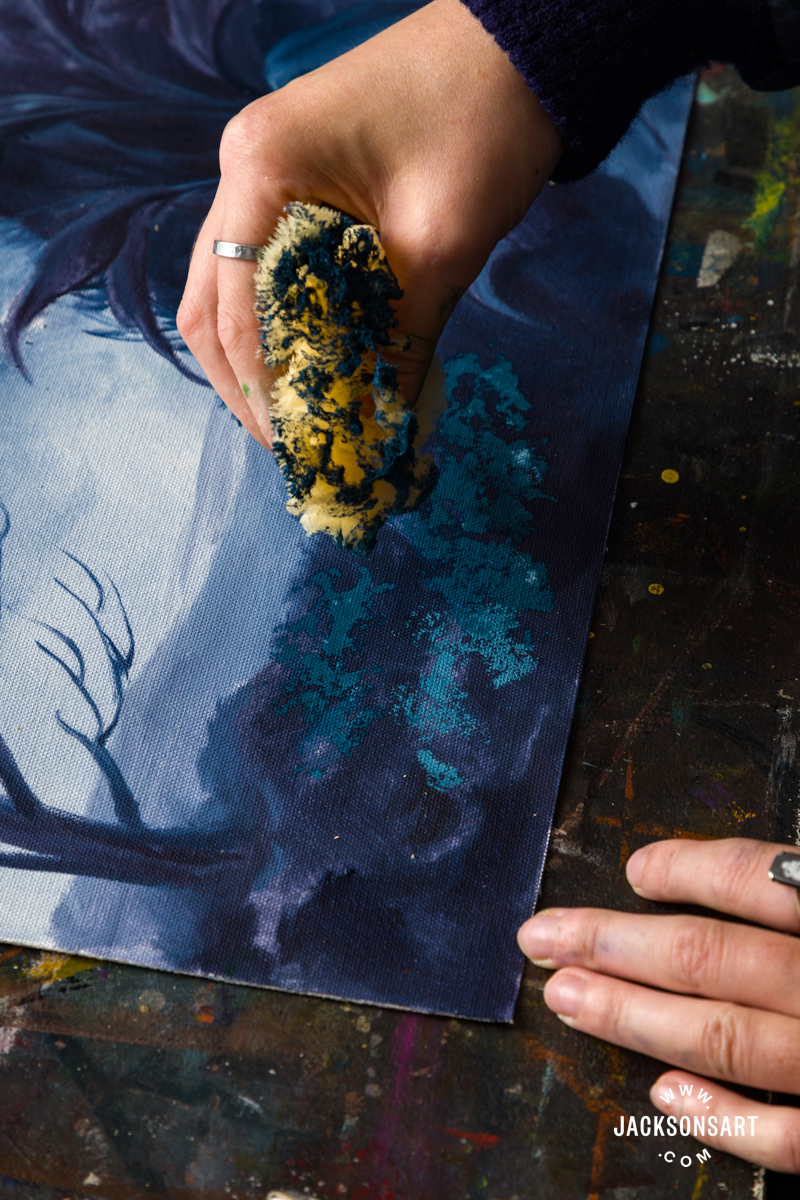
For the winter leaves on the tree, I switched to a wispy edge of the sponge to get the desired detailed, clustered effect.
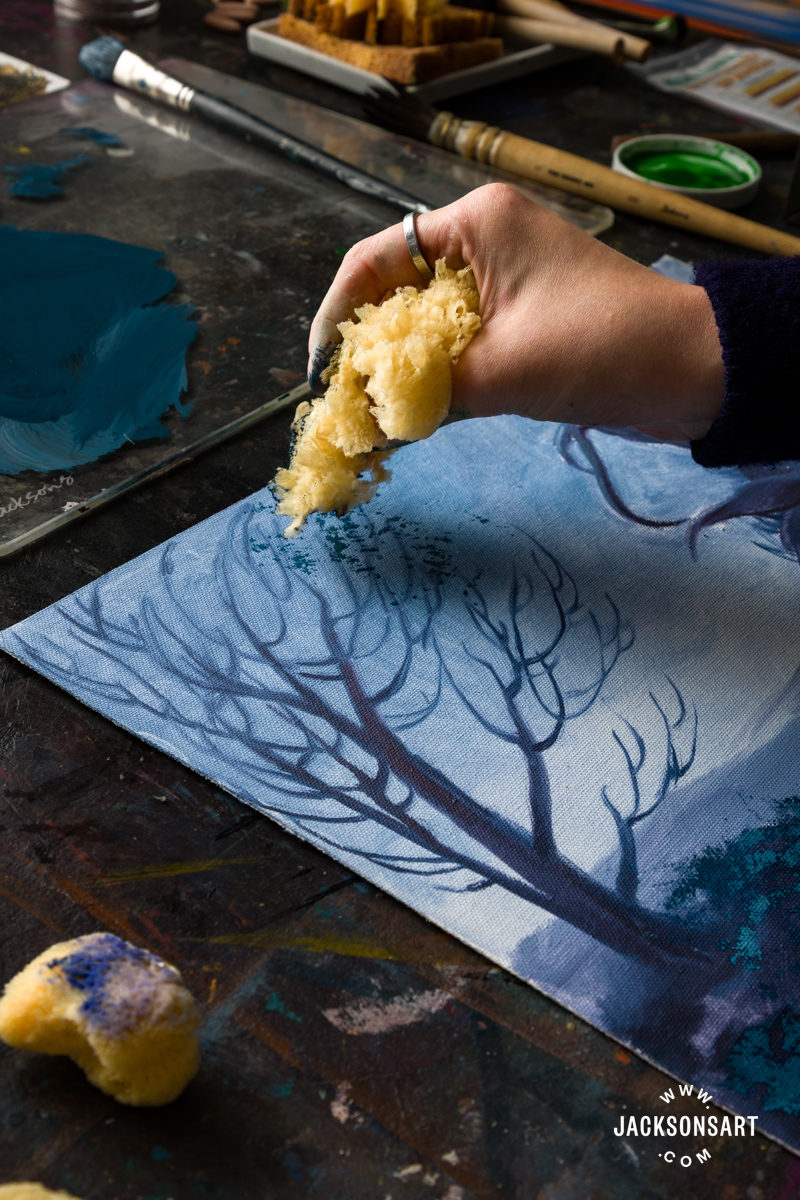
Tips: If you dab over the same area too many times in oil paint without allowing previous layers to dry, you may blend the marks together and lose the texture of the sponge. This could be useful if you are intentionally diffusing the paint, but very annoying if you intended to keep some sharper, detailed marks. It’s best to be patient and build sponging in oil paint in separate dried layers.

Mark-making with Jakar Sponge Brushes
On first impression, the Jakar Sponge Brushes may seem like a basic or crafty tool, but they can actually be used to create a plethora of compelling mark-making techniques.
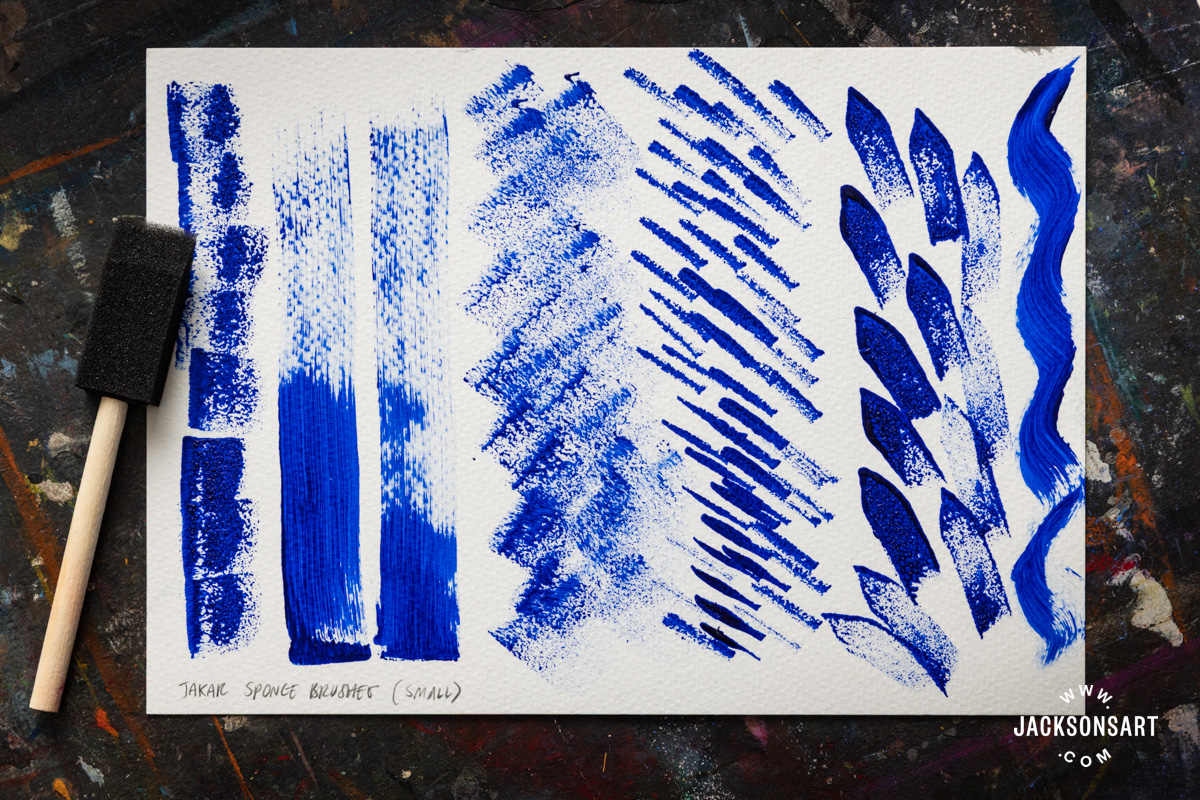
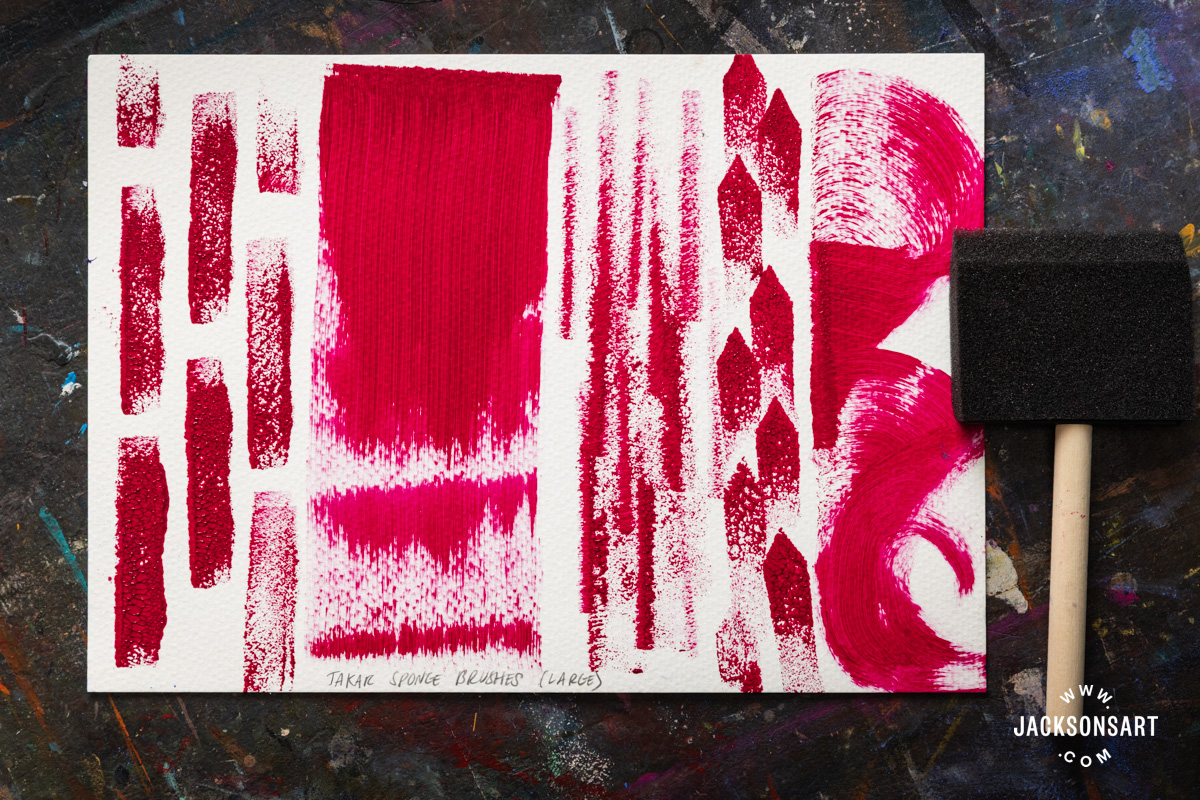
You can build up a network of interesting patterns by utilising the various sides and edges. To demonstrate some of these effects, I created example sheets with acrylic paint, using the biggest and smallest sponge brushes from the set.
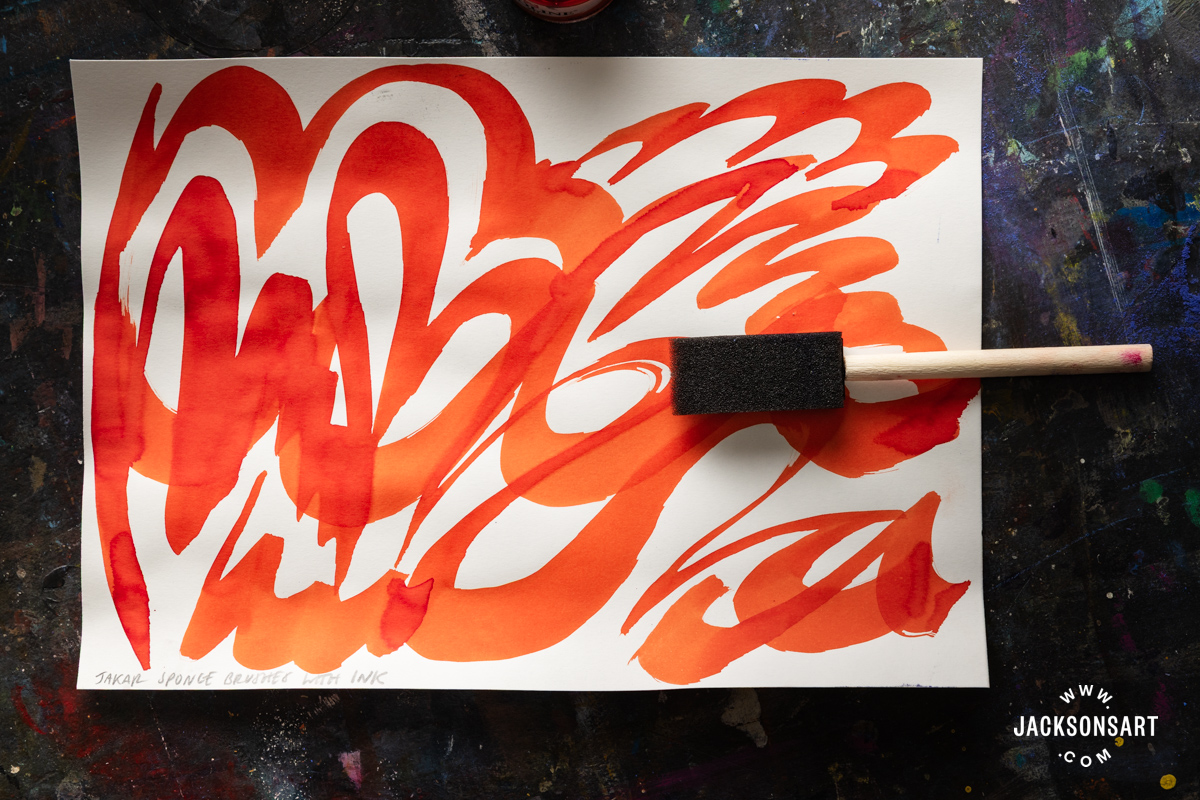
The Jakar Sponge Brushes can also be used with ink to create fluid calligraphic marks. The sponge held lots of ink, meaning I didn’t have to keep rewetting it and breaking my lines. For this example, I used the Royal Talens Ecoline Watercolour Ink in Deep Orange.
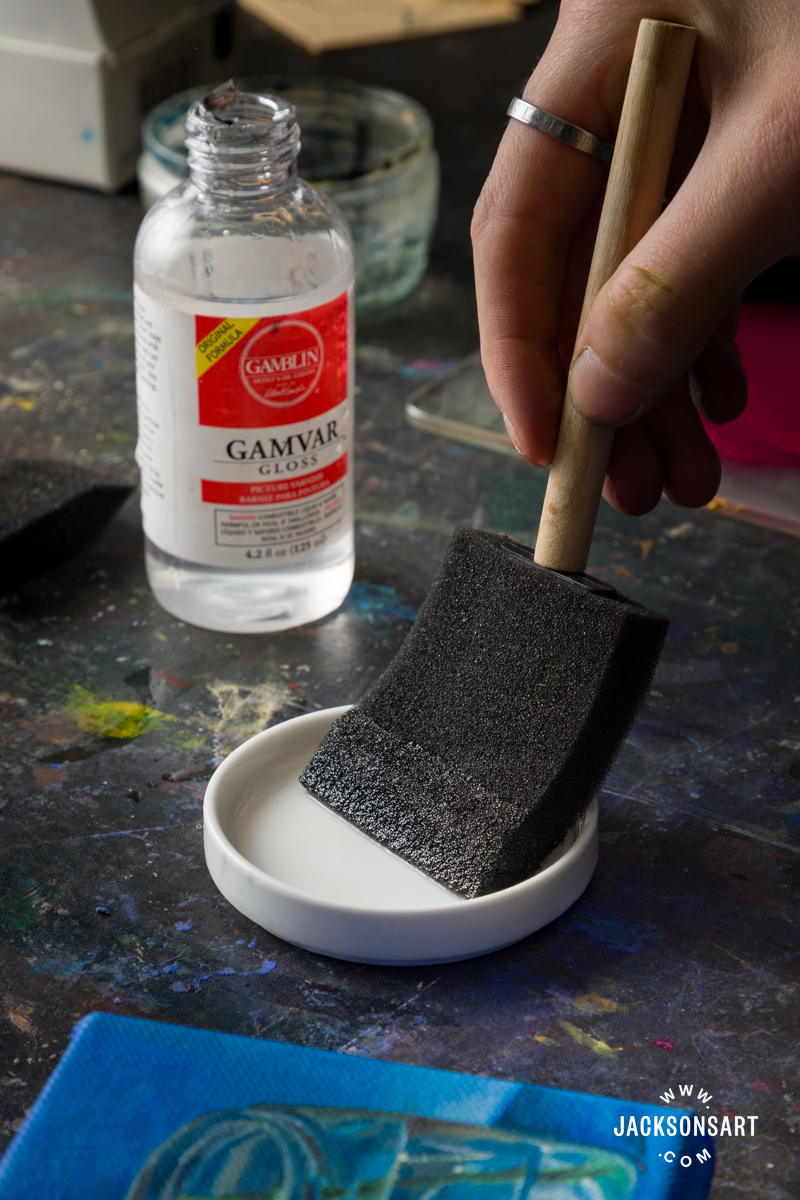
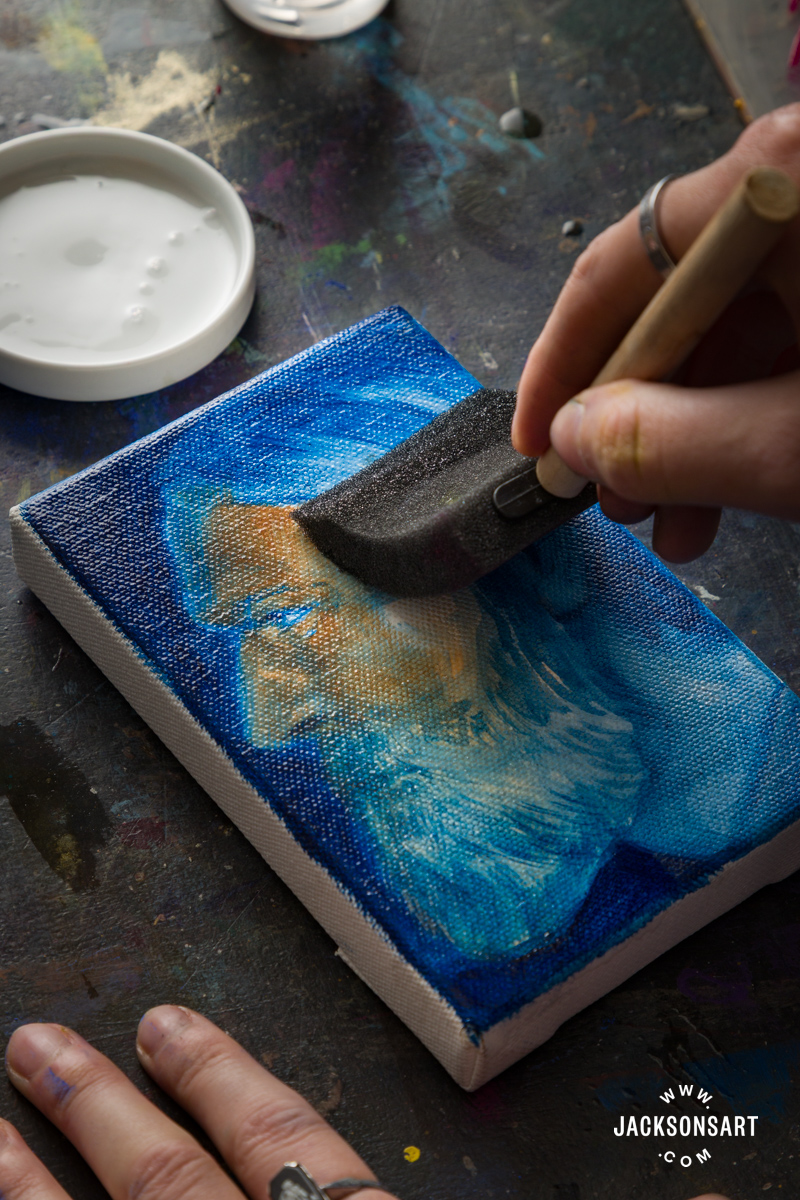
These handy Sponge Brushes can also be used to evenly apply varnish to paintings. To demonstrate this, I used the medium-size sponge brush to apply Gamblin Gamvar Varnish to two small dried oil paintings.
The sponge glided across the surface of the work, and as you can see distributed it very evenly by making contact with the side of the wedged top.
Using the PanPastel Sponge Brushes
PanPastels are professional quality soft pastels in the format of circular pans that can be applied more like paints using brushes, your fingers, and sponges.
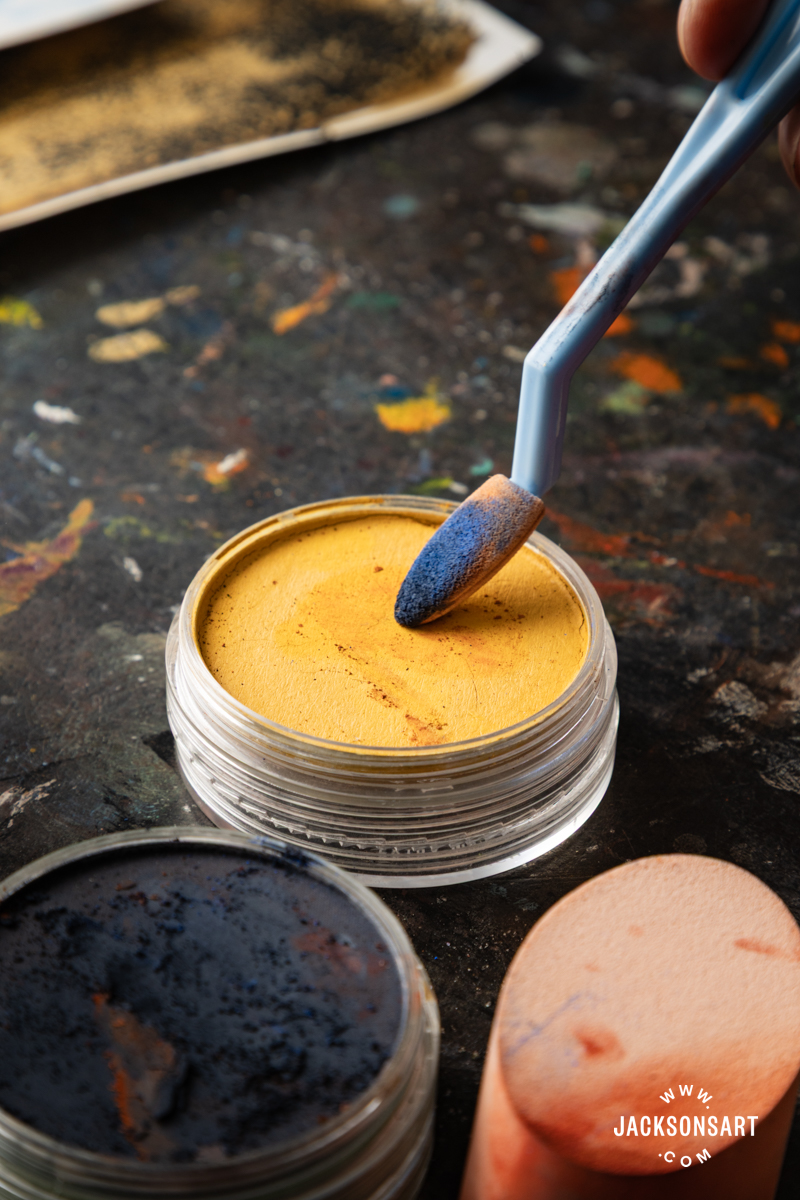
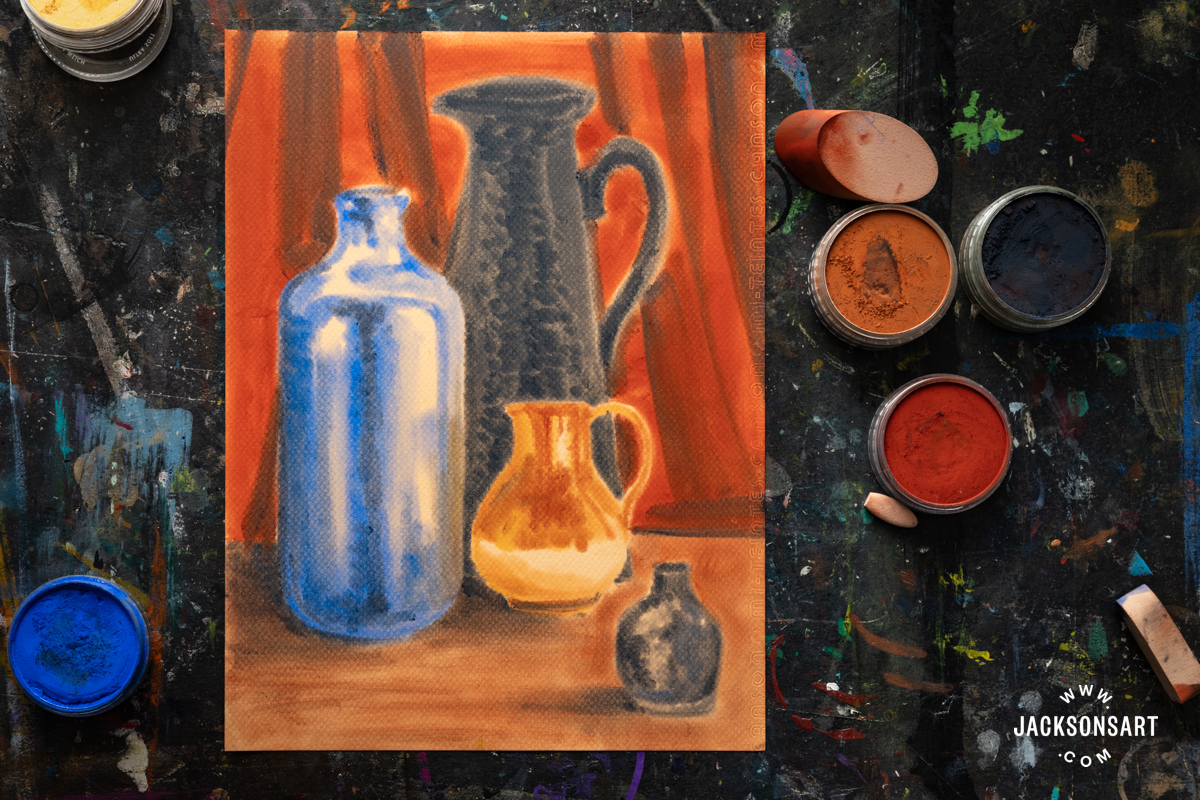
PanPastel makes their own Sofft Sponge Applicator tools for use with them, which are available in a variety of sets. For this example, I worked with their Starter Set of 8, which allowed me to pick out refined details and create broader blocked marks. The stiff sponges picked up the pigment beautifully, allowing me to create strong paint-like marks and subtle blended effects.
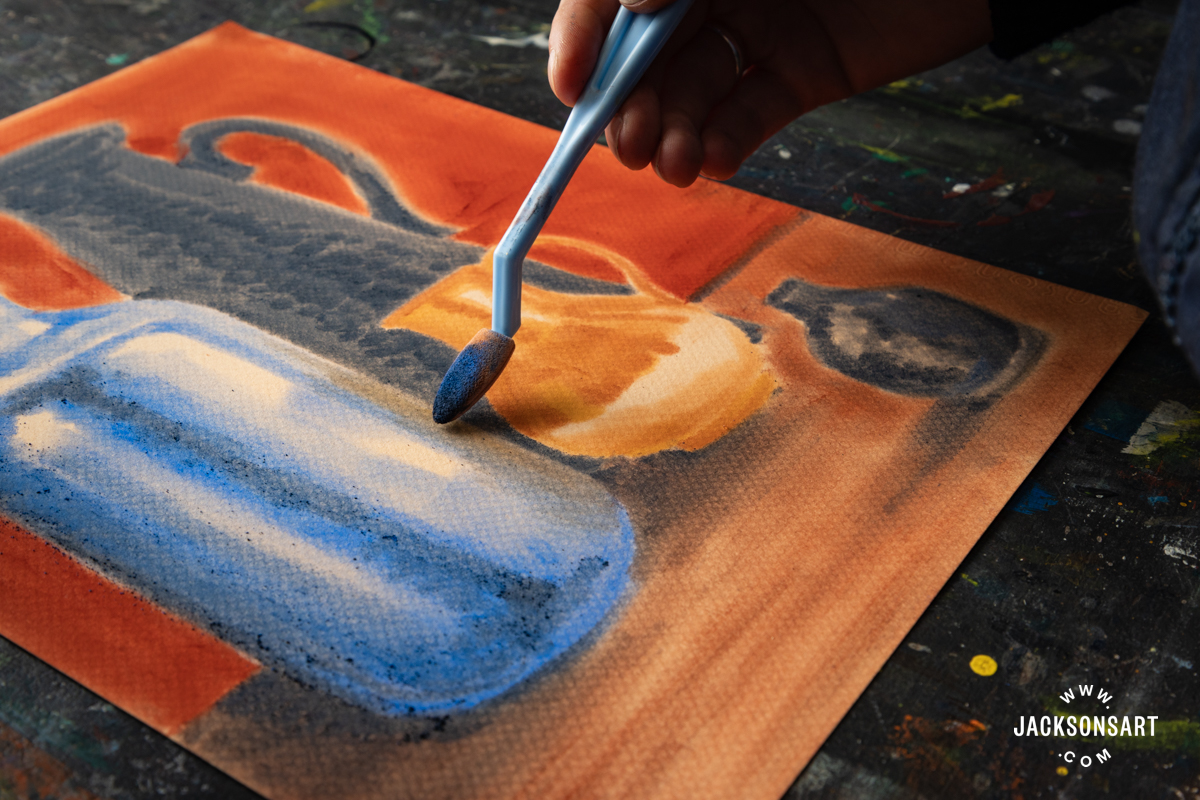
For my example, I worked on a still life of pottery on a sheet of Canson Mi-teintes pastel paper, to ensure the pastels had some tooth to adhere to. After blocking in the main shapes and forms, I was able to work back on top of the initial layer to build in more tone and reflected colour, adding details like the folds in the drapery in the background.
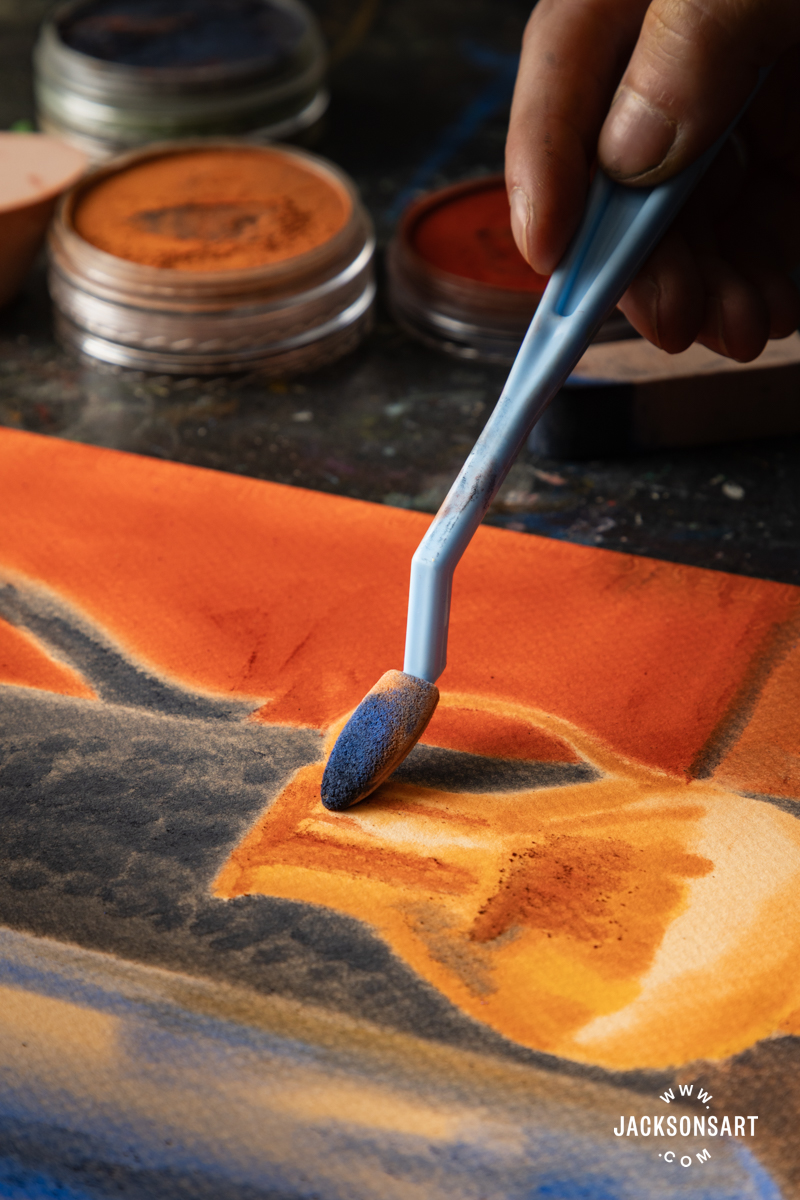
Swiping the sponges on top in successive layers didn’t lift the previous pastels away, and I found it satisfying how easy it was to blend colours together.
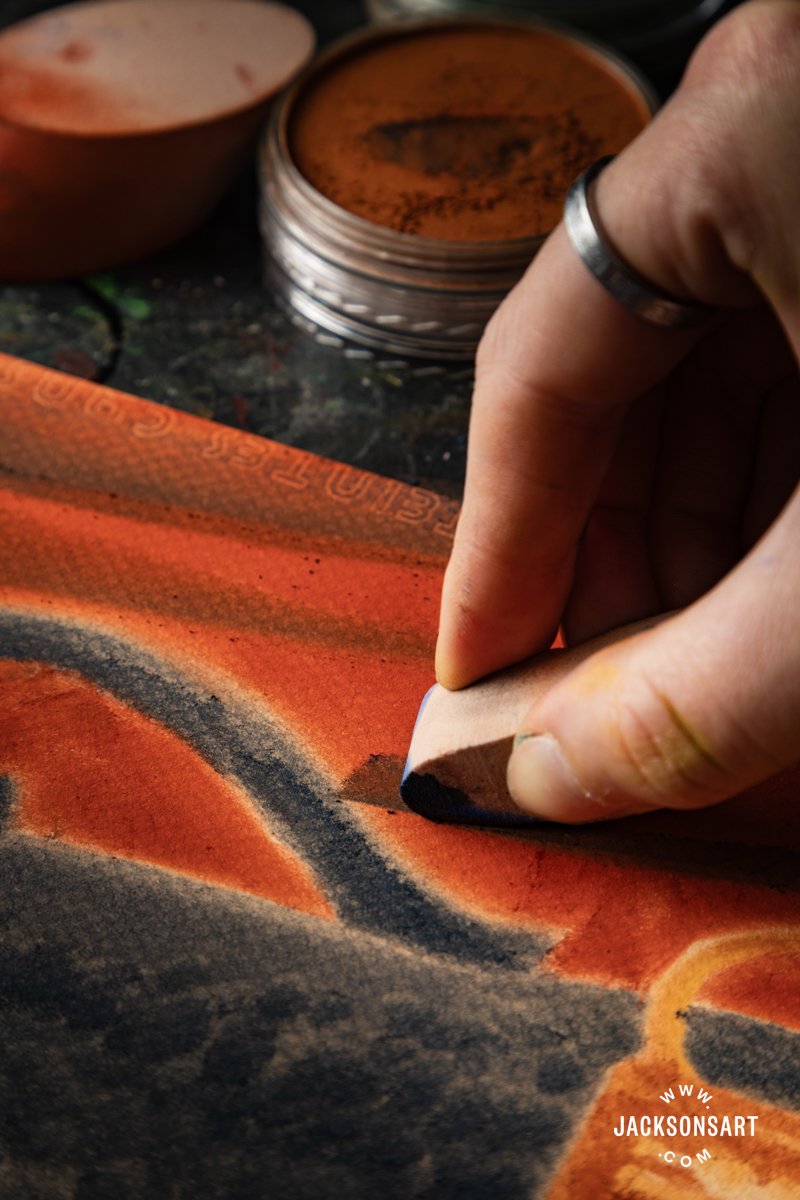
Beyond this stage, you could refine the drawing further with regular soft pastels or pastel pencils. Once I finished, I wiped the sponges on some scrap paper to remove the excess pigment before giving them a good wash with soap.
Testing the Colourwheel Company Miracle Sponges
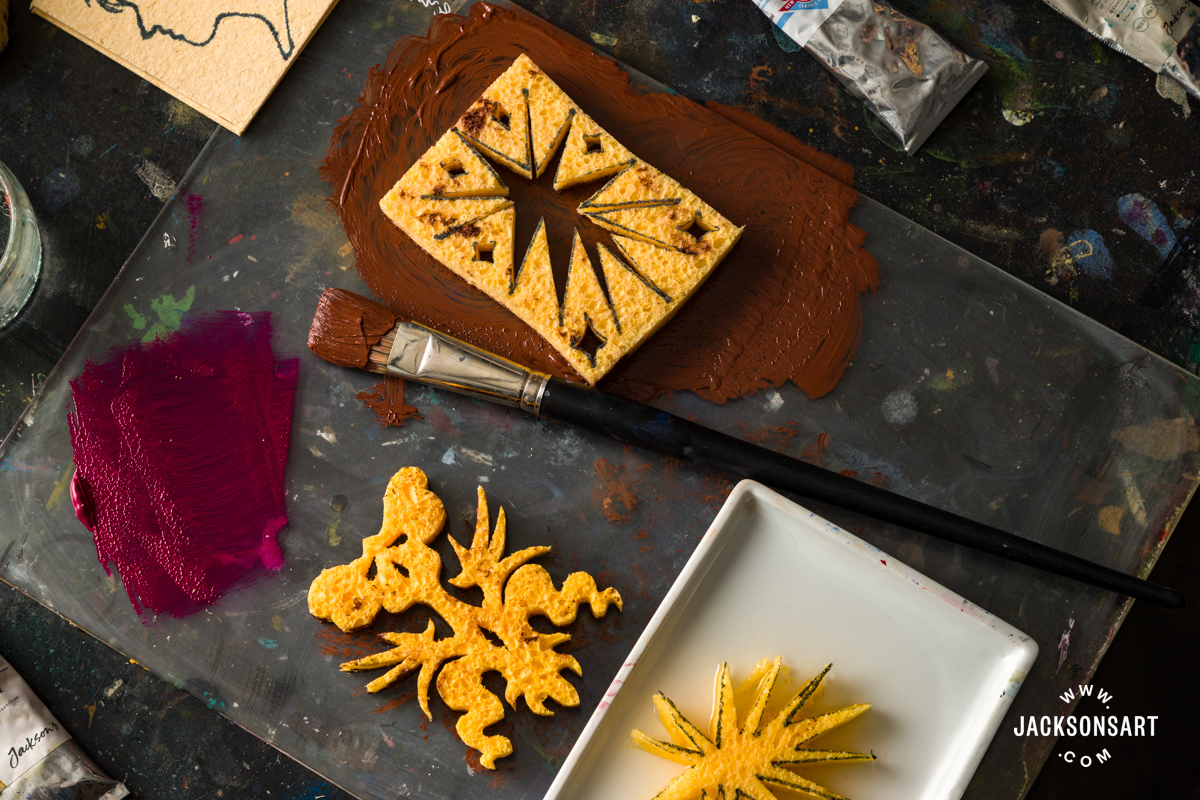
The Colourwheel Company Miracle Sponges are an inventive solution to the difficulty of cutting a fluffy sponge into a specific shape – particularly if it’s geometric or detailed. The bulk and malleability of a normal sponge make it hard to cut clean lines and edges, whereas the miracle sponge is thin and firm when dry. This makes cutting through it exceptionally easy.
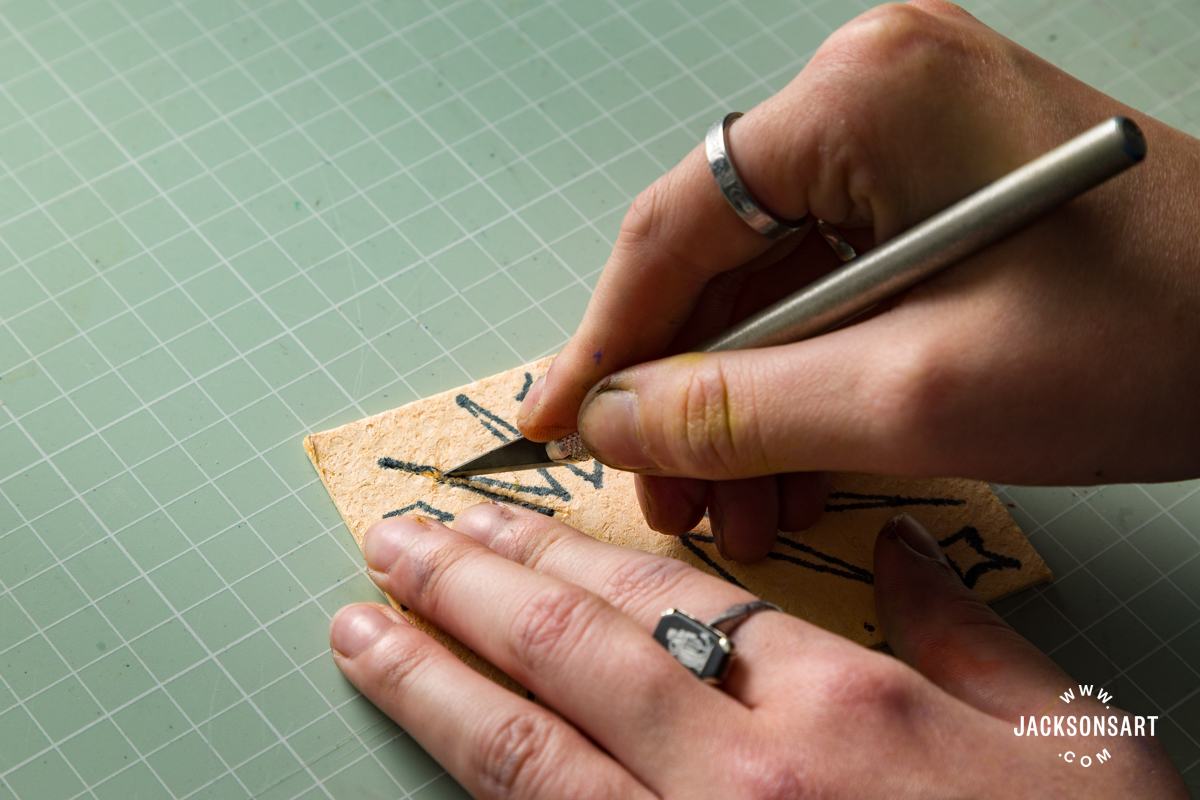
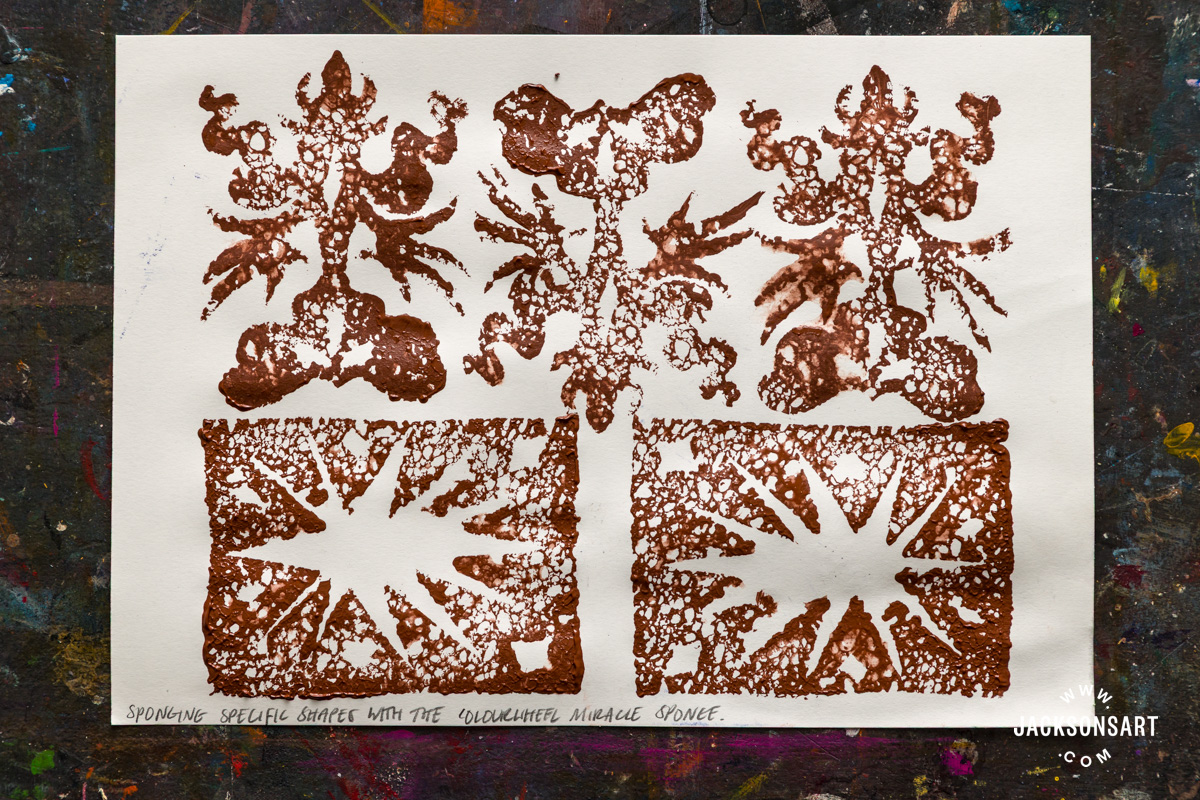
For this example, I drew some designs I wanted to print on my painting using a pen onto the sponges, before carefully cutting them out with sharp scissors, and a craft knife for the fiddly details.
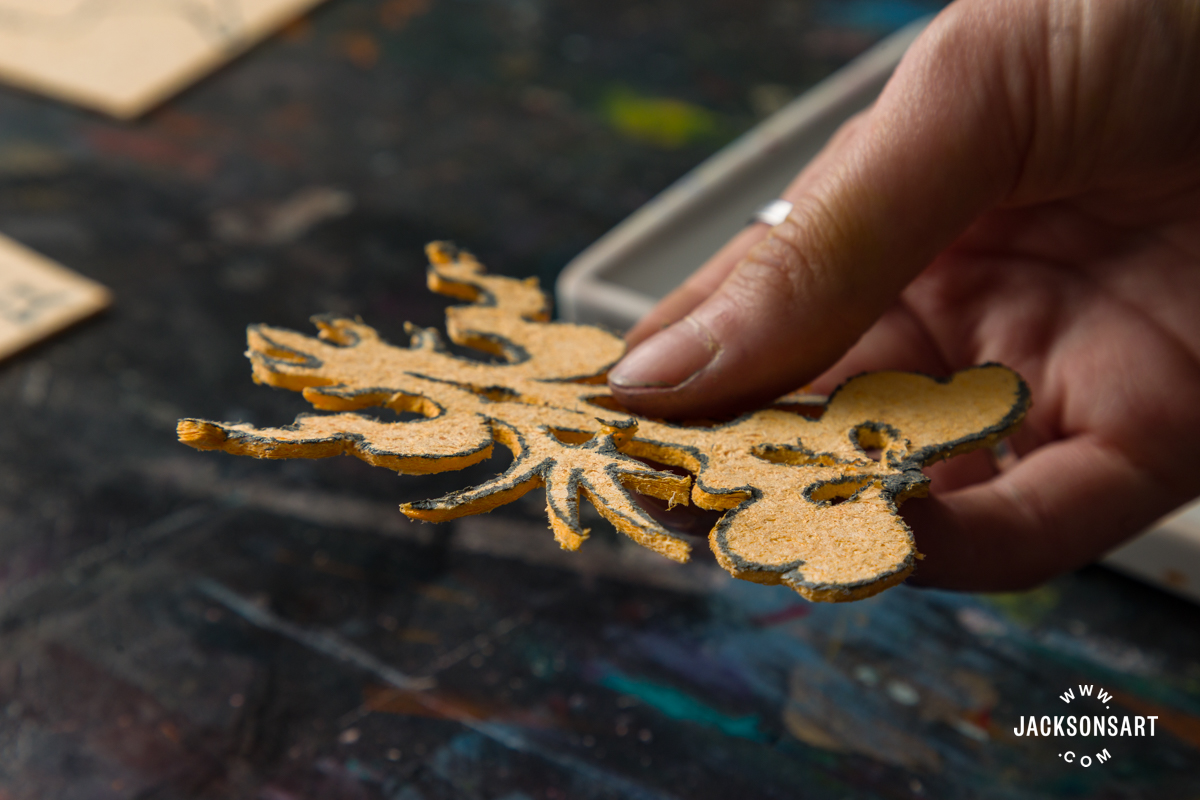
Once I finished cutting out my designs, I placed them in a shallow palette full of water, and they instantly sprang up into normal-sized sponges. They instantaneously absorb the water and grow, so you don’t have to wait for this process to happen.
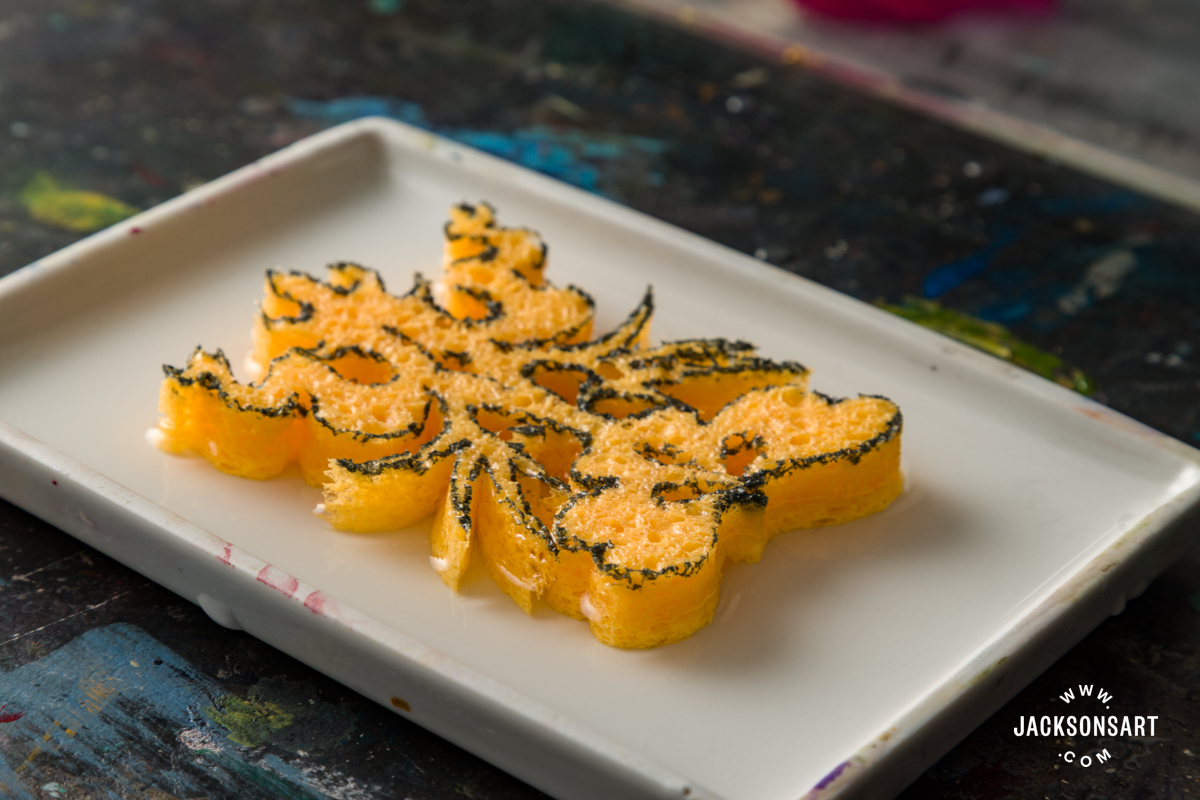
Next, I began printing my designs by dipping the sponges in acrylic paint and carefully pressing them on my paper.
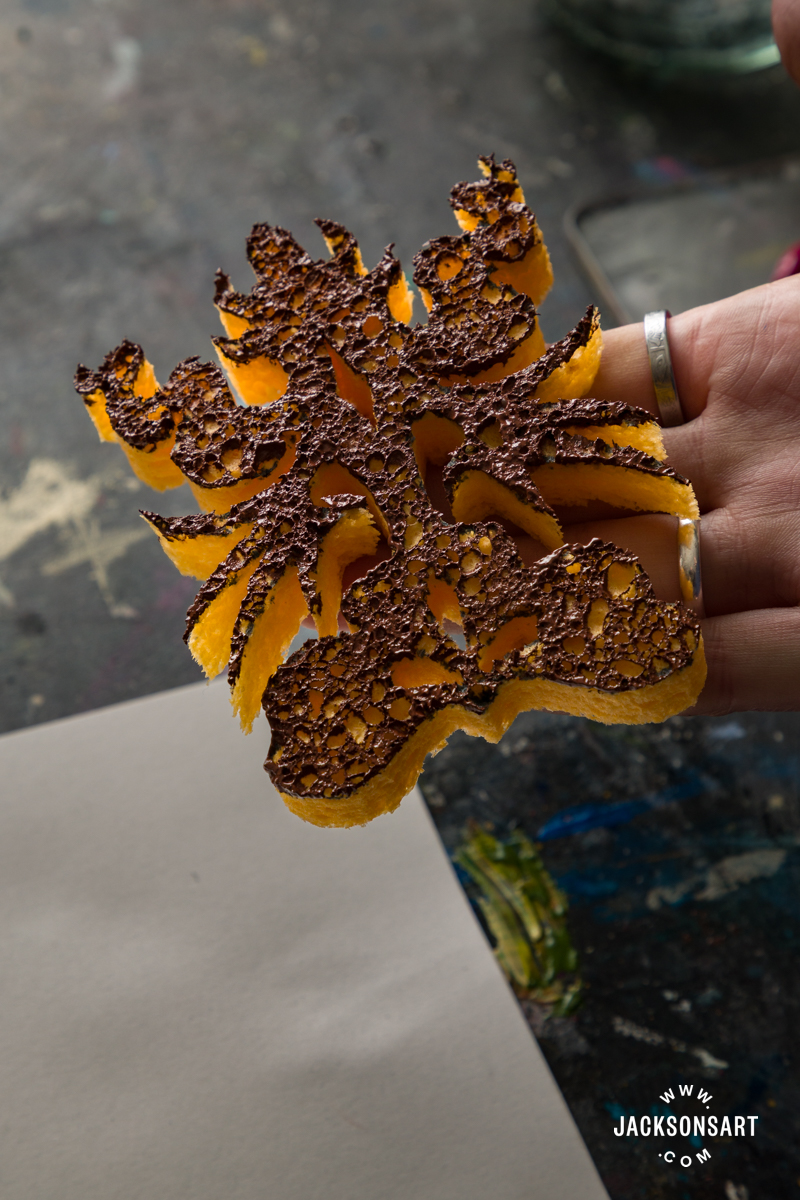
I love the mottled texture that these sponges give, ensuring that each print has personality and isn’t too unified.
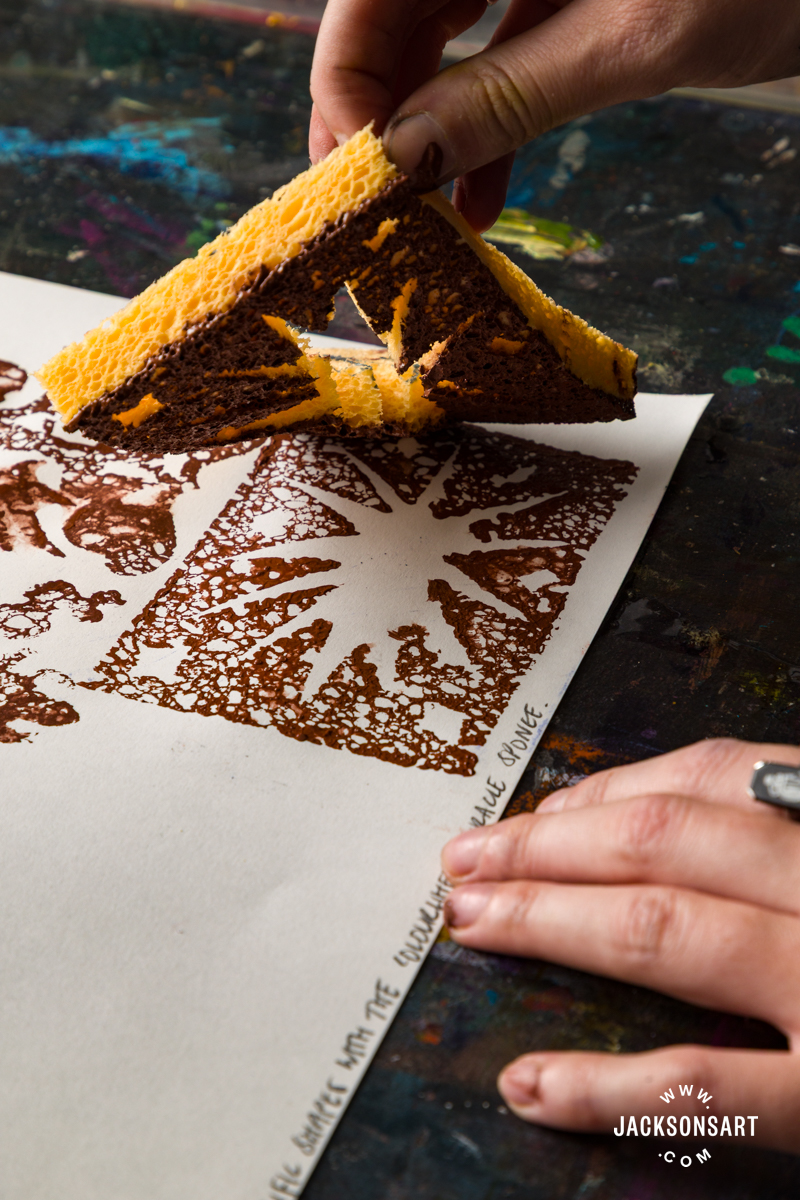
Tips: Once you’ve dipped the Miracle Sponges in water, they won’t return to their flattened state. So make sure you’re completely satisfied with your design before having any water around them. An accidental splash of water will make the area it made contact with expand too.
Using Sponges for Charcoal and Pastel Drawings
Blending charcoal and pastel can be challenging on a large scale, and in difficult shapes or textures. By using sponges, artists can easily control the format that their blending tool takes, and also make use of any desired texture it brings to the drawing.
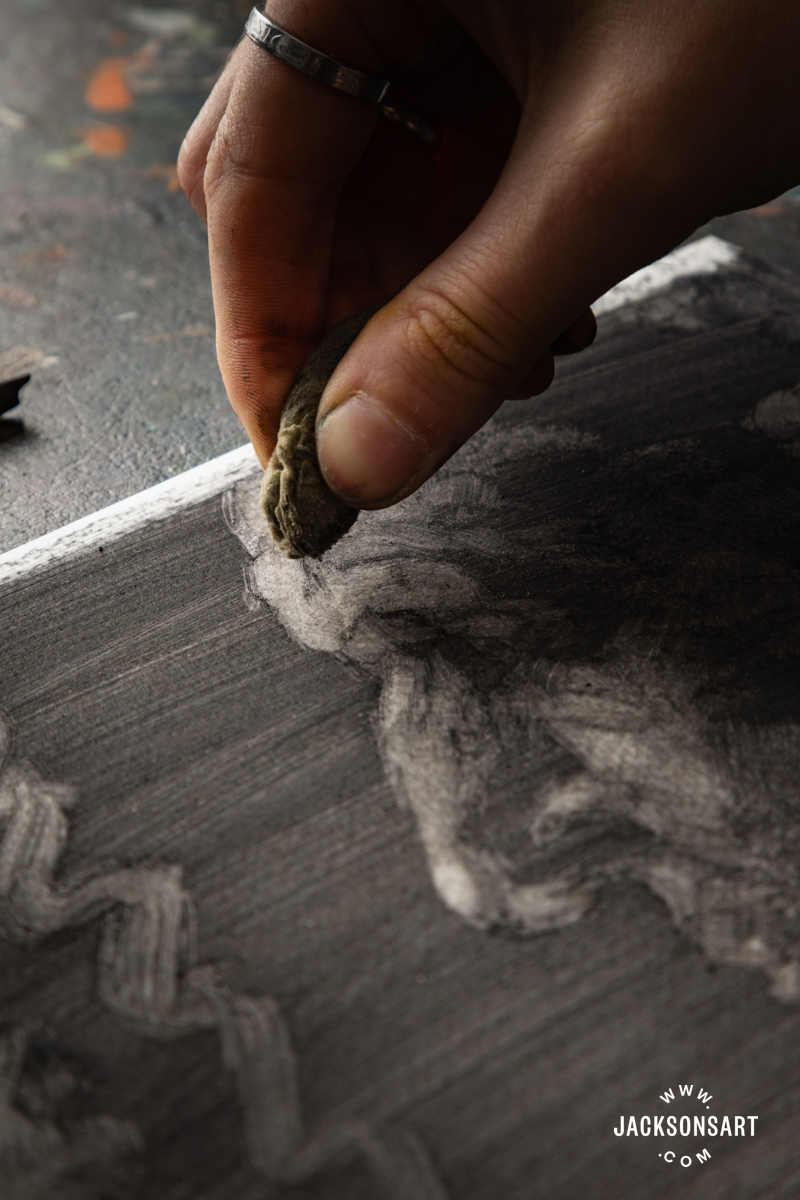
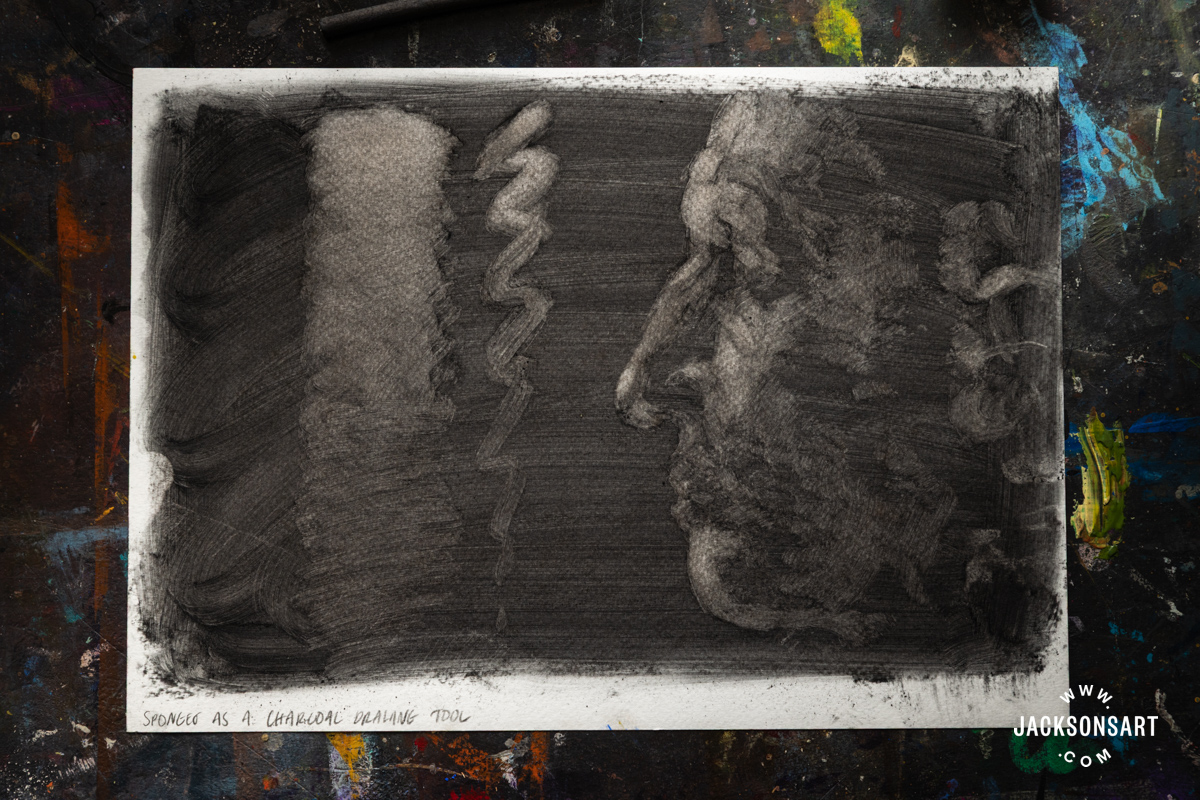
For my first example, I covered a piece of paper in charcoal and used a completely dry sea sponge to work in reduction. The texture of the sponge lifted the charcoal beautifully and even allowed me to bring out bright highlights. I pinched the sponge in my hand to lift some sharper edges, which returned to its normal form after I rinsed it out.
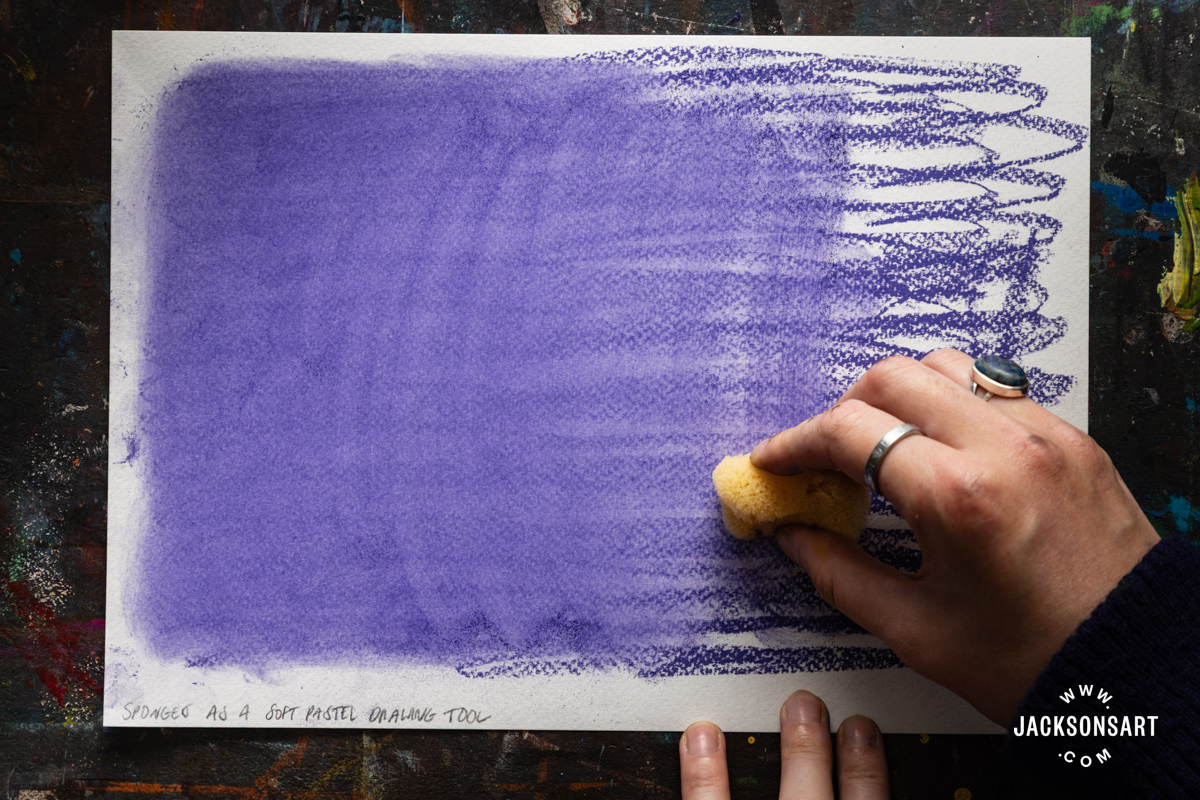
Next, I wanted to demonstrate using a sponge to blend soft pastels by covering a sheet of pastel paper in scribbles using a Jackson’s Handmade Soft Pastel. Blending this same scribble seamlessly with your fingers or a paintbrush would be difficult to shift evenly, and require a lot of refining. With the sponge, I smoothed out the entire surface rapidly, without hurting my hand or ruining any bristles.
Tips: Using a sea sponge for drawing with charcoal and pastels is a sustainable option for artists, since the sponges can be rinsed out and returned to their original state. Other blending approaches, like using paper towels, create unnecessary waste. Also, using a sea sponge to lift the initial layers of a charcoal drawing saves your erasers from getting unnecessarily dirty from the early stages of the work.
Further Reading
A Guide to Watercolour Painting
The Dabbing Technique for Painting
Blending Techniques in Oil, Acrylic, Pencil, Pastel, Charcoal, Watercolour, and Ink
From Field to Studio: Coates Willow Charcoal
Shop Art Materials on jacksonsart.com


2 thoughts on “Sponging Techniques for Painting, Drawing, and Printmaking”
Great article with a wealth of useful info. I’m particularly interested in the Miracle Sponges. I just love the texture they create and the ability to form distinct shapes, amazing.
Thank you! I agree they are really exciting to use
Comments are closed.