




Airbrushing allows for ultra-smooth blending and soft, seamless shading. It dries quickly and can be applied to an extensive range of surfaces, making it an extremely versatile medium, popular across a wide scope of art and design – from movie posters and makeup artistry to fine art. In this film, artist and educator Daniel Smalling-Bennet introduces the fundamental concepts of airbrushing, including the equipment you’ll need, the best inks to use, and some painting techniques to get you started.

Contents
0:00 Introduction
0:22 What Is an Airbrush?
1:27 The History and Uses of Airbrushing
3:19 What Kind of Paint Do You Use in an Airbrush?
5:53 What Mediums Can Be Used in an Airbrush?
8:03 Making Airbrush Inks from Acrylic Paint and Mediums
13:09 Removing Paint from Your Airbrush
14:05 What Surfaces Can Be Used for Airbrushing?
16:15 Erasing Airbrush Paint
17:28 What Is an Airbrush Compressor?
18:43 Demonstrating the Airbrush Process
29:57 Conclusion
30:21 Credits
Film Extract
What is Airbrushing?
An airbrush is essentially a miniature spray gun, which is usually attached to a machine called a compressor. The compressor generates air pressure by compressing and forcing air through the system. An airbrush is usually dual-action, meaning that you press the trigger down for air and pull back for paint. This design allows you to create very complex artwork – you can achieve a lot of detail through this interaction with the trigger.
Hi, my name is Daniel Smalling-Bennett, and I’m a painter and educator. I’ve been welcomed here at the Jackson’s Studio to introduce you guys to airbrushing.
The airbrush model I have here is the Iwata Revolution airbrush. If I take it apart, you can see the back section of the airbrush. The spring nut holds the spring in place, while the needle here at the back is connected to the trigger mechanism. At the front, there’s also the nozzle, which controls the flow of paint through the tip of the airbrush.
The airbrush has actually been around for a long time – since the late 19th century. It was first used to decorate warcraft machines, and then later on it became widely used for creating movie posters and painting props on film sets, serving as a primary medium before the rise of modern digital tools. The technique was popularised by artists such as H.R. Giger, the conceptual artist behind Alien, directed by Ridley Scott. Another notable figure is Dru Blair, who went on to establish his own school dedicated to airbrushing.

Horatio C. Forjohn
Airbrush on paperboard, 18.7 x 18.1 cm | 7.4 x 7.1 in
Smithsonian American Art Museum
I’ve brought along some of my own pieces to show the versatility of what airbrushing can achieve. In this study of a lit cigarette, you can see a wide range of textures – from the soft, diffused smoke to the subtle glow of light in the background. In my view, airbrushing is on par with oil painting, as it allows for a high level of detail and the kind of smooth blending typically associated with oils.
I also have a monochromatic study of an eye, created using only black. Here again, you can see the range of effects possible – how smooth gradients can be, as well as how much texture can be built up within a single piece.
Airbrushing isn’t limited to the fine art world. It’s used across a wide range of industries, including cake decorating, automotive work (such as painting and detailing cars), engineering applications, and the cosmetics industry, for example, by makeup artists.

Arnold Eagle
Getty Center
Acrylic Inks and Mediums
Acrylic inks are the best paint for an airbrush. I use the Schmincke Aero Color inks because they’re highly pigmented, very saturated, and they have a thin consistency amongst all their colour range, and all the colours are lightfast.
Golden High Flow acrylics are also highly pigmented, very saturated, and have an even consistency throughout the whole colour range.
Lastly, we have Daler-Rowney FW inks and System 3 acrylic inks. Again, they’re valued for their highly pigmented, saturated colours, but not all are lightfast, and the consistency varies across the range.
Now, I did leave one aside, and that was the Golden Fluid Acrylics. You may be wondering, what’s the difference between the Golden High Flow and the Golden Fluid? The Golden Fluid is more akin to a soft body acrylic, so it’s a lot thicker than the rest of the paints here. Whereas these can work straight from the bottle into your airbrush without any thinning or medium, Golden Fluid will definitely need a medium to thin it enough to pass through the airbrush. If you don’t do that and just pour it straight in, you’ll clog the airbrush. You can use a medium like Golden Airbrush Medium in a one-to-one ratio; so, when you mix your paint, you just need one part of Golden Fluid to one part of Golden Airbrush Medium.

Airbrush medium is useful to strengthen the binding of your acrylic inks and paints. It also thins the paint enough so it can go through the airbrush more easily – this helps with the spraying and the airflow. The medium also helps with the adhesion of the paint to non-porous surfaces, such as plastic or metal, like aluminium panels. The airbrush medium allows the paint to actually stick onto the surface and not just run down.
Another medium that we have is the retarder, also known as the slow-drying medium. You want to look out for a slow-drying medium specifically for the airbrush. Now, as the name suggests, the slow-drying medium slows down the drying time of your airbrush paints and inks. Regular acrylic paint dries very quickly, and airbrush ink through an airbrush dries instantly. And that’s because there is constant air moving through the mechanism and mixing with the paint. So as soon as the paint sprays from the airbrush onto the surface, it will be touch-dry in seconds.
But this can also create what’s known as ‘tip dry’ – acrylic paint builds up at the tip of your airbrush, and it starts to clog up the airbrush because there is no way for the air or the paint to escape. And this can cause a number of issues, such as clogging and splattering.
And then lastly, airbrush cleaner. This is more of a solvent than a medium. The airbrush cleaner helps with the maintenance of your airbrush. It breaks down any dried paint that’s inside. And it’s very helpful to have, especially if you’ve left your airbrush paints overnight, and there is some dried-up paint in there.
Making Airbrush Inks
First, I’ll demonstrate how to use the Golden High Flow acrylics straight out of the bottle. A little bit goes a long way with these inks. So it only requires like two drops. Of course, it depends on how big your painting is and how much you want to spray. But I just want to do a couple of line works, so two drops will be enough.

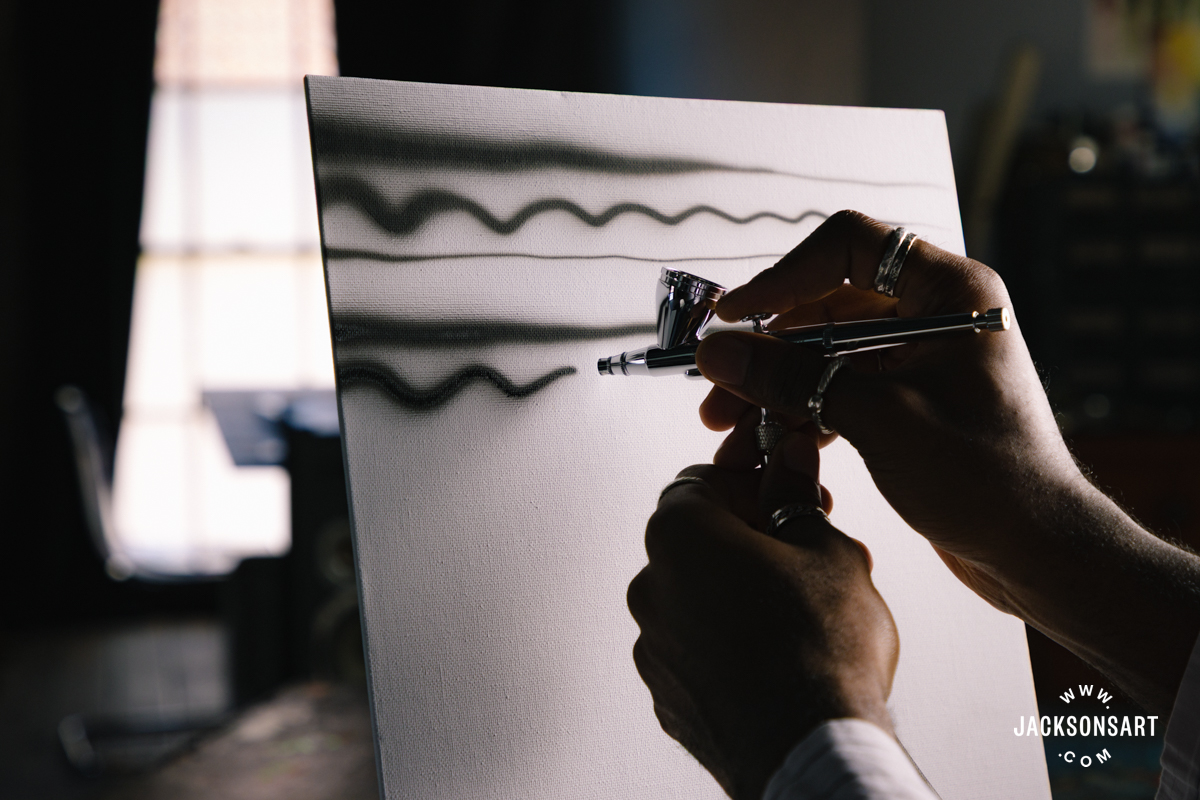
This airbrush is dual-action; I’m pressing down for air. So when I press down on the trigger, it’s just air coming out, no paint. I can do it on my face. And I pull back for paint. So this is what it means to be dual action. And you can see here, I’m using a Phthalo Blue. Golden High Flow paint, on its own, sprays very well. Then I could add some Schmincke Aero Retarder, slow-drying medium. It only requires like one drop because a little bit goes a long way.
When you’re mixing your medium, you could use the end of a paintbrush because it’s a very tiny cup. And you could use what’s called a backflow technique, where you purposely cover the tip of the needle to stop air from coming through. The air will then back up into the cup and mix the colours inside.
So I’ve mixed the slow-drying medium and the paint thoroughly, and now the paint is flowing. The airbrush paint is flowing very quickly and easily, and I’m getting a lot smoother lines. On a non-porous surface, for example, like the gesso panel, you will really see how you can still work the paint. Obviously, if I spray more paint on the surface, you can see the paint is still wet, and that’s the slow-drying medium working.
Airbrushing is like no other medium, in terms of never touching the surface with the tool that you’re using. It’s not like working with a pencil, where you have to touch the surface. It’s not like oil painting, where you have the connection between the brush and the oil paint on the canvas. With the airbrush, you are constantly hovering over the surface. Never do the two meet. If that happens, then you will damage the needle. So you always have to hover your hand and have steady control.

Next, I’m going to show you how to make your own airbrush inks with the Golden Fluid acrylics and the Golden Airbrush Medium. It is a one-to-one ratio with this medium and the paint. Using the dropper, I’m going to count it by the number of drops in the airbrush. So if I put five drops of Golden Fluid acrylic, then I’m going to put five drops of the Golden Airbrush Medium. If you are working with larger quantities, it is best to mix them in a separate bottle to ensure the mixture is even and thoroughly combined. But we’re using small amounts here, so it really won’t be an issue.
A spare sheet of paper is useful for testing the airflow and spray pattern. This mix is spraying pretty well using a one-to-one ratio, although it isn’t as smooth as the High Flow. There’s still quite a lot of texture because we’re working with heavier pigments, so you’re seeing more of those particles. To reduce that, I could add more medium or a little water. This helps the paint and medium mix more evenly and creates a smoother spray pattern.
Removing Paint From the Airbrush
I’m going to clean out the current paint that I have, into this cleaning pot here. And this is really helpful to get rid of any excess paint that you don’t want. So if you want to change a colour, it kind of stores the excess and some of the fumes that will be coming out, and it’s better than spraying out in the open with all those paint particles.
I’m going to use some of the airbrush cleaner just to make sure that there is no dry paint inside when I switch the colours over. If I were using a different colour, I would want to clean that out a lot more.
Surfaces for Airbrush
You can airbrush on a variety of surfaces. Here I have the aluminium panel, which is a non-porous surface. And this is really good for when you want to manipulate the airbrush paint, because the airbrush paint won’t be absorbed into the material. It will allow you to achieve unique effects that you can’t really get with any other medium, such as scratching and erasing the paint from the surface. You can create textures, highlights, and really unique designs by actually erasing the paint from the surface. It’s also good if you make a mistake in your painting and you want to get it back to the whiteness of the gesso panel or aluminium board.

Another non-porous surface is Yupo paper, which works exactly the same way as if you were to spray on the aluminium panel. The Yupo paper is slightly thinner; it is a synthetic non-porous paper. And a gesso panel is another non-porous surface.
Porous surfaces, such as wood and MDF boards, absorb paint, making it harder to erase. Other suitable surfaces include canvas and canvas panels. Bristol paper is really inexpensive in comparison to the rest. And this is really good for people who are beginners, who just want to practice their airbrushing skills. Bristol paper is very smooth, and it is less absorbent than cartridge paper or watercolour paper.
Airbrush Compressors
There are many different types of compressors on the market. I would recommend a silent airbrush compressor, as it is good for in-studio use. You also have industrial airbrush compressors, which are used for more powerful equipment, such as power drills, which isn’t really necessary for an airbrush.
This airbrush compressor has a tank which acts as a reservoir to hold more air. It comes with a water trap to hold any that escapes, also a pressure gauge which indicates how much air pressure is out, and you can control it using the dial.

Erasing Airbrush Paint
Now I’ll demonstrate how you can erase airbrush paint. This really depends on the surface you’re using. It’s much easier on a non-porous surface, such as a gesso panel. The tools I’ll be using are an eraser and a scalpel blade.
On this gesso panel, I’ll let the paint sit for a little while because it isn’t being absorbed into the surface – it’s sitting on top. Using the eraser and scalpel blade, I can either scratch into the paint or lift it away. This is especially useful for creating effects like animal fur or bright highlights. Right now, I’m just spraying air to help dry the paint a little, and then I’ll go in with the eraser to create softer effects.
The Airbrush Process
The possibilities of this tool are endless. You’re not limited to just using stencils with an airbrush or creating abstract backgrounds – you can achieve an incredible amount of detail. As an example, I’m going to work on this close-up study of an eye. It’s going to be a monochromatic painting using only black.
In this image, there are many different shades of grey. This is another advantage of the airbrush: you can use just one colour, one ink, and still achieve a wide range of tones and variations. I have a sketch underneath to guide placement, and I’m also referring back to my reference image. I’m using black ink, diluted with water to make it more transparent, and I can increase the strength by adding more ink.
You can use stencils with an airbrush, even on complex shapes like the eye, but I’m going to show you how to do it using only the airbrush itself and some good hand-eye coordination.
I’m going to start by looking at the darkest areas first to help gauge the rest of the values and contrast. Because I’m working on canvas, which is slightly absorbent, I might not be able to erase the paint to create highlights. Since I said I wouldn’t be using any colour other than black ink, I’m going to use masking fluid instead.

This is a masking pen, and I’m going to use it to apply masking fluid to the areas I want to keep white, particularly the highlights in the eye. I’m building up the values and contrast as I work. The eyelid has a strong cast shadow, so that’s where I’m focusing most of the darker tones.
When you’re first starting out, it’s best to work lightly and build things up gradually. I can pull back to create a softer, more diffused spray pattern and soften any lines that feel too harsh. The left-hand side is in shadow, so I can afford to be quite loose there. Line width and thickness depend on how far back you pull the trigger and your distance from the surface. If I want a thicker line, I move slightly further away; for finer detail, I move in close and gently pull back on the trigger.
A useful tip for building up texture is to use figure-eight motions. I’m not trying to copy every detail exactly; I’m thinking in broader abstract shapes, otherwise it would take far too long to paint every small detail in the eye. Skin isn’t perfectly smooth, so you want to include imperfections to keep it realistic.
The eyelashes fade into the shadows, so they become less defined. Many painters rush to add dark tones too early, but building depth and contrast is what really lifts the painting. I’m using a dagger stroke here. A dagger stroke is when you taper the lines you’re making, and that’s by starting off with a thicker point and then slowly moving closer to the canvas until you get a tapered edge.
In my reference, some eyelashes are soft and blurred, while others are more in focus. I’m going to apply masking fluid to preserve certain highlights. Masking fluid can create very hard edges, which can be useful or not depending on the effect you want. Before finishing, you can remove it and soften any edges if needed. So that’s an example of how masking fluid helps preserve whites when you’re not using white paint. And this eraser isn’t really removing paint so much as softening texture and transitions.
What I love about airbrushing is how quickly you can progress with a painting in a short amount of time. In one sitting, I’m able to achieve multiple layers of detail. If I were at home, I would still take my time and spend a couple of days on this. I would focus on the textures on the eyelids – I don’t want to make it perfectly smooth, I still want to make it look like skin.
Further Reading
Absolute Black: Jackson’s Join the Ultra-Black Paint Market
Blending Techniques in Oil, Acrylic, Pencil, Pastel, Charcoal, Watercolour, and Ink
Shop Art Materials on jacksonsart.com

4 thoughts on “Film: A Guide to Airbrushing”
I’ve been curious about airbrushing for a long time and this was such an informative film. You included a range of topics–actually as I was thinking my question, it seemed the next segment addressed it (i.e., what kind of paint, what kind of paper, what is an airbrush, what is a compressor). And the artist you interviewed was so knowledgeable and such a confident communicator. He mentioned he’s also a teacher…which shines through in his careful, thorough presentation. Thank you.
Thank you so much for your kind comment – we’re so glad to hear you enjoyed the film.
Thanks so much Daniel – a fascinating film. I’ve never used an airbrush but always wondered about the capabilities.
Extremely comprehensive article/teaching from Daniel – encouraged to use again
thankyou -excellent x
Comments are closed.